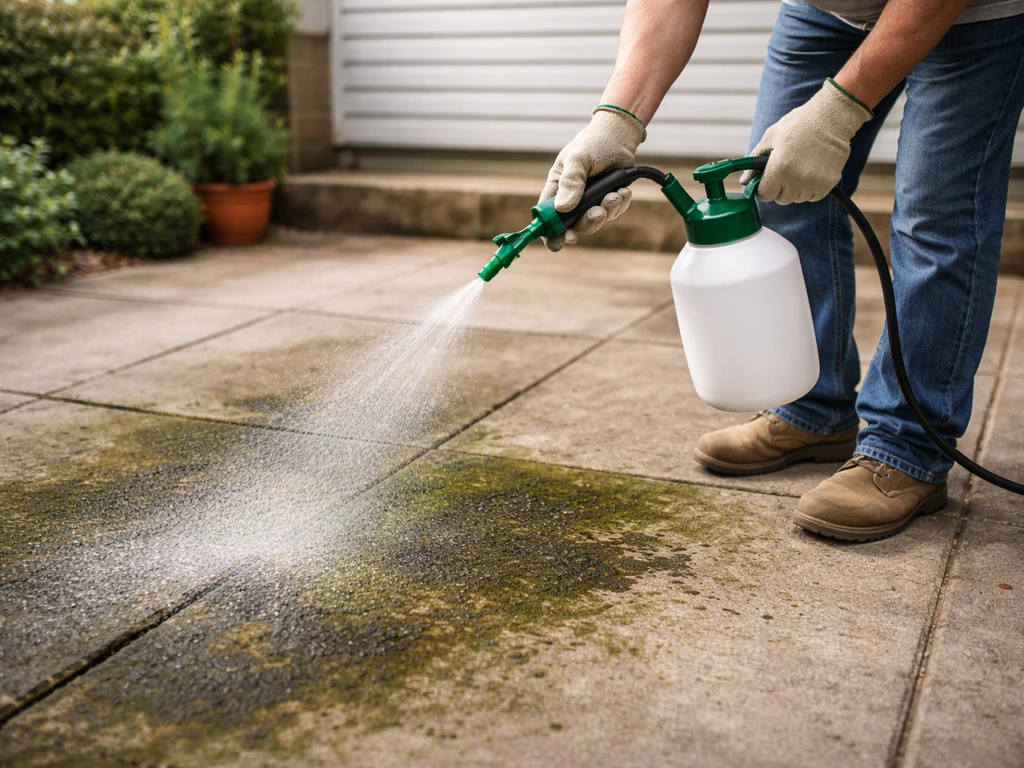
The most important patio cleaning tip is also the simplest: match your method to your surface before you pick up a single piece of equipment. Use too much pressure on sandstone and you'll pull the surface apart. Use acid on limestone and you'll etch it permanently. Get those two decisions right and everything else falls into place. This guide walks you through a quick-start checklist, surface diagnosis, step-by-step cleaning for concrete, stone, brick, sandstone, slate and porcelain, stain-specific fixes, and what to do after you've cleaned to keep the patio looking good for seasons to come.
Patio Cleaning Tips: Surface Guide, Costs & Maintenance
Rhea Lang
17 Jul 2026
Quick-start checklist: tools, safety and step priorities
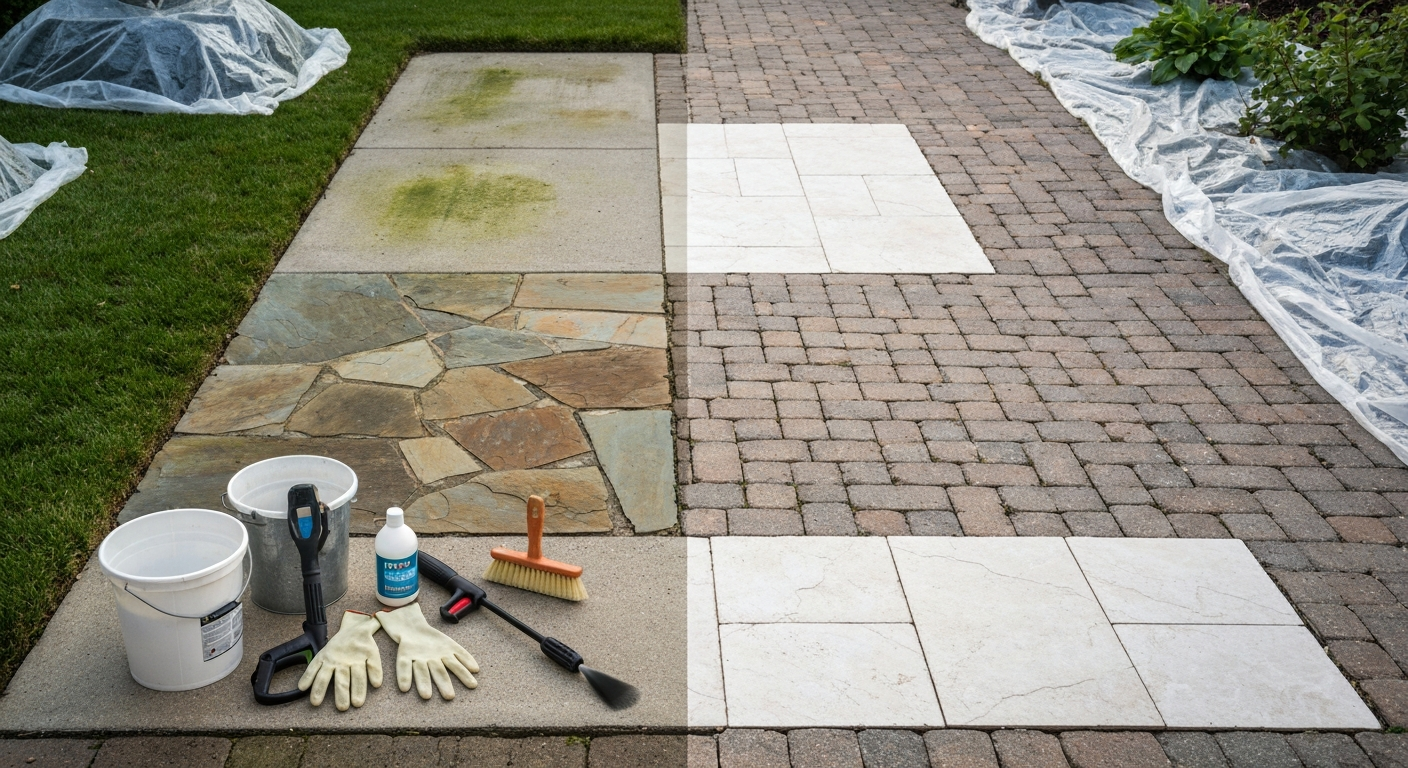
Before you drag the pressure washer out of the garage, run through this checklist. It takes about five minutes and it will save you from the two most common mistakes: damaging the surface and soaking everything nearby.
Tools to gather
- Stiff-bristle brush and/or deck scrubbing brush (for manual pre-treatment)
- Garden hose with adjustable nozzle
- Pressure washer (1,800–3,500 PSI depending on surface) with nozzle set: 40° white, 25° green, 15° yellow, soap/black tip
- Surface cleaner attachment (optional but excellent for large flat areas)
- Bucket, measuring cup and stirring stick for diluting detergents
- Surface-appropriate cleaner: oxygen bleach product for organic growth, pH-neutral cleaner for natural stone, alkaline degreaser for oil stains
- Sealer appropriate to your surface (for post-cleaning protection on porous materials)
- Protective sheeting or plastic bags for nearby plants and furniture
- Safety goggles, rubber gloves and non-slip footwear
Safety steps before you start
- Cover or move outdoor furniture, BBQs and planters well away from the cleaning zone
- Wet surrounding plants or cover with plastic sheeting before applying any chemical cleaner
- Check for overhead cables or light fittings before raising a pressure-washer wand
- Put on goggles and gloves before mixing or applying any cleaning product
- Always do a small test patch in an inconspicuous area before cleaning the full surface
Step priority order
- Clear and protect the area (furniture, plants, drainage covers)
- Dry-sweep to remove loose debris, leaves and grit
- Diagnose the surface type and the specific problem (see next section)
- Pre-treat stains or biological growth with appropriate cleaner and allow the recommended dwell time
- Pressure-wash or hand-scrub using the correct PSI and nozzle for the surface
- Rinse thoroughly and inspect
- Allow 24–72 hours of drying time before sealing or heavy use
How to assess your surface and diagnose what's growing (or staining) on it
Spend five minutes on diagnosis and you'll avoid a lot of expensive mistakes. Walk the patio and look for the following: green or black biological film (algae, moss, mildew), white powdery deposits (efflorescence), orange or brown marks (rust or tannin from leaves), dark irregular patches (oil or grease), and surface damage like cracking, spalling or missing grout. Note where water pools, because that's almost always where biological growth will be worst.
Identifying your surface material is equally important. Concrete is usually grey and uniform, sometimes brushed or exposed-aggregate. Natural stone (flagstone, limestone, sandstone, slate) has irregular edges and visible grain variation. Brick and clay pavers have a distinct fired texture. Porcelain tiles look very consistent in colour and are often slightly glossy. If you're unsure, check any leftover materials in the garage or look at the original receipts. Getting this right determines everything from the maximum safe pressure to whether you can use an acid-based cleaner.
Common problems by surface
| Surface | Most Common Problems | Key Sensitivity |
|---|---|---|
| Concrete | Algae, mould, oil/grease, efflorescence, rust from fixings | Tolerates higher pressure; avoid acid on coloured concrete |
| Natural stone (flagstone/limestone) | Algae, moss, biological film, tannin staining | Calcareous stone is acid-sensitive; test all cleaners first |
| Brick and clay pavers | Moss, efflorescence, mortar haze, joint erosion | High pressure washes out pointing/jointing sand |
| Sandstone | Deep staining, green algae, surface erosion | Soft and porous; acid and high pressure cause grain loss |
| Slate | Algae, iron oxide staining, surface flaking | Layered structure means high pressure can delaminate |
| Porcelain / glazed tile | Grout discolouration, algae on grout lines, detergent residue | Non-porous surface is durable; grout and edges need care |
Surface-by-surface decision guide: sweep, vacuum, steam, power-wash or hire a pro?
There's no single best method for every patio. Here's how I think about the decision for each surface type. Vacuuming a patio is genuinely useful for removing dry debris, leaves and grit from textured or irregular surfaces before you apply any liquid, though it won't clean the surface itself. For practical guidance on using a vacuum on patios, see our guide Can I vacuum my patio for tips on when and how to do it safely. Steam cleaning works well on delicate carved stone, listed structures and indoor-style porcelain tiles where you want to kill biological growth without chemicals or aggressive pressure. If you're wondering specifically about steam, see can you steam clean a patio for detailed guidance on when and how to use steam safely on different patio materials. Power washing suits most homeowners on concrete, brick and porcelain, but requires care on natural stone and should be avoided or used very carefully on sandstone and soft slate. For more on safe technique and nozzle/PSI selection, read our power washing patio tips.
| Surface | Sweep/Brush | Vacuum (dry debris) | Steam | Power Wash (DIY) | Hire a Pro |
|---|---|---|---|---|---|
| Concrete | Always first step | Optional | Works but slow | Yes: 2,500–3,500 PSI, 25° nozzle | For heavy staining or large area |
| Natural stone (flagstone) | Always first step | Optional | Good option | Yes: 1,800–2,500 PSI, 40° nozzle, test patch | Fragile, historic or carved stone |
| Brick and clay pavers | Always first step | Optional | Yes, good for mould | Yes: 1,800–2,500 PSI, 25–40° nozzle, avoid joints | For repointing or large commercial areas |
| Sandstone | Always first step | Optional | Preferred method | Low pressure only: ≤1,500 PSI, 40° nozzle, 3–4 ft | Recommended for significant staining |
| Slate | Always first step | Optional | Preferred method | Low pressure only: ≤1,500 PSI, 40° nozzle, 3–4 ft | Any flaking, delicate or historic slate |
| Porcelain / glazed tile | Always first step | Optional | Good for grout lines | Yes: 1,500–2,500 PSI, 40° nozzle | Rarely needed |
On the question of hiring a professional: expect to pay roughly £3–£8 per square metre (UK) or $0. If you want specific pricing for your area, see a short guide on how much to jet wash a patio for typical DIY and professional rates. 10–$0.50 per square foot (US) for a basic jet-wash service. Repointing or chemical treatment for severe biological growth sits at the higher end. A 40 square metre (430 sq ft) patio might cost £150–£300 professionally cleaned in the UK, and $150–$350 in the US. That's genuinely worth it if you have delicate or historic stone, if the area is very large, or if you've got persistent staining that hasn't responded to DIY treatment.
Cleaning concrete patios: methods, PSI settings and what to watch out for
Concrete is the most forgiving patio surface to clean, but it still has failure modes. The most common problems I see are green or black biological films, oily patches from BBQ drips or vehicle spillage near garage aprons, orange rust stains from metal furniture legs, and white efflorescence (soluble salts crystallising at the surface). Each needs a slightly different approach.
For algae, moss and mould on concrete
Apply an oxygen bleach product (sodium percarbonate-based) diluted according to the label, let it dwell for 10–20 minutes while keeping the surface wet, then scrub with a stiff brush before rinsing. Oxygen bleach breaks down to oxygen and water, which makes it a genuinely safer choice around garden beds and pets compared to chlorine bleach. Products like Simple Green Oxy Solve are EPA Safer Choice listed and can go directly into a pressure-washer's detergent tank for application, which speeds things up considerably on large areas.
For oil and grease stains on concrete
Degreasers (alkaline or surfactant-based) are the right tool here. Spread the degreaser, let it sit for at least 10–15 minutes, agitate with a brush, then hit it with a pressure washer. Hot-water pressure washing or a specialist concrete degreaser is noticeably more effective on heavy petroleum staining than a cold-water machine with general detergent. I learned this the hard way after spending an hour on a stubborn oil patch with the wrong product before switching to a proper alkaline degreaser and watching it lift in two passes.
For efflorescence on concrete
Light efflorescence often washes off with plain water. Persistent deposits may need a specialist efflorescence remover. Follow the manufacturer's instructions carefully, as most contain mild acid and need neutralising and thorough rinsing. Never use these on coloured or stamped concrete without testing first, as the colour pigment can be affected.
Pressure washer settings for concrete
- PSI range: 2,500–3,500 PSI for general concrete; stay at 2,000–2,500 for coloured, stamped or older concrete
- Nozzle: Start with 25° (green) tip; use 15° (yellow) only for very stubborn marks on robust concrete
- Distance: Begin at 3–4 feet from the surface and move closer only after testing
- Surface cleaner attachment: Strongly recommended for flat concrete areas to avoid stripe marks
- Apply detergent with the black/soap tip at low pressure, then switch to a cleaning tip for rinsing and scrubbing passes
Natural stone patios: what works and what will ruin it
Natural stone is where I see the most DIY cleaning disasters. The critical distinction is between siliceous stone (granite, quartzite, most slate) and calcareous stone (limestone, marble, travertine, some sandstones). Calcareous stones contain calcium carbonate, which reacts with acid. Use any acid-based cleaner on limestone and you'll etch or pit the surface permanently. The Natural Stone Institute recommends pH-neutral or mildly alkaline cleaners for all calcareous stones, and I'd extend that to say: if you're not certain which category your stone falls into, use a pH-neutral cleaner and avoid acid-based products entirely.
Dos and don'ts for natural stone
- DO identify your stone type (siliceous vs calcareous) before choosing any cleaner
- DO always run a test patch on an inconspicuous area first
- DO use pH-neutral or alkaline cleaners for calcareous stones (limestone, some sandstones, travertine)
- DO start with the gentlest method (warm water, soft brush, low-pressure rinse) before escalating
- DO consider steam cleaning for delicate or textured natural stone surfaces
- DON'T use vinegar, citric acid or any acid-based cleaner on limestone or calcareous stone
- DON'T use a 0° (red) or 15° (yellow) nozzle on natural stone
- DON'T pressure-wash carved, decorative or historic stone without specialist advice
- DON'T skip the test patch, even with products labelled as 'stone safe'
For biological growth on natural stone, oxygen bleach solutions at lower concentrations work well and are far safer than chlorine bleach from a surface-chemistry perspective. Keep the pressure at 1,800–2,500 PSI maximum, use a 40° white nozzle, and hold the wand at least 3 feet from the surface. After cleaning, porous natural stone benefits significantly from a quality impregnating sealer to slow biological recolonisation and staining.
Brick and paver patios: cleaning, fixing joints and tackling stains
Brick and clay pavers are resilient, but the jointing sand between them is not. The single most common mistake I see with DIY brick patio cleaning is blasting the joint sand out with a direct high-pressure stream, which leaves gaps that weeds and water then exploit. Unilock and other paver manufacturers are clear on this: use a fan-angle or angled tip, hold the wand at roughly knee height and a 45-degree angle, and never aim the spray directly at joint lines. Unilock, How to Clean Pavers / Maintenance Guidance Unilock recommends routine sweeping, an initial mild detergent scrub, and—if using a pressure washer—use a fan/angled tip, hold the wand at roughly knee height and a 45° angle, and avoid high‑pressure or close‑angle passes to prevent joint‑sand loss and paver damage..
Cleaning brick and pavers step by step
- Sweep thoroughly and remove weeds from joints by hand or with a joint-clearing tool
- Pre-treat any moss, algae or mould with an oxygen bleach solution and allow 15–20 minutes dwell time
- For mortar haze or efflorescence, use a manufacturer-approved masonry cleaner (test first on one brick)
- Pressure-wash at 1,800–2,500 PSI using a 25–40° nozzle, holding the wand at a 45° angle to the surface
- Work in consistent passes in one direction to avoid stripe marks
- Rinse thoroughly with clean water
- Allow to dry fully (at least 24–48 hours) before inspecting joints
Re-jointing after cleaning
Once your brick or paver patio is dry, inspect the joints. If you can see gaps wider than about 3–4mm or if the sand level has dropped noticeably below the surface, top up with kiln-dried jointing sand or a polymeric sand product. Brush the sand into the joints, compact it with a plate compactor or by tamping, and sweep off the excess. Polymeric sand is worth the extra cost if weed growth has been a persistent problem, as it sets slightly firm and is much more resistant to weed germination.
Stain repair on brick
Rust stains on brick usually respond to oxalic acid-based cleaners, but the Brick Industry Association is clear: test on a single brick before treating any visible area, and avoid abrasive methods like sandblasting, which can remove the harder surface of the brick and expose the softer interior to accelerated weathering. For very persistent or widespread staining, a specialist brick-cleaning contractor will have access to stronger, application-specific products not widely available to consumers.
Sandstone and slate: the fragile ones
Sandstone and slate are where you need to dial everything down. Both can be softer and more porous than concrete or brick, and both can be damaged very easily by the methods that work perfectly well on harder surfaces. I'd go as far as saying that if you have genuine riven sandstone or soft slate, steam cleaning is your best DIY method for biological growth, and a soft brush with a pH-neutral cleaner is your default for everything else. High-temperature, low-pressure steam kills algae and moss without chemical use and without the mechanical erosion risk of pressure washing.
Sandstone cleaning
Sandstone is particularly vulnerable because many varieties have a calcareous cement binding the sand grains together. Acid cleaners dissolve that cement and you end up with a rough, sugary surface that stains even faster than before. NPS Preservation Brief 1, masonry cleaning cautions for calcareous/sensitive stones warns that acid cleaners and high‑pressure washing can etch or remove calcareous cement in sandstones and other sensitive stones, and recommends pH‑neutral cleaners, soft brushes, steam or very low pressure with testing first NPS Preservation Brief 1 — masonry cleaning cautions for calcareous/sensitive stones. For routine cleaning, use a pH-neutral stone cleaner, a soft-to-medium brush and warm water. If you do use a pressure washer, stay at or below 1,500 PSI, use a 40° white nozzle only, and keep the wand at 3–4 feet. For deep organic staining, an oxygen bleach solution (low concentration, short dwell time) followed by gentle brush agitation is far safer than any acid treatment.
Slate cleaning
Slate has a layered structure (it's a metamorphic rock), and high pressure can get into those layers and cause delamination or surface flaking over time. Conservation guidance from Historic England and the NPS both point to steam as the preferred method for delicate stone surfaces, including softer slates used in traditional buildings. For garden patio slate, low-pressure washing (again, max 1,500 PSI, 40° nozzle, 3–4 feet) combined with a pH-neutral cleaner and a soft brush is safe for routine maintenance. Iron oxide staining (rust-coloured marks) on slate can be treated with a non-acidic iron stain remover designed for natural stone, always tested first.
Fragility warnings for both surfaces
- Never use a 0°, 15° or turbo/rotary nozzle on sandstone or slate
- Never use acid-based cleaners (including vinegar, brick acid or HCl-based products) on either surface
- Do not apply high-concentration chlorine bleach: it can bleach colour from sandstone
- If your sandstone or slate is showing surface erosion, flaking or powdering, stop all pressure washing immediately and consult a stone restoration specialist
- Seal porous sandstone after cleaning with a breathable, impregnating stone sealer to reduce re-staining and water ingress
Porcelain and tiled patios: easy to clean, but the grout needs attention
Porcelain is the most low-maintenance patio surface to clean. It's non-porous, so stains sit on the surface rather than soaking in, and it doesn't need sealing. Manufacturers like Daltile confirm that mild detergent and low-to-moderate pressure washing is all most porcelain patios ever need. Where things go wrong is at the grout lines and the tile edges, which are often made of a more porous material and can harbour algae and discolouration even when the tile face is clean.
Safe cleaning method for porcelain
- Sweep and remove loose debris
- Apply a mild pH-neutral or slightly alkaline cleaner diluted to the manufacturer's recommendation
- Scrub grout lines with a stiff grout brush or an old toothbrush for stubborn discolouration
- Pressure-wash at 1,500–2,500 PSI with a 40° white nozzle at a moderate distance (2–3 feet)
- For grout-line algae, an oxygen bleach solution applied with a brush and left for 10 minutes before rinsing works very well
- Rinse the entire surface with clean water and allow to dry
Grout care and re-grouting
If grout lines are cracking, crumbling or have gone beyond what cleaning can fix, raking out and re-grouting is a straightforward DIY job on smaller areas. Use a flexible, frost-resistant exterior grout and a grout float to press it firmly into the joints. Seal the grout once fully cured (usually 24–48 hours) with a grout sealer, which will significantly extend how long it stays clean. On larger or commercial-format porcelain installations with wide joints, a polymeric jointing compound is a better choice than standard grout.
Pressure limits for glazed surfaces
Glazed porcelain (the more polished, indoor-look tiles increasingly popular for outdoor use) is robust but can be scratched by grit under very high pressure. Keep the nozzle at 40° and stay within the 1,500–2,000 PSI range for glazed finishes. The bigger risk is not the tile face but the grout and pointing around it: excessive pressure directed at joints on large-format porcelain paving can wash out the bedding mortar at the edges over time, so angle your passes along the tile face rather than directly at joint lines.
Pressure washing technique: the settings that actually matter
A lot of the damage I see on DIY-cleaned patios comes from using the wrong nozzle rather than the wrong machine. Nozzle angle controls impact pressure far more than the machine's rated PSI does. The industry colour coding is: 0° red (cutting/stripping, avoid on all patio surfaces), 15° yellow (heavy duty, concrete only), 25° green (general purpose, good for robust concrete), 40° white (light duty, suitable for stone, brick, porcelain, pavers), and black/soap tip (low pressure for detergent application). Start with the 40° white nozzle every time. Step narrower only after a test patch confirms the surface can handle it.
| Nozzle (Colour / Angle) | Use Case | Suitable Surfaces |
|---|---|---|
| Red / 0° | Cutting, stripping | Not recommended for any patio surface |
| Yellow / 15° | Heavy-duty cleaning | Robust concrete only, with care |
| Green / 25° | General purpose cleaning | Concrete, hard brick, robust stone |
| White / 40° | Light-duty cleaning and rinsing | All surfaces; always start here |
| Black / Soap tip | Detergent application (low pressure) | All surfaces for pre-treatment |
Distance matters too. Start at 3–4 feet and move in gradually only after checking the test patch for surface damage. A surface cleaner attachment is a worthwhile investment if you have a large flat area: it houses a rotating nozzle in a circular shroud, cleaning evenly without stripe marks and significantly faster than wand passes. Make sure your machine's PSI and GPM ratings match the surface cleaner's requirements before fitting it. For step-by-step instructions on setting up and using a power washer safely on patio surfaces, see our guide on how to use power washer on patio.
Eco-friendly and pet-safe cleaner options
If you have pets, children or sensitive garden planting near your patio, the cleaner you choose matters. Chlorine bleach (sodium hypochlorite) is effective on biological growth but is toxic to plants, can bleach fabrics and furniture, and leaves residue that irritates paws. Oxygen bleach products (sodium percarbonate) are the practical alternative: they break down into oxygen and water, are listed under EPA Safer Choice programs (Simple Green Oxy Solve is a well-known example), and are effective against algae, mould and mildew on most surfaces. University extension research also supports oxygen bleach as a less plant-toxic option for moss and algae removal compared to chlorine products.
For general cleaning without biological growth, a pH-neutral or mildly alkaline detergent in low concentration is genuinely safe around pets once rinsed. Always rinse thoroughly regardless of which product you use, as residue (even from 'safe' products) can cause skin or paw irritation if left on the surface. If you're unsure about a product around specific plants, wet the surrounding soil and plants before applying the cleaner and rinse the surrounding area as well as the patio itself when you're done.
Stain-specific treatments at a glance
| Stain Type | Recommended Treatment | Notes / Cautions |
|---|---|---|
| Algae / green film | Oxygen bleach solution, 10–20 min dwell, brush and rinse | Safe on most surfaces; avoid high concentration on sandstone |
| Moss | Oxygen bleach or dedicated moss killer, allow dwell, brush off dead growth | Physically brush off dead moss before pressure washing |
| Mould / mildew | Oxygen bleach or alkaline cleaner with brush agitation | Ensure good ventilation; rinse thoroughly |
| Oil / grease | Alkaline degreaser, 10–15 min dwell, agitate with brush, pressure wash | Hot-water machine more effective on heavy petroleum stains |
| Rust | Oxalic acid-based rust remover (test first) | Do not use on calcareous stone; always test and rinse |
| Efflorescence | Water wash first; specialist efflorescence remover for persistent deposits | Follow manufacturer dilution; neutralise and rinse after acid-based products |
| Tannin / leaf stains | Alkaline cleaner or oxygen bleach solution with dwell time | Often responds well to pressure washing after pre-treatment |
| Pet stains / urine | Enzyme-based cleaner designed for outdoor use, dwell 10–15 min, rinse | Enzyme cleaners neutralise odour as well as staining |
Post-cleaning care: sealing, maintenance schedule and common mistakes
Cleaning is only half the job. What you do in the 24–72 hours after cleaning determines how long the results last. The single most impactful aftercare step for porous surfaces (concrete, brick, sandstone, natural stone) is applying a quality impregnating sealer once the surface is fully dry. Sealers don't make surfaces bulletproof, but they significantly slow water ingress, biological re-colonisation and staining. Porcelain doesn't need sealing (it's non-porous), and glazed brick generally doesn't either, but the grout between them benefits from a dedicated grout sealer.
Suggested maintenance schedule
- Weekly (or after each use): Sweep away leaves, grit and debris before they break down and stain
- Monthly (spring through autumn): Spot-treat any visible biological growth before it establishes
- Annually: Full clean using surface-appropriate method; inspect and top up jointing sand on brick and paver patios
- Every 2–4 years (or when water stops beading): Re-seal porous surfaces (concrete, sandstone, natural stone, brick)
- As needed: Re-grout or re-point areas showing cracking or joint loss
Most common mistakes to avoid
- Using a 0° or 15° nozzle on any surface other than hard concrete
- Applying acid-based cleaners to calcareous stone (limestone, some sandstones, travertine) without testing
- Skipping the test patch: five minutes on a hidden corner can save the whole patio
- Power washing jointing sand out of brick or paver patios by directing the nozzle at joints
- Sealing a damp surface: always allow 24–72 hours of drying time after cleaning before sealing
- Using chlorine bleach near planted borders without protecting the plants first
- Cleaning in full sun on hot days: cleaners dry too quickly, increasing the risk of residue marks
One last practical note: timing your annual clean matters. Late spring (before the main growing season) is ideal because biological growth is active and easier to treat, the weather is warm enough for cleaners to work efficiently, and you have the whole summer ahead to enjoy the results. Autumn cleaning is also worthwhile to remove accumulated organic matter before winter freeze-thaw cycles drive staining deeper into porous surfaces.
FAQ
What’s a concise pre-cleaning checklist I can follow before starting patio cleaning?
Clear furniture and planters; sweep or vacuum loose debris; protect nearby plants and grass with plastic sheeting; move or cover nearby items (grills, toys); test-clean a small, hidden patch for chosen method; gather PPE (gloves, eye protection, knee pads, respirator if using chemicals); choose and mix cleaners per label; have a hose and bucket ready for rinsing; note weather (avoid rain within 24–48 hours if sealing afterwards).
How do I assess my patio surface and choose an appropriate cleaning approach for concrete, stone, brick, sandstone, slate, and porcelain?
Concrete: durable — safe for medium–high pressure and degreasers; test for sealers. Brick: porous and mortar‑sensitive — start with low pressure, pH‑neutral or manufacturer cleaners; avoid blasting. Natural stone (sandstone, slate): often calcareous/soft — use pH‑neutral cleaners, soft brushes, steam or very low pressure; avoid acids. Porcelain tiles: non‑porous — low to moderate pressure ok, mild detergent; usually no sealer needed. For all surfaces perform a test patch and verify whether the surface is sealed or unsealed before using chemicals or pressure.
When should I vacuum/sweep vs steam cleaning vs pressure washing?
Sweep/vacuum to remove loose debris every time. Use steam cleaning (high‑temp, low‑pressure) for delicate carved or historic stone, sensitive surfaces, or where chemicals must be avoided. Use pressure washing for general heavy soiling, pavers, concrete, and when removing dirt/biological growth — but match pressure/nozzle to surface: low for delicate stone/brick, higher for concrete. If unsure, start with the gentlest method and escalate after testing.
What are safe pressure‑washing PSI/GPM ranges and nozzle choices by surface?
General nozzle guidance: 40° (white) light/rinse; 25° (green) general; 15° (yellow) heavy; 0° (red) concentrated/cutting; black soap tip for low‑pressure detergent. Suggested starting PSI/GPM: porcelain & sealed stone: ~1,800–2,200 PSI, ≥1.5 GPM; pavers/brick: 1,800–2,800 PSI, ≥1.8 GPM (use fan tip and keep wand angled); slate/sandstone (sensitive): ≤1,800 PSI, wide 40° tip, hold >2–3 ft; concrete (heavy grime/grease): 2,500–3,500+ PSI, narrower tip for spots but wide passes for general cleaning. Always start wide and 3–4 ft back; test patch; avoid turbo and 0° tip on fragile surfaces.
Walk me through a safe, step‑by‑step power washer how‑to for patios.
1) Read machine manual and use PPE. 2) Clear and protect area and plants. 3) Sweep loose debris. 4) Apply detergent (black soap tip or low‑pressure applicator) and allow dwell time per instructions. 5) Start with a 40° tip and keep wand 3–4 ft from surface at a 45° angle. 6) Work in overlapping passes, moving closer only after test patch. 7) For stubborn stains switch to 25° or 15° briefly, never use 0°/turbo on delicate material. 8) Rinse thoroughly; for surface cleaners use manufacturer‑matched PSI/GPM. 9) Let dry 24–72 hrs before resealing or heavy use.
What are realistic DIY jet‑wash and professional cleaning cost ranges and when should I hire a pro?
DIY: renting a mid‑range pressure washer ~ $40–$80/day; buying homeowner units ~$250–$700. Pro jet‑washing: typical residential patio cleaning $150–$450 for standard areas; heavy cleaning, oil/grease or large patios $400–$1,000+. Specialty conservation/steam/DOFF or historic stone cleaning can be $1,000+. Hire a pro when: surface is listed/historic/delicate; you lack safe access or proper equipment (hot‑water washer for deep grease); damage risk (loose mortar, unstable pavers); or stains persist after proper DIY attempts.
Next Article
How to Use Wet and Forget Patio Cleaner Step by Step
Step by step guide to apply Wet and Forget patio cleaner, prep and safety, dwell time, rinse or no rinse, and troublesho