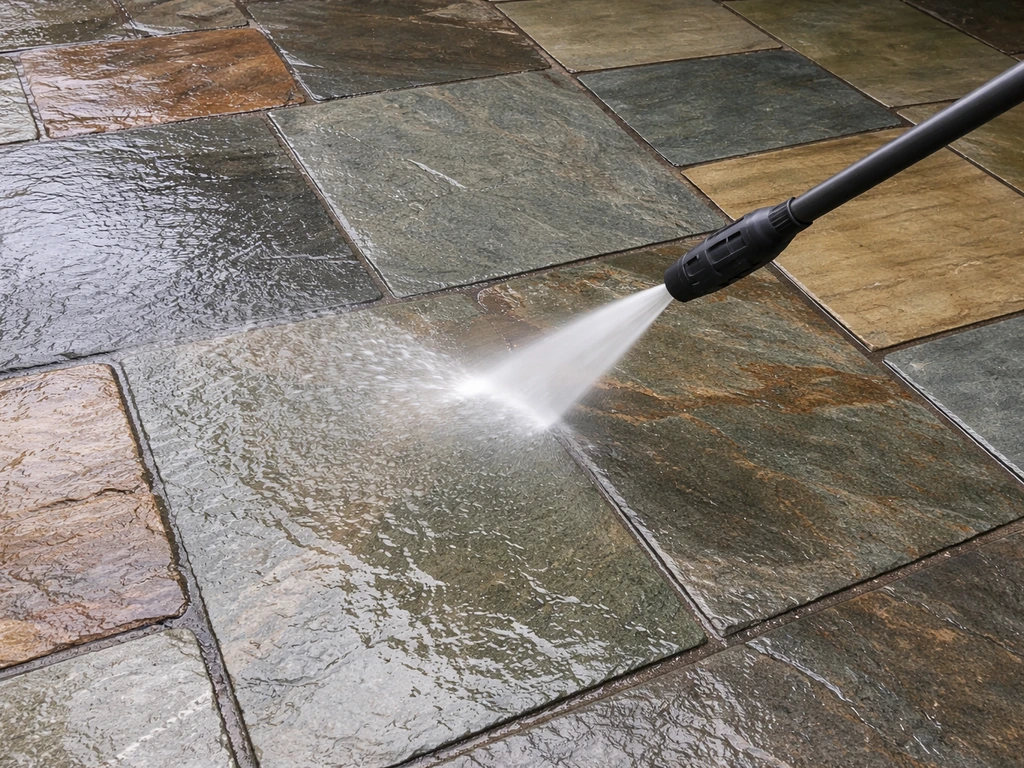
Yes, you can pressure wash a slate patio, but slate is one of the more unforgiving natural stones if you get it wrong. The safe zone is 800 to 1200 PSI, a 25-degree or 40-degree fan tip nozzle, held at least 12 to 18 inches from the surface. Go above that pressure or too close with a narrow jet, and you risk chipping edges, flaking surface layers, or blasting water into cracks and grout joints where it causes long-term damage. Get the settings right, though, and a pressure washer is genuinely one of the best tools for stripping algae, moss, and grime from a slate patio.
Can You Pressure Wash Slate Patio Safely? PSI and Steps

Rhea Lang
26 Jun 2026
When pressure washing slate is (and isn't) a good idea
Pressure washing works well on slate that is in good condition: tiles are solid, edges are intact, grout or pointing is not crumbling, and there are no visible cracks or loose sections. If your patio fits that description and you're dealing with a buildup of algae, moss, general grime, or light staining, a pressure washer will clean it faster and more thoroughly than scrubbing alone.
Where it gets risky is with older or weathered slate. Slate is a layered stone and it can delaminate over time, especially if water has been getting into small fractures and freezing. Before you even connect the hose, walk the patio and press down on each tile. Any that rock, flex, or sound hollow need to be re-set before you clean them. Pointing a pressure washer at a loose tile can chip corners, drive water under the substrate, or turn a minor repair into a full re-lay job.
Pressure washing is also a bad idea if the slate was recently sealed and the sealer is beginning to peel or bubble. High-pressure water will strip that sealer unevenly and you'll end up with a patchy, blotchy finish that's harder to fix than the original problem.
- Good candidate: solid tiles, intact grout, no cracks, heavy algae or moss buildup, general grime
- Risky: loose or rocking tiles, flaking surface layers, crumbling grout joints, peeling sealer, visible fractures
- Not worth the risk: heavily delaminated or crumbling slate, historic or irreplaceable paving where damage cannot be reversed
Slate safety: risk of chipping, flaking, and etching
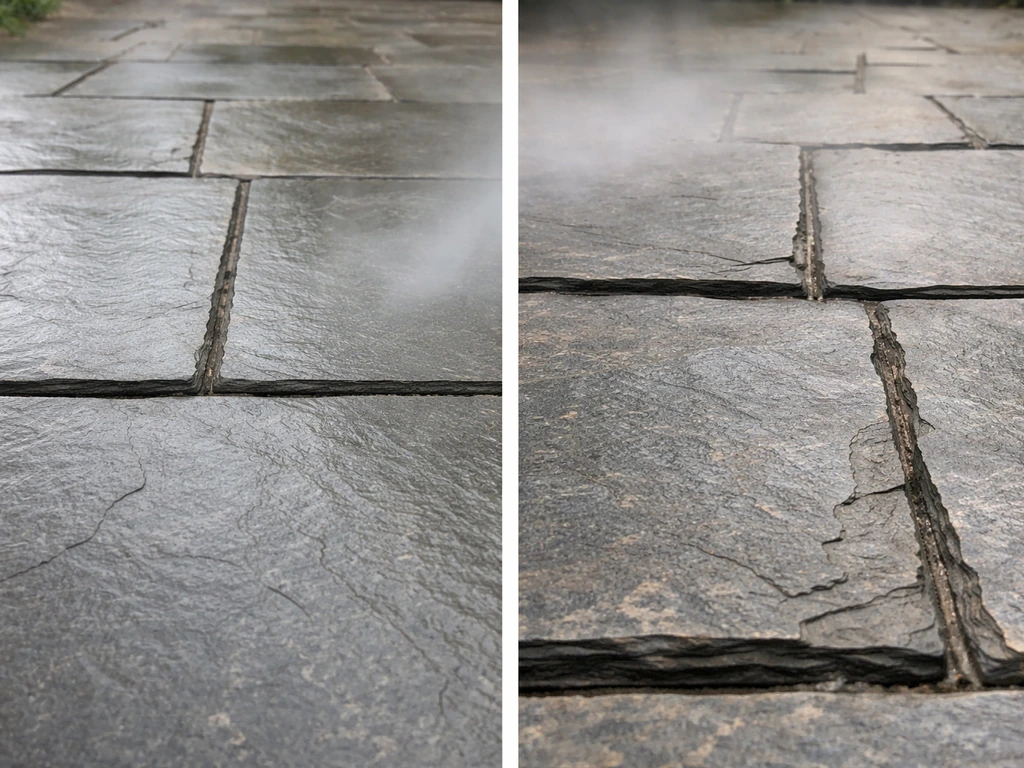
Slate's layered structure (the technical term is foliation) is what gives it that attractive texture, but it's also the reason it needs more care than concrete or porcelain. The layers can separate, especially at edges and corners, if hit with too much direct pressure. This is called spalling, and once a corner chips off a slate tile, it's very difficult to fix without replacing the tile entirely.
Etching is a separate problem. Acidic cleaners, including anything with vinegar or lemon-based ingredients, react with the minerals in slate and leave dull, roughened patches on the surface. Natural stone maintenance guides are consistent on this: blank" rel="noopener noreferrer">never use acidic or ammonia-based cleaners on natural stone. Even if the stone looks fine immediately after, the etching shows up weeks later when the light hits it at the right angle.
Water intrusion is the third big risk. Slate patios usually have grout joints, sand-filled gaps, or mortar pointing between tiles. A narrow, high-pressure stream aimed directly at those joints will blast out the filler, leaving gaps where water can pool and freeze in winter. Over time, that frost heave lifts tiles and causes cracking. When in doubt, always angle the spray across the surface rather than directly into joints.
Best pressure washer settings and technique for slate patios
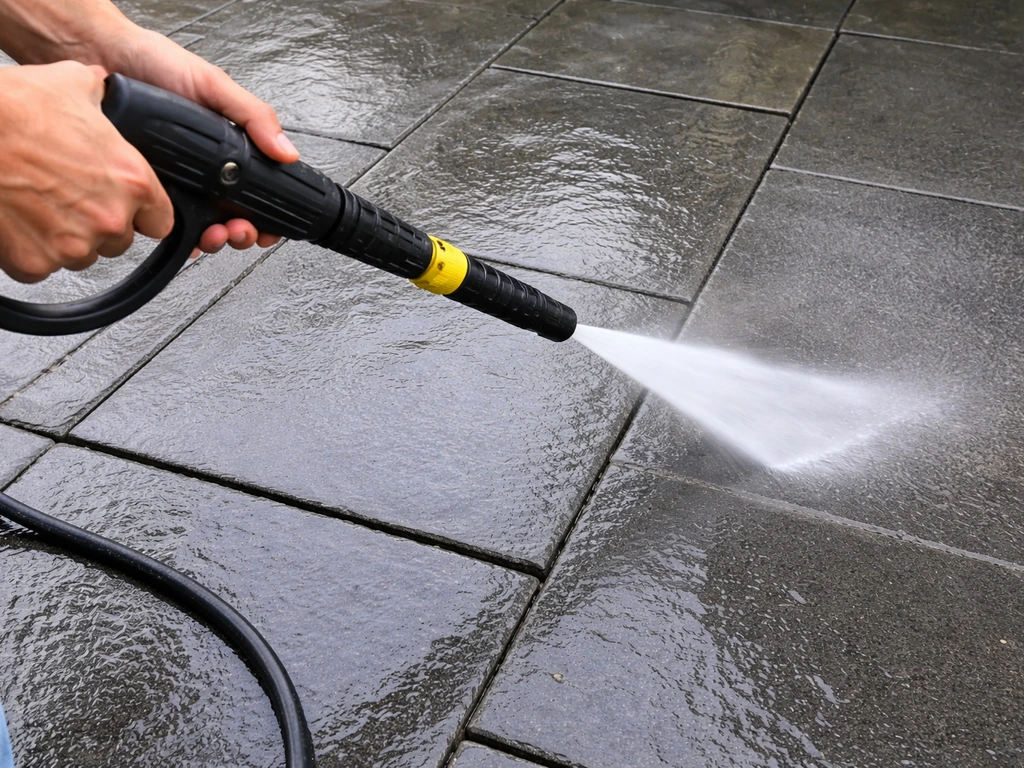
The numbers that matter most are PSI (pressure), nozzle angle, and standoff distance. Get all three right and you can clean slate effectively without any damage. To get patio cushions looking fresh again, use the same careful pressure-washer approach and avoid blasting water into seams and fabric clean slate effectively without any damage.
| Setting | Recommended for Slate | What to Avoid |
|---|---|---|
| PSI | 800 to 1200 PSI | Above 1500 PSI |
| Nozzle | 25-degree (green) or 40-degree (white) fan tip | 0-degree (red) or 15-degree (yellow) — too concentrated |
| Standoff distance | 12 to 18 inches from surface | Closer than 10 inches |
| Spray angle | Slight angle (30 to 45 degrees to surface) | Perpendicular blasting directly into grout joints |
| Movement | Smooth, overlapping passes | Stopping in one spot or erratic movement |
If you own a pressure washer that only goes to 1400 or 1600 PSI, you can still use it on slate by backing off the distance to 18 to 24 inches and using the 40-degree (white) tip. You're effectively spreading the pressure over a wider area so the impact on any single point is lower. A turbo or rotary nozzle is worth avoiding on slate entirely, even though it's great for concrete.
Work in sections of about one square metre at a time. Use long, sweeping passes that slightly overlap the previous pass, moving in the same direction as the natural grain of the slate where possible. Don't blast perpendicular to grout joints. Keep the nozzle moving at a consistent speed: stopping even for a second concentrates pressure in one spot and that's when chips and flaking happen. I once paused mid-pass to reposition my grip and came back to a small flake sitting on top of a tile. Lesson learned.
For a light clean on a well-maintained patio, the 40-degree tip at 1000 PSI from 15 inches will often be enough. For heavy moss or algae, start the same way but follow up with a cleaning agent (more on that below) and a second pass rather than cranking up the pressure.
Cleaning agents for slate (and when to avoid them)
Choosing the right cleaner for slate matters as much as the pressure settings. The wrong product can etch the stone, strip the sealer, or leave a residue that attracts more algae growth in a matter of weeks.
What works on slate
- pH-neutral stone cleaners: the safest all-purpose choice. Products like PROSOCO's stone and tile cleaners are formulated specifically not to damage natural stone finishes or sealers.
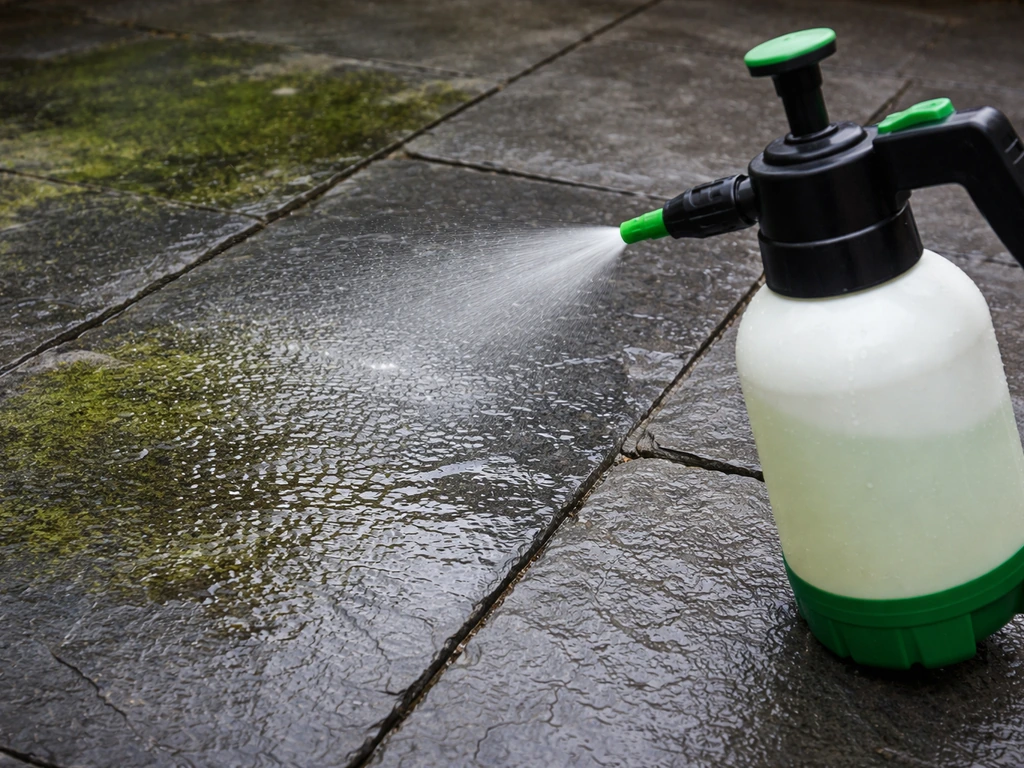
- Dedicated algae and moss removers (biocidal): look for products that list slate or natural stone as a compatible surface. Brands like Wet and Forget, Patio Magic, or Algon are commonly used. These work well as a pre-treatment applied before pressure washing.
- Mold stain removers: products like Concrobium Mold Stain Remover work by maximising dwell time on the surface before rinsing. Apply, let it sit for the time specified on the label (usually 10 to 15 minutes), then pressure wash off.
- Oxygen-based (non-chlorine) degreasers: useful for greasy stains and general grime. Much gentler than bleach-based alternatives and won't bleach out the natural colour variation in the slate.
- Diluted dish soap or washing-up liquid: a genuine budget option for light cleaning, safe on slate, though it won't do much against established moss or algae colonies.
What to avoid on slate
- Vinegar and lemon juice: both are acidic and will etch slate over time. Despite being popular 'natural' cleaning suggestions online, they are specifically flagged as harmful to natural stone by stone care professionals.
- Bleach and ammonia-based cleaners: these can discolour slate, react badly with certain minerals, and break down sealers. They're also not selective — they'll kill surrounding plants and grass if runoff reaches them.
- Acidic patio cleaners (including many budget 'patio cleaner' products): check the label before using anything marketed generically as a patio cleaner. If the pH is below 7, keep it off your slate.
- Wire brushes or steel wool: not a cleaning agent, but worth mentioning here. Always use a nylon scrub brush if you're adding manual agitation. Wire will scratch slate permanently.
How to tackle common slate patio stains
Mold and algae
These are the most common complaints on slate and, thankfully, the most straightforward to treat. Apply a dedicated algae or mold remover to the dry surface, let it dwell for at least 10 to 15 minutes (longer for thick growth), then pressure wash at 1000 to 1200 PSI with the 25-degree tip. For heavy infestations, a light scrub with a stiff nylon brush during the dwell time helps break up the biofilm before you rinse. You may need two passes on particularly thick algae mats.
Moss
Thick moss is best removed physically first. Scrape off the bulk with a plastic scraper or stiff nylon brush before applying any chemical. Then apply a biocidal moss killer, allow the full dwell time, and pressure wash. If you just blast moss with a pressure washer without treating it first, you'll spread spores across the patio and find new growth appearing within a few weeks. After cleaning, apply a growth inhibitor or long-life moss treatment to slow re-colonisation.
Grease stains
Grease from barbecues, outdoor cooking, or engine drips needs a degreaser specifically rated for natural stone. Apply it to the stain, work it in gently with a nylon brush, leave it for 5 to 10 minutes, and then pressure wash. For deep-set grease that has had months to soak in, you may need two applications. Avoid solvent-based degreasers unless the product specifically states compatibility with sealed or natural stone.
Rust stains
Rust on slate usually comes from metal furniture legs, planters, or fixings. This is one situation where you need a specialist rust remover for natural stone, and these are worth handling carefully. Many general rust removers are acid-based, which will etch slate. Look for an oxalic-acid-free, stone-safe rust treatment and spot-test on a hidden area first. Let it dwell according to the label, then rinse thoroughly. Pressure washing helps but is secondary to the chemical treatment here. If you’re wondering, “Is it ok to power wash patio pavers?”, the answer depends on the paver material, joint sand, and whether the surface has been sealed pressure wash patio pavers.
Pet stains
Pet urine and waste can leave both visible stains and persistent odour in porous slate. An enzyme-based cleaner is the most effective approach because it breaks down organic matter rather than just masking it. Apply generously, allow a long dwell time (15 to 20 minutes), agitate with a nylon brush, and pressure wash off. You may need to repeat for ingrained odours. After cleaning, sealing the slate significantly reduces porosity and makes future staining much easier to clean up.
Prepping, protecting nearby areas, and post-clean care
Before you start
- Clear the patio completely: furniture, planters, rugs, and any decorations.
- Sweep off loose debris, leaves, and dirt. This stops you grinding grit into the surface when you're scrubbing or pressure washing.
- Inspect every tile: press each one to check for looseness, look for cracks, check grout joints for gaps or crumbling. Mark any problem areas with chalk so you know to avoid high pressure on those spots.
- Protect surrounding plants and lawn: cover border plants with plastic sheeting. Wet down grass and garden beds near the patio before you start, and rinse them again after cleaning if you've used any chemical treatment.
- Check the weather: aim for a dry day with temperatures above 5°C (40°F). Cleaning in rain makes rinsing harder to judge, and cleaning in near-freezing temperatures risks water freezing in joints before it drains.
After cleaning: drying and sealing
Allow the patio to dry completely before applying any sealer, which typically means at least 24 to 48 hours of dry weather. Sealing slate after cleaning is genuinely worth doing, especially if the tiles are porous. A good impregnating sealer (not a surface film sealer) reduces the rate at which water, oil, and biological growth penetrate the stone. It makes future cleaning much easier and significantly slows the return of moss and algae.
For ongoing prevention, consider applying a long-life biocidal treatment or growth inhibitor once the sealer has cured. Products like Wet and Forget or Patio Magic can be applied annually and work slowly over weeks to kill and prevent biological growth without needing pressure washing every time.
Step-by-step DIY process, troubleshooting, and when to call a pro
The full DIY process
- Inspect and prep: check all tiles, mark problem areas, protect plants, sweep off debris.
- Pre-wet the patio: give the whole surface a light rinse with plain water before applying any cleaner. This helps cleaning agents spread evenly and prevents them from being absorbed too quickly into dry stone.
- Apply your chosen cleaner: follow label dilution rates, apply evenly, and allow the specified dwell time. Don't let the cleaner dry on the surface.
- Agitate if needed: for moss, algae mats, or heavy staining, scrub with a stiff nylon brush during dwell time.
- Pressure wash: fit the 25 or 40-degree tip, set 800 to 1200 PSI, hold 12 to 18 inches away, work in smooth overlapping passes at a slight angle. Start at the highest point of the patio and work toward drainage.
- Rinse thoroughly: do a final rinse with plain water to remove all cleaner residue. Leftover cleaning product residue can attract dirt faster and may react with a sealer applied on top.
- Inspect the result: check for missed patches, streaking, or any damage before putting furniture back.
- Dry and seal: allow 24 to 48 hours to dry, then apply an impregnating sealer for long-term protection.
Troubleshooting common problems
Uneven cleaning or streaking usually means the cleaner wasn't left to dwell long enough, or the nozzle was moved too quickly in some areas. Go back over streaky sections with another application of cleaner and a slower, more deliberate pressure-washing pass. If one area just won't come clean, it's likely an embedded stain rather than surface grime, and you'll need a targeted stain remover rather than more pressure.
Green regrowth within a few weeks almost always means spores survived in grout joints or at the tile edges. A post-clean application of biocidal treatment will deal with this. If it keeps coming back fast, the slate may be more porous than average and really does need sealing before any further treatment.
If you notice small chips, flaking, or white powdery deposits (efflorescence) after cleaning, stop and assess before doing anything else. Chips on tile edges mean the pressure was too high or the nozzle too close. Reduce both on the next pass. Efflorescence is mineral salts being drawn out by water, which usually clears on its own as the patio dries out fully, but if it's persistent it can signal water ingress in the substrate below the tiles.
When to hire a professional instead
Be honest with yourself about a few scenarios. If you find more than two or three loose tiles during your inspection, a professional can re-set them before cleaning. If the slate is antique, historic, or genuinely irreplaceable, the risk of DIY damage isn't worth it. If you start cleaning and notice the surface is flaking or spalling under even gentle pressure, stop immediately: the slate may be deteriorating structurally and needs professional assessment before any further water exposure. And if the grout or pointing is in very poor condition across large areas, a stone restoration company can clean and re-point in a single job, which is usually better value than multiple DIY attempts.
The PSI question comes up a lot in the context of different patio surfaces. Slate sits at the gentler end of the spectrum compared to concrete or porcelain, where you can push harder without damage. If you're cleaning other surfaces around the garden at the same time, the settings and methods are quite different depending on material, so it's worth checking the specifics for each surface type before switching between them.
FAQ
What PSI should I use if my slate is very old or looks weathered but the tiles seem solid?
Start at the low end (around 800 to 900 PSI), keep extra standoff (about 18 inches), and use the wider fan tip (40-degree). If you see any surface haze, flaking, or sand/grit loosening, stop and switch to a dwell-based cleaner approach with a lighter rinse rather than increasing pressure.
Can I use a surface cleaner attachment (the spinning disk) on a slate patio?
Generally avoid it. Those attachments can increase impact uniformity and encourage water into grout and edges at a level that is harder to control. Stick to handheld fan tips with consistent standoff and slower, overlapping passes.
How do I avoid blasting water into grout joints during cleaning?
Angle the spray so it travels across the face of the slate, not straight into the seams. Keep the nozzle moving continuously and use wider fan settings. Also avoid trying to “strip” the joint filler, if it already looks intact.
What should I do if my pressure washer has only 1600 PSI and I cannot reduce PSI?
Use the widest fan tip you have (40-degree), increase your distance to roughly 18 to 24 inches, and make multiple lighter passes. Avoid turbo/rotary nozzles, because the concentrated jet makes it much more likely to chip slate corners even at distance.
Is it safe to pressure wash slate if it was recently sealed?
Only if the sealer is fully cured and still bonded (no peeling, bubbling, or tackiness). If you see any failure spots, pressure washing can strip it unevenly and create patchy sheen, so pause and let a reseal or restoration plan handle it after cleaning.
How long should I let the patio dry before sealing after pressure washing?
Plan on at least 24 to 48 hours of dry weather. If you can, verify dryness by looking for darkening that persists after an hour or two of sun, because trapped moisture can prevent proper sealer penetration and cause uneven results.
Do I need to pre-soak algae or can I pressure wash right away?
If growth is established, it is usually better to apply an algae or mold remover to the dry surface and let it dwell (typically 10 to 15 minutes, longer for thick mats). Rinsing immediately or blasting first often smears grime and leaves regrowth sources behind.
Can I pressure wash slate without chemicals, just to remove dirt?
Yes for light grime, but heavily soiled slate often needs dwell time with a compatible cleaner. Without chemicals, you may be tempted to raise PSI, which increases risk of spalling, especially on edges and corners.
Why does my slate look streaky or patchy after cleaning?
Common causes are insufficient dwell time for the cleaner or inconsistent nozzle speed and overlap. Re-treat streaky sections with the same cleaner, dwell again, and do a slower second pass, keeping the nozzle angle across the surface rather than perpendicular to joints.
What do I do if I see white powder after washing, is it always efflorescence?
Not always, but white powdery deposits are often mineral salts that can fade as the patio fully dries. If it keeps returning quickly, it can indicate water ingress under tiles, so you should inspect grout joints and consider stopping further washing until the source of water entry is addressed.
Will pressure washing help with rust stains on slate?
It helps only as a rinse, not as the main fix. Most rust removers are incompatible because they can etch slate. Use an oxalic-acid-free stone-safe rust treatment, spot-test first, follow the dwell time exactly, then rinse thoroughly and only then consider a gentle pressure wash.
Can I pressure wash slate if animals have urinated on it?
Yes, but standard cleaners may not eliminate odor. Use an enzyme-based cleaner with a longer dwell time, agitate with a nylon brush, and plan on repeating for ingrained smells. Afterward, rinse off and let it dry completely before any sealing.
Should I seal slate immediately after cleaning moss and algae?
Seal only after everything is fully dry and the biological treatment has done its work. If regrowth is still active, sealing too soon can trap nutrients and make recurrence faster, so wait until the patio is dry and visually stable.
How can I tell if there are too many loose tiles for DIY pressure washing?
If more than two or three tiles rock, flex, sound hollow, or show visible edge separation during your walk-over test, it is safer to have them re-set first. Pressure washing can turn loose tiles into chipping and force water under the substrate.
Next Article
Can You Pressure Wash a Porcelain Patio Safely
Yes, with correct PSI, nozzle, distance, and test spot. Avoid grout damage, etching, and water intrusion.
