Patio cleaner works by using a combination of chemical agents, mainly surfactants, biocides, acids, and oxidizers, to break down the specific substances making your patio look terrible. Surfactants lift and loosen dirt and grime from the surface. Biocides and algaecides (often quaternary ammonium compounds or sodium hypochlorite) kill mold, algae, moss, and mildew at the root, then break apart the biofilm holding them to your slabs. Acid-based or chelating formulas dissolve mineral deposits and rust stains by chemically binding to metal ions and releasing them from the surface. The cleaner then needs time to do its job (that dwell period you'll see on every product label) before you rinse everything away. That's the whole mechanism in plain terms.
How Does Patio Cleaner Work? Mechanisms and Steps to Use It

What patio cleaner actually is (and what it isn't)
Patio cleaner is a purpose-formulated outdoor cleaning chemical, not a general household cleaner, dish soap, or diluted bleach solution you've cobbled together yourself. It's designed specifically for hard outdoor surfaces that are regularly exposed to rain, organic growth, moss, algae, and weathering. A dedicated product like Simple Green OxySolve combines surfactant action with an oxygen-release system to tackle both dirt and organic staining in one application. That's different from squirting fairy liquid on your slabs and hoping for the best.
What patio cleaner is NOT: it's not a sealant, not a pressure washer substitute on its own, and not a magic eraser for every stain type. A standard biocidal patio cleaner won't dissolve rust. An acid-based rust remover won't kill algae. Matching the right cleaner to the right problem is half the battle, and I'll get into that in detail below.
The chemistry: how patio cleaner formulas actually work
Understanding the basic mechanism helps you use these products more effectively and avoid costly mistakes. Most patio cleaners rely on one or more of these four chemical actions:
Surfactants for dirt and general grime
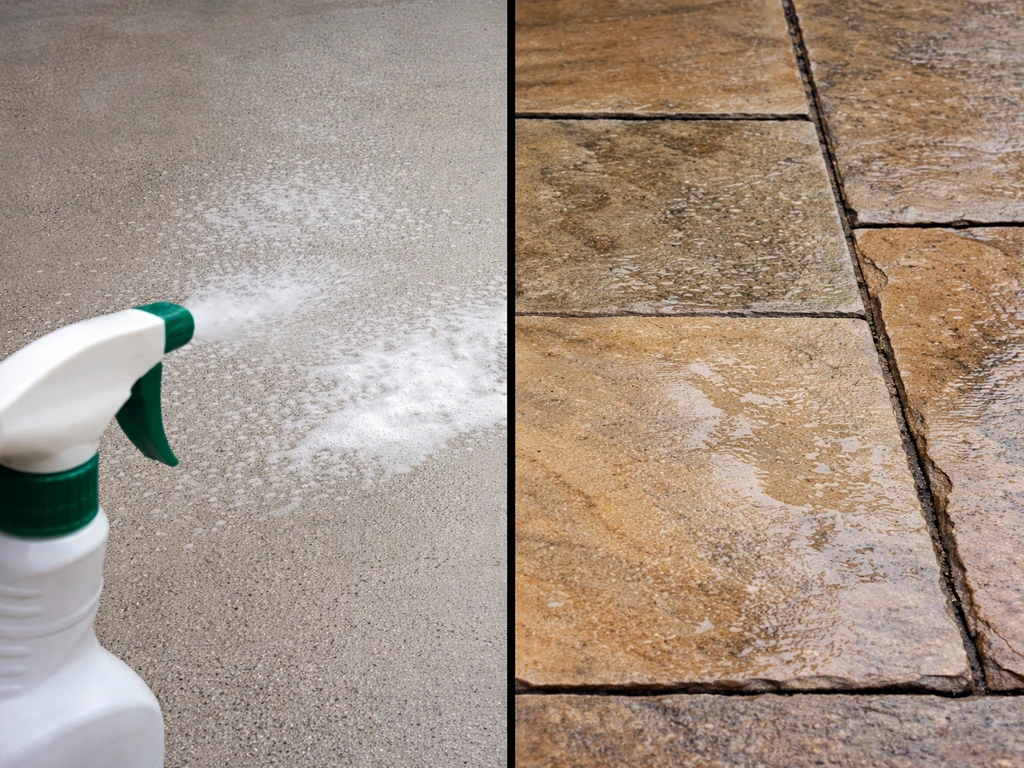
Surfactants reduce the surface tension between water and grease or dirt particles. They essentially wedge themselves between the grime and the patio surface, surrounding the dirt with water-attracting molecules so it can be rinsed away. Simple Green OxySolve's SDS classification confirms it contains surfactants alongside its oxygen-based system. This is why patio cleaners always need a rinse step: the surfactant has encapsulated the loosened soil, and you need water to carry it off the surface.
Biocides and algaecides for mold, moss, and algae
Biocidal patio cleaners use active ingredients like sodium hypochlorite (bleach-based formulas, as used in products like Olympic Deck Cleaner and blank" rel="noopener noreferrer">Clorox Pro Results) or quaternary ammonium compounds (quats) to kill organic growth. blank" rel="noopener noreferrer">Quats work by disrupting the cell membranes of algae, mold, and mildew, effectively killing the organisms and breaking down the slimy biofilm they form. This is why these cleaners don't just lift surface discoloration: they actually kill the growth at its base. If you skip a proper dwell time, you'll lift the visible surface layer but leave living spores behind that regrow within weeks.
Acids and chelators for rust and mineral stains
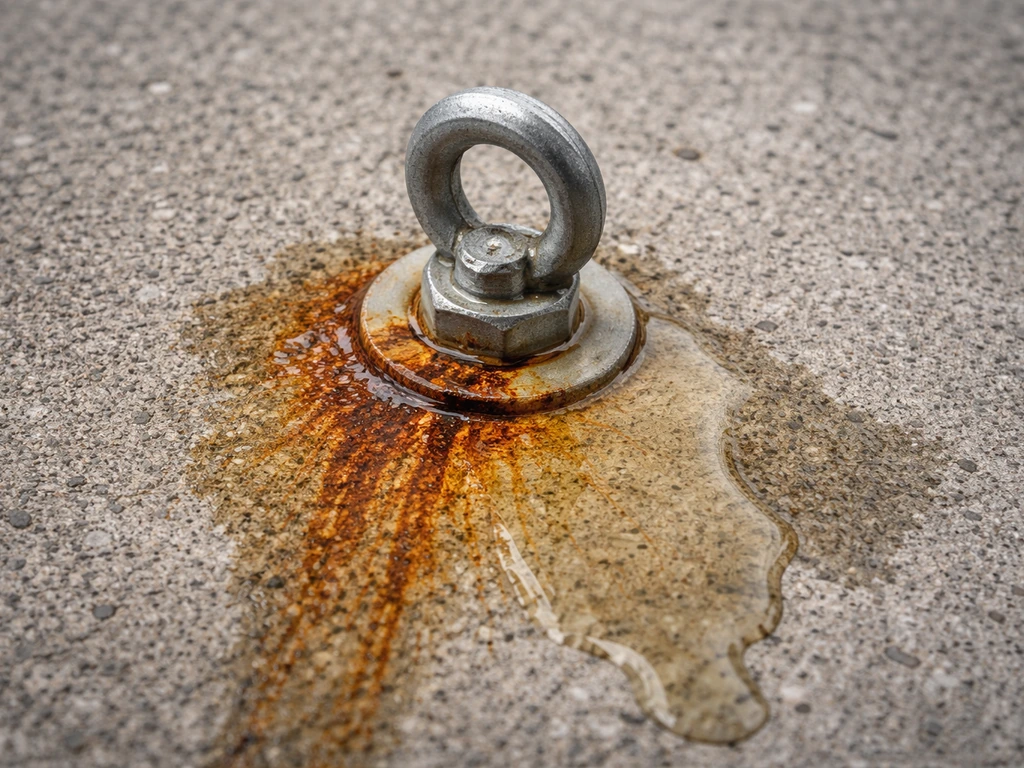
Rust removers use acid chemistry, typically oxalic acid (as in Diggers Rust and Stain Cleaner), or chelating agents that chemically bind to iron ions and pull them away from the surface. Oxalic acid converts insoluble iron oxide (rust) into a soluble iron oxalate compound that rinses away cleanly. Because this is an acid reaction, the product instructions specify keeping the surface wet during the dwell period (5 to 10 minutes, per Recochem's Diggers guidance) and rinsing thoroughly before the acid dries and potentially etch-marks the patio. Some rust removers, like Rusterizer, even recommend a post-treatment neutralization step with a dilute alkali solution to prevent lingering acid damage.
Solvents and degreasers for oil and grease
Grease and oil stains require a solvent or degreaser component. These work by dissolving the hydrocarbon chains in oil so the surfactants can then encapsulate and rinse the residue away. Standard biocidal patio cleaners often have limited effect on heavy grease, which is why dedicated degreasers exist for garage aprons, BBQ areas, and driveways. If you're dealing with a cooking oil spill or engine grease near a carport, a standard algae cleaner alone probably won't cut it.
How to use patio cleaner step by step
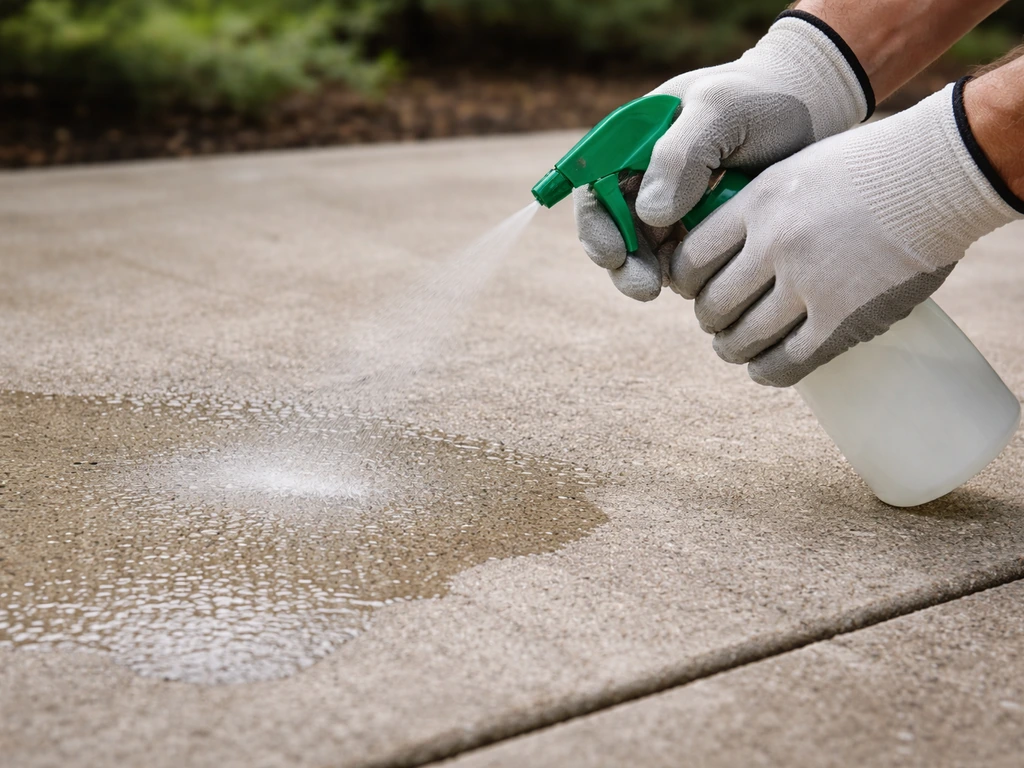
The application process matters as much as the product itself. I've seen people buy a perfectly good cleaner, apply it wrong, and declare it useless when the real problem was their technique. Here's the method that actually works. If you want a practical walkthrough, follow the step-by-step method and dwell times explained in the patio-cleaner use section Here's the method that actually works.. If you want a DIY approach, you can learn how to mix and apply patio cleaner at home safely for different stain types. If you want the full patio cleaner how to use process, including application timing and technique for your specific stain, follow the step-by-step guide here.
- Clear the surface: Remove furniture, planters, and anything else sitting on the patio. Sweep off loose debris, leaves, and surface dirt. The cleaner needs direct contact with the contaminated surface, not a layer of wet leaves.
- Pre-wet nearby plants and grass: Before you open the cleaner, thoroughly saturate any plants, lawn edges, or soil near the patio with plain water. This dilutes any chemical splash or runoff during application. ZEP's product guidance specifically calls this out, and it's good practice with any patio cleaner.
- Dilute correctly: Follow the product's dilution ratio precisely. Simple Green OxySolve, for example, specifies a mix ratio of approximately 1 part cleaner to 20 parts water for manual application. More concentrated does not mean better results, and it often means more damage to your surface.
- Pre-wet the patio surface: Lightly wet the patio with plain water before applying the cleaner, especially in warm weather or direct sunlight. This prevents the cleaner from drying too quickly on the surface before it has time to work.
- Apply the cleaner evenly: Apply from the back of the patio toward your exit point so you're not walking through treated areas. Ensure full, even coverage over the stained sections.
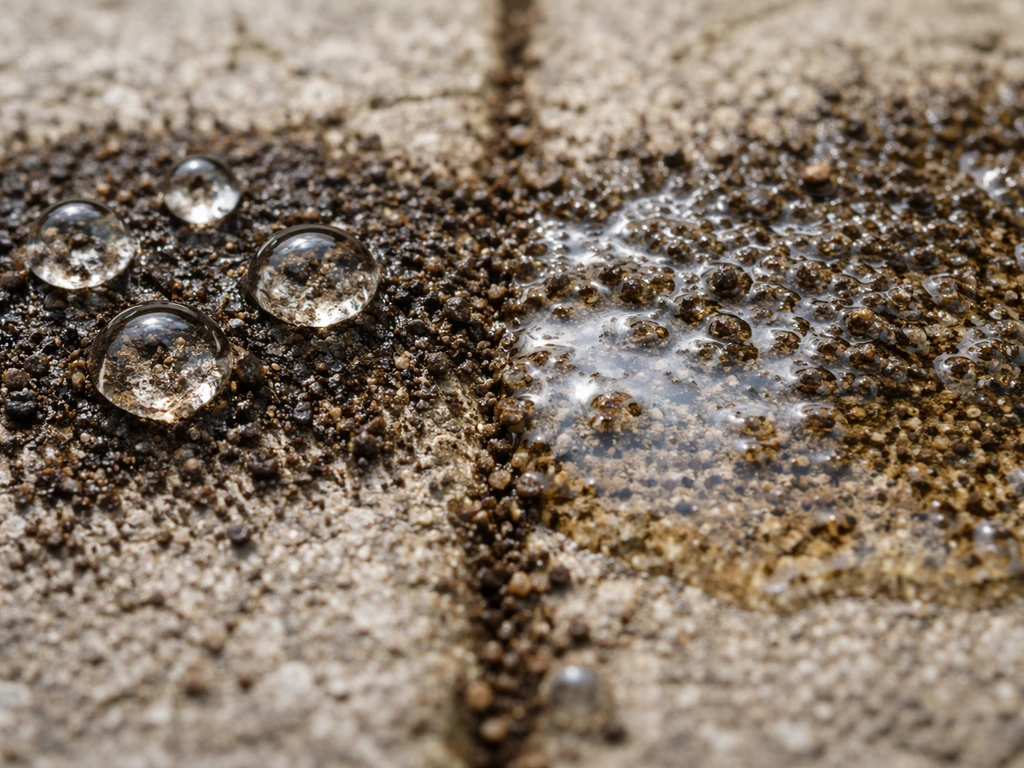
- Allow proper dwell time: Let the cleaner sit and work. For products like Simple Green OxySolve, that's 3 to 5 minutes. For acid-based rust removers like Diggers, it's 5 to 10 minutes, keeping the surface wet throughout. Do not let the cleaner dry on the surface. Insufficient dwell time is the single most common reason patio cleaners seem not to work.
- Scrub if needed: For heavy mold, thick algae, or embedded staining, use a stiff-bristle brush or deck scrubber during or after the dwell period. This physical agitation breaks up the loosened growth and forces the cleaner into porous surfaces.
- Rinse thoroughly: Rinse the entire area with a hose and spray nozzle or pressure washer on a wide fan setting. Clorox's guidance recommends a thorough rinse to remove all chemical residue. Work the rinse water off the edges of the patio, not toward planted borders.
- Re-water nearby plants: After rinsing the patio, water the surrounding plants and lawn again to dilute any residual runoff.
- Repeat if necessary: Heavy algae or deeply embedded staining may need a second treatment after the surface dries. Don't apply a second coat while the surface is still wet from rinsing.
What types of stains and growth patio cleaner targets
Not all patio stains respond to the same chemistry, so knowing what you're dealing with upfront saves a lot of time and wasted product.
| Problem | What's causing it | Cleaner type to use | Key action |
|---|---|---|---|
| Green/black algae | Airborne algae spores colonising damp surfaces | Biocidal or bleach-based cleaner | Kills organisms, breaks biofilm |
| Moss | Moisture-loving plant growth in shaded/damp areas | Biocidal cleaner or dedicated moss killer | Kills and loosens plant structure |
| Mold and mildew | Fungal growth, often black or dark grey | Biocidal cleaner with surfactants | Kills fungus, lifts surface staining |
| Rust stains | Iron runoff from furniture, tools, or water minerals | Oxalic acid or chelating rust remover | Converts rust to soluble compound |
| Grease and oil | BBQ drips, cooking oil, engine oil | Solvent-based degreaser | Dissolves hydrocarbon chains |
| General dirt and grime | Accumulated dust, soil, traffic marks | Surfactant-based general cleaner | Lifts and rinses particles away |
| Organic/pet stains | Pet urine, bird droppings, leaf tannins | Enzymatic or biocidal cleaner | Breaks down organic compounds |
One thing worth flagging: products like Simple Green OxySolve are designed to handle mold, mildew, moss, and algae in a single formula, which makes them genuinely versatile for most UK and US patios where the main enemy is biological growth. Rust is a different beast and needs its own dedicated product.
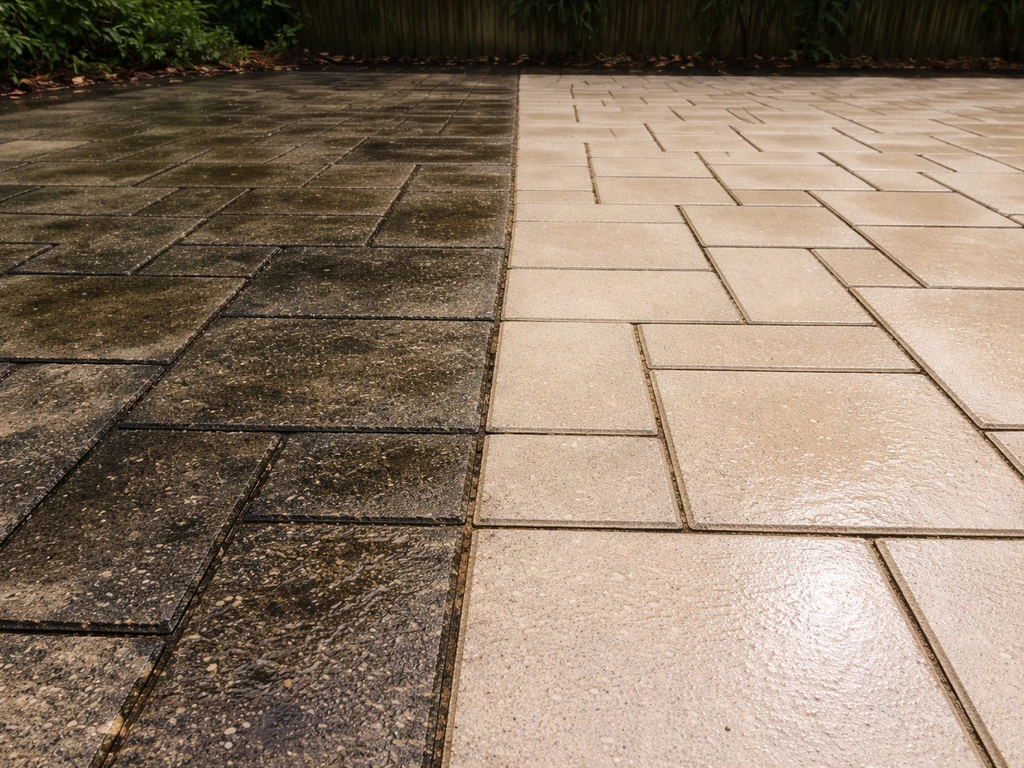
How patio cleaner works on different surface materials
The same cleaner can work brilliantly on one surface and cause serious damage on another. This is where a lot of homeowners go wrong. Here's how to approach the most common patio materials.
Concrete
Concrete is the most forgiving patio surface for cleaning. It's dense and relatively resistant to most biocidal cleaners, bleach-based formulas, and degreasers. You can use stronger concentrations here than you would on natural stone. Bleach-based products (sodium hypochlorite) work well on mold and algae on concrete. Acid-based cleaners also work on concrete rust stains, though repeated acid use can slowly weaken the surface. Always rinse thoroughly: residual bleach or acid left sitting on concrete will start to break down the surface binder over time.
Brick
Brick is porous and can absorb cleaner quickly, which means it responds well to biocidal treatments for algae and moss. Rust staining on brick (common around old iron fittings or plant pots) responds well to oxalic acid solutions applied by brush, as specified in Recochem's Diggers instructions: apply, brush in, soak for 5 to 10 minutes without letting it dry, then rinse. Avoid highly acidic formulas on mortar joints, as these can erode the pointing over time.
Natural stone (sandstone and limestone)
This is where you need to be careful. Sandstone and limestone are acid-sensitive. Any cleaner with a low pH (including oxalic acid rust removers and some bleach products with low pH) can etch, pit, or discolour these stones permanently. Stick to pH-neutral or alkaline-based biocidal cleaners specifically labelled as safe for natural stone. Always test in a small hidden area first. I learned this the hard way on a sandstone terrace where a splash of undiluted cleaner left a pale mark that took months to weather out.
Slate
Slate is moderately acid-sensitive and can be easily scratched by aggressive scrubbing. Use a gentle biocidal cleaner at the lower end of the recommended dilution range, apply with a soft-bristle brush, and rinse carefully. Avoid high-pressure washing at close range: the laminar structure of slate means high pressure can flake the surface layers.
Porcelain
Porcelain paving is the easiest surface to maintain. It's non-porous, so algae and moss can't root deeply into it, and most cleaners rinse off cleanly. Standard biocidal patio cleaners work fine here. The one thing to watch: porcelain can be slippery when wet, so don't apply cleaner to large areas you then have to walk across. Also, while porcelain itself is tough, the joint filler between slabs may not be, so avoid letting undiluted acid products pool in the joints.
Choosing the right cleaner and avoiding damage
Getting the chemistry right for your surface and stain type is the most important decision in this whole process. Here's how to make that call without making an expensive mistake.
Match the cleaner to the stain and surface
- Biocidal or bleach-based cleaner: best for mold, algae, moss, and mildew on concrete, brick, and porcelain. Avoid on sandstone and limestone.
- pH-neutral biocidal cleaner: the right choice for natural stone (sandstone, limestone, slate) where acid or strongly alkaline products can cause etching.
- Oxalic acid or chelating rust remover: for rust stains on concrete, brick, and porcelain. Not for natural stone. Keep the surface wet during dwell time and neutralise if recommended.
- Solvent degreaser: for oil, grease, and cooking residues. Works on all hard surfaces but may require a follow-up rinse with a general cleaner.
- Enzyme-based cleaner: good for pet urine and organic stains where a biocide alone won't fully eliminate odour or break down organic matter.
Dilution: follow the ratio, don't improvise
More concentrated is not more effective. Over-concentrated cleaner can strip colour from natural stone, leave residue that's difficult to fully rinse away, and damage joint mortar. Simple Green OxySolve specifies roughly 1:20 for manual application. Clorox and ZEP products have their own stated ratios. Always check the product's SDS or label for the correct dilution, and if you're dealing with a delicate surface, start at the weaker end of the range.
Dwell time: let the chemistry work
The dwell period is non-negotiable. A 3 to 5 minute dwell (Simple Green OxySolve) or 5 to 10 minutes for acid-based rust removers isn't just a suggestion: it's the time needed for the active ingredients to kill organisms, convert rust, or break apart grime at a molecular level. Rinsing too early leaves the job half done and is the most common reason people conclude their cleaner didn't work. The flip side: leaving cleaner on too long, especially acids, risks etching or staining. Set a timer.
Never mix chemicals
This is the safety rule that matters most. Do not mix patio cleaners with bleach, with each other, or with any other cleaning product unless the label explicitly says it's safe. ZEP specifically warns against mixing their deck cleaner concentrate with bleach. WHINK and Rusterizer both include incompatibility cautions in their technical data. Mixing bleach with acid-based cleaners produces chlorine gas. Mixing bleach with ammonia-containing products creates toxic fumes. Use one product at a time, rinse fully between applications if you're switching products, and store them separately.
Basic safety and protection
- Wear nitrile gloves and eye protection whenever you're handling concentrated patio cleaners. The Clorox Pro Results SDS specifies avoiding skin and eye contact.
- Work in good ventilation: outdoors is generally fine, but avoid applying in enclosed covered areas without airflow.
- Keep pets and children away from the area until the patio has been thoroughly rinsed and dried.
- Pre-wet and re-water plants before and after cleaning, especially with bleach-based or acid products.
- Avoid applying patio cleaner in strong direct sunlight: the product can dry too fast on the surface, reducing dwell effectiveness and potentially leaving marks.
- Check the SDS (Safety Data Sheet) for any product you're using: ZEP, Clorox, and other major manufacturers make these available on their product pages, and they contain dilution, dwell, PPE, and disposal guidance specific to that formula.
When results aren't immediate
Heavy, long-established algae and moss growth often doesn't disappear in a single treatment. The cleaner may kill the organisms but leave behind a brown or bleached residue that needs a second application and scrub after the surface has dried and any dead growth has dried out. For thick moss in particular, remove the bulk mechanically first (scraper or stiff brush) before applying the chemical treatment. You'll get much better contact between the product and the actual surface, rather than just treating the top layer of the moss canopy. There's much more detail on application timing and technique covered in guides on how to apply patio cleaner and how long to leave patio cleaner on the surface, which go deeper into those specific questions. There's much more detail on application timing and technique covered in guides on how to apply patio cleaner and how long to leave patio cleaner on the surface, which go deeper into those specific questions.
FAQ
What temperature and weather conditions are best for using patio cleaner?
Most patio cleaners should be used on a wet-but-not-pooling surface, then you let the chemistry work for the label’s dwell time and rinse thoroughly. If you apply to a dry, hot patio and it dries early, surfactants and oxidizers cannot do their full job, and acids can cause streaking or etch marks. If the label allows it, lightly pre-wet the area, apply, keep within the dwell window, then rinse.
How can I tell if the cleaner is actually working?
A foam or “bubbling” look can happen with some oxygen-release formulas, but it is not a reliable sign the cleaner is working. The more dependable indicator is whether visible growth lightens or lifts after the correct dwell period, and whether the rinse carries off loosened grime. If nothing changes after the first full dwell time and a thorough rinse, you likely need a different chemistry (for example, rust remover instead of biocide).
Do I always need more than one application, especially for moss and algae?
For bio-growth, a second treatment is common if the growth is heavy or long-established. The key is to wait until the dead growth has dried and stopped shedding, then brush/scrape lightly, and only then reapply if needed (using the same dwell time). Retrying too soon can just smear dead material around, making it look like the first application failed.
Can I dilute patio cleaner more than the label says to make it safer?
Yes, but only if the product instructions allow it and you match the surface. On porous materials like brick, pre-diluting can reduce penetration and kill-rate, leaving a residue. On sensitive stones like limestone and sandstone, using a weaker dilution is often safer, but if it is too weak you may not kill the organisms or dissolve mineral staining. The safest approach is to follow the label ratio, then if you’re between two surfaces, test a small hidden spot.
Is it okay to let patio cleaner dry instead of rinsing?
Not all surfactant cleaners should be left to “dry and then brush off.” Many are designed to be rinsed because the loosened soil is held in suspension. If you let surfactant and biocide residue dry, you can end up with a film that attracts dirt again and can cause uneven discoloration. Only skip rinsing when the label explicitly says it is a no-rinse or leave-on product.
Can I use a pressure washer with patio cleaner, or does it ruin the results?
Power washing can damage some patio materials and can also undo the dwell time by blasting chemicals before they react. If you use a pressure washer, wait until the dwell and rinse steps are complete, then use a moderate setting with a wider nozzle distance, especially on slate and jointed stone. For algae and moss, a gentler rinse often prevents re-anchoring dead biofilm into pores.
What if I use a biocide cleaner and the stain still looks brown or rusty?
It depends on the stain type. Rust needs acid or a chelating approach, while algae and mildew need biocides or oxygen-based oxidation. If you use one cleaner repeatedly for the wrong stain, you can spread residue and create a permanent haze, especially on natural stone. When in doubt, clean a small test patch, rinse fully, and compare results before treating the whole patio.
My patio looks streaky after cleaning, what caused it and how do I fix it?
Often, it is leftover chemistry or a rinse problem. Residue can show up as streaks, a dull film, or patchy color, usually when the dwell time was exceeded, the dilution was too strong, or rinsing was incomplete. Re-rinse with plenty of clean water, then if needed switch to the appropriate neutralization step only when the product instructions specify it (some acid rust removers include a neutralizer).
Can I mix different patio cleaners to speed things up?
Mixing is the biggest mistake. Do not combine bleach-based products with acid-based cleaners, and do not mix bleach with ammonia-containing products, since dangerous gases can form. Even mixing two “green” patio concentrates can create unpredictable reactions. If you switch products, rinse thoroughly, let the surface dry enough per label guidance, then apply only the new cleaner.
How do I protect plants, pets, and landscaping while using patio cleaner?
If children, pets, or sensitive plants are nearby, treat the patio like a chemical work area. Wet surrounding soil lightly before you start (if the label allows) to reduce uptake, keep people and pets off until the product has been rinsed away, and avoid runoff into drains or ponds. For plant protection, verify whether the product label recommends watering in, covering plants, or keeping a buffer zone.
What safety precautions matter most when using patio cleaner?
Wear gloves and eye protection, and use ventilation even outdoors because some oxidizers and acids can irritate. Avoid splashing, especially during brushing and rinsing. If you are using an acid rust remover, do not let it pool in joints, because pooling increases etch risk. If you get product on skin, rinse immediately with plenty of water and follow the first-aid directions on the label.
Should I test the product before cleaning the whole patio, and where?
If the cleaner is safe on your specific patio material, a test spot is still smart, especially for natural stone. The best test patch is small, hidden, and you should replicate your full process (dilution, dwell time, scrubbing intensity, and rinse). For sandstone and limestone, even small splashes can cause slow, pale discoloration that might take weeks to fade, so test before committing.
Does Patio Cleaner Work? Results, Timing, and Tips
See if patio cleaner works on mold, algae, moss, rust, grease, pet stains, plus dwell time, safety tips, and fixes.
