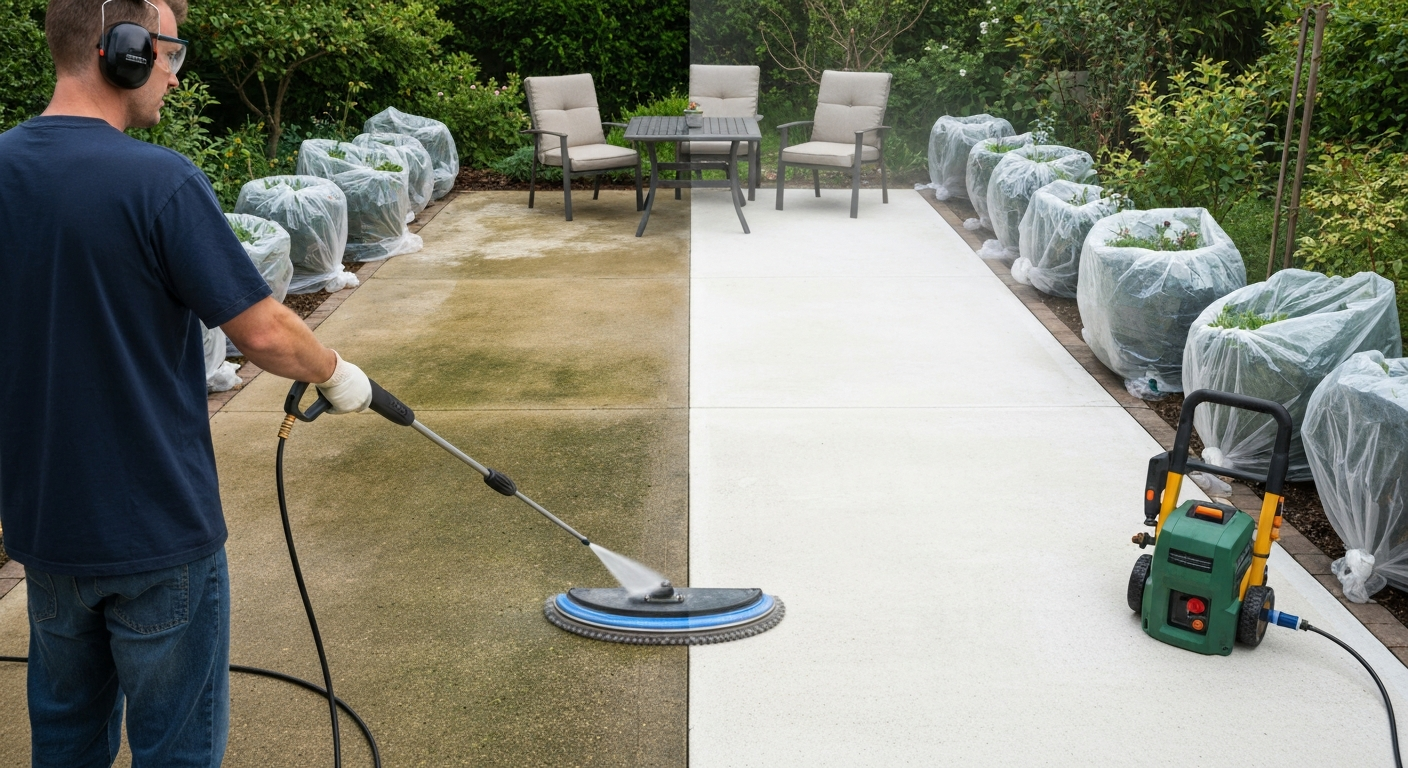
For most patios, you want a cold-water pressure washer running between 1,500 and 3,000 PSI depending on the surface, a 25-degree green nozzle for general cleaning, and a detergent pre-soak for anything with mold, algae, or grease. Start at the highest point of the patio, work in overlapping passes toward a drain or lawn edge, keep the nozzle 12 to 18 inches from the surface, and never let the beam sit still. That covers about 80 percent of DIY patio jobs. The remaining 20 percent is where surface type, stain type, and equipment choice really matter, and that is what this guide covers in full.
How to Use Power Washer on Patio: DIY Guide to Safety, Nozzles & Stain Fixes
Rhea Lang
13 Aug 2026
Should you DIY or hire someone? A quick decision checklist
Before you pull out the pressure washer or start comparing rental prices, it is worth spending two minutes deciding whether this is actually a job you should tackle yourself. Most homeowners can handle a straightforward concrete or paver patio clean. Some situations genuinely call for a professional, and getting that wrong is expensive.
- DIY is fine if: the patio is concrete, standard clay brick, or concrete pavers in reasonable condition; staining is general grime, algae, or light moss; you have access to a garden hose and a power outlet or petrol machine; the area is under about 60 square metres; and you are comfortable with basic equipment.
- DIY is fine if: you have done a test patch before and know the surface holds up to pressure washing.
- Consider hiring if: the patio is sandstone, limestone, slate, or any other soft or porous natural stone where the wrong PSI can permanently etch or erode the surface.
- Consider hiring if: the patio is historic, features decorative pointing or grout that is already crumbling, or is under any kind of planning or listed building restriction.
- Consider hiring if: there are deep oil or rust stains that require hot-water equipment or specialist chemical treatment you cannot source easily.
- Consider hiring if: the patio is large (over 80 to 100 square metres) and you want it done in a single session without the fatigue and risk of rushing.
- Call a pro immediately if: you notice cracked or spalling stone, loose tiles, or badly eroded mortar joints before you start. Pressure washing damaged surfaces makes the damage significantly worse.
- Permits are rarely needed for patio cleaning in most residential settings, but if you are in a conservation area or the property is listed, check with your local authority before using any high-pressure water on external surfaces.
On the cost side, hiring a professional jet wash contractor typically runs between £80 and £250 for an average garden patio in the UK, or $100 to $350 in the US, depending on size, surface type, and whether sealing is included. Renting a pressure washer for a day costs roughly £40 to £70 (UK) or $50 to $90 (US). Buying a decent homeowner-grade electric unit starts around £100 to £150, which pays for itself after two or three uses. I cover the full cost breakdown separately in the jet washing cost guide on this site.
Prep checklist before you start
Skipping prep is the most common reason a power wash job takes twice as long or produces patchy results. I have made most of these mistakes personally, so take this list seriously.
- Clear furniture, planters, rugs, and ornaments completely off the patio. Do not just move them to the side — water travels far and detergent overspray will stain fabric and damage certain plant pots.
- Cover or move plants growing close to the patio edge. Pressure-washer detergents, even supposedly eco-friendly ones, can scorch foliage. Use plastic sheeting or move pots at least 2 metres away.
- Sweep off loose debris (leaves, dirt, sand, gravel) with a stiff brush before wetting the surface. Wet debris clogs drains and makes it harder to see what you are actually cleaning.
- Inspect the surface for existing damage: cracked slabs, loose pointing, lifted pavers, crumbling grout. Mark or photograph these spots. Do not pressure wash over loose mortar joints without repairing them first — you will blast the material out completely.
- Block or divert drain openings if the runoff will carry heavy sediment or chemical detergent into a stormwater system. Many local authorities require this. A simple drain blocker from a builders merchant works well.
- Check the weather forecast. You need a dry day with at least 48 hours of dry weather forecast afterward if you plan to re-sand joints or apply sealer. Washing a patio the day before rain is fine for cleaning, but useless if you want to seal or re-sand.
- Connect and test your water supply first. Pressure washers need a consistent inlet flow, typically at least 8 to 10 litres per minute. A weak garden tap will cause the pump to cavitate and wear prematurely.
- Set up your pressure washer on a flat, stable surface well away from the area being cleaned. Keep the high-pressure hose unkinked and away from foot traffic.
Choosing the right equipment: pressure washers, PSI, GPM, and nozzles explained
Pressure washer types
For patio cleaning, you will generally be choosing between three categories: electric homeowner machines (typically 1,300 to 2,000 PSI), petrol/gas-powered machines (typically 2,500 to 4,000 PSI), and hot-water units (usually commercial grade). Electric machines are quieter, lower maintenance, and perfectly capable for patios under about 40 to 50 square metres. Petrol machines give you more power and flow for large areas or heavily soiled concrete. Hot-water pressure washers are significantly more effective at cutting through grease and oil because heat emulsifies fatty residues far better than cold water alone, but they are heavier, more complex to operate, and usually rented rather than owned for home use.
PSI and GPM: what the numbers actually mean
PSI (pounds per square inch) measures pressure, which cuts through dirt and grime. GPM (gallons per minute) measures flow, which flushes material away and affects how fast you cover an area. Both matter. A machine rated at 3,000 PSI but only 1.5 GPM will feel underpowered on a large patio because it cannot move enough water. Contractor-grade concrete cleaning typically benefits from around 3,000 PSI combined with 4.0 GPM or more. For most homeowner patios, 2,000 to 2,500 PSI and 1.8 to 2.5 GPM is a practical sweet spot that handles general cleaning without being dangerous on moderately hard surfaces. The cleaning unit (CU) formula, PSI multiplied by GPM, gives you a single comparable number: a machine at 2,000 PSI and 2.0 GPM produces 4,000 CUs, which is a reasonable homeowner benchmark.
Nozzle types and when to use each
Quick-connect nozzles follow a universal colour-coded system used by all major manufacturers including Kärcher, Simpson, and Ryobi. The angle controls how concentrated the pressure beam is: a narrow angle delivers more force to a small point, while a wide angle spreads the same pressure over a larger area with less impact per square centimetre. For patio work, you will almost never need the 0-degree red nozzle. I will be honest: I keep it in the kit but have never used it on a patio surface.
| Colour | Angle | Best Use on Patios | Avoid On |
|---|---|---|---|
| Red | 0° | Not recommended for patio surfaces | All patio materials |
| Yellow | 15° | Heavy residues on hard concrete, tar marks | Brick, stone, pavers, grout |
| Green | 25° | General cleaning of concrete, hard pavers | Soft stone, porcelain grout lines |
| White | 40° | Rinsing, delicate surfaces, porcelain tiles | Nothing — this is your safe default |
| Black / Blue | Low pressure (soap) | Applying detergent to all surfaces | Do not use for rinsing |
Surface cleaners and attachments worth buying
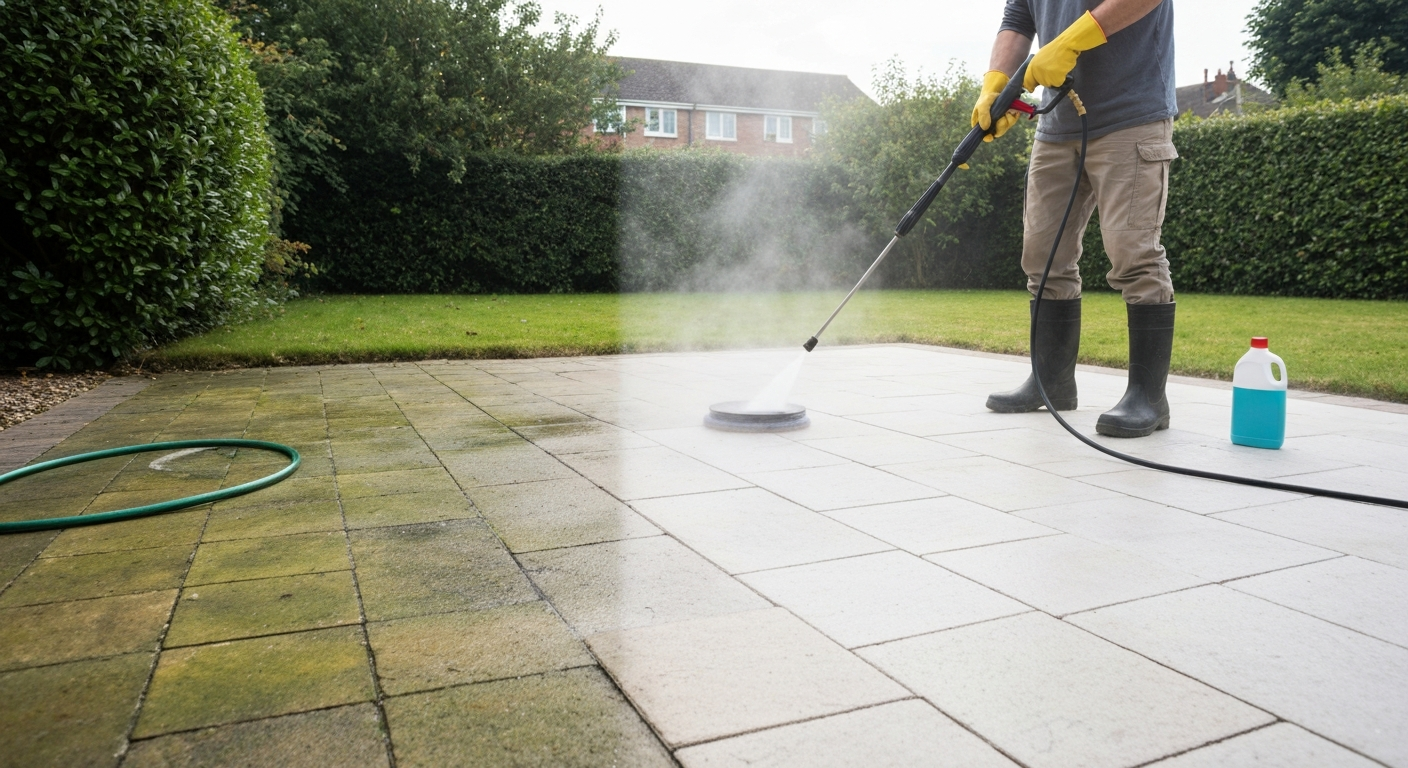
A rotary surface cleaner is the single best accessory for flat patio work. It is a disc-shaped head with two rotating nozzles inside a shroud, and it eliminates the tiger-striping (uneven streak marks) that a handheld wand produces on concrete. Surface cleaners typically require a minimum of 2,000 PSI and 2.0 GPM to spin properly. They also reduce the risk of accidentally blasting joint sand out of paver gaps because the nozzles stay inside the shroud at a consistent angle. If you are cleaning more than about 20 square metres of flat paving, a surface cleaner attachment will save you significant time and give a more even result. Other useful accessories include a turbo nozzle (rotary zero-degree that delivers a pencil jet in a circular pattern, good for spot stains on robust concrete) and a chemical injector if your machine does not have a built-in detergent tank.
Safety and environmental precautions
Pressure washing looks straightforward but the risks are real. A direct hit from a 2,500 PSI nozzle at close range will break skin. Beyond personal safety, chemical runoff into stormwater drains is an environmental and in some areas a legal issue. These are not box-ticking formalities.
- PPE minimum: wear safety glasses or goggles (water and debris ricochet), closed-toe shoes (ideally steel-toecap boots), long trousers, and waterproof gloves. Hearing protection is worth adding if you are using a petrol machine for more than an hour.
- Never point the nozzle at people, animals, or fragile objects. Keep bystanders at least 5 metres back from active cleaning.
- Keep the electrical cable and any extension leads well away from water. Use a residual current device (RCD) on any electric machine.
- Runoff control: if you are using detergent, block the nearest stormwater drain and allow wash water to soak into a lawn or gravel area rather than running directly into the drain. Let detergent dwell and rinse thoroughly before unblocking.
- Plant protection: alkaline cleaners (sodium hypochlorite blends for algae) and acidic cleaners (for rust or efflorescence) both damage vegetation. Cover nearby borders with plastic sheeting during chemical application and rinsing.
- Neighbour awareness: notify neighbours before starting, especially if the patio is near a shared boundary. Overspray and noise both carry. In terraced or semi-detached situations, driveways and front patios especially can be problematic.
- Detergent selection: only use detergents rated for pressure washers or labelled as pump-safe. Bleach and solvent-based cleaners can damage pump seals and void warranties on many consumer machines. If you need bleach for heavy algae or black spot, apply it manually by brush before the wash, not through the machine unless the manual explicitly allows it.
- Check that any detergent you use is safe for the specific patio material. Some acid-based cleaners (used for efflorescence on concrete) will stain or etch limestone, sandstone, and polished stone.
Step-by-step power washing procedure
This universal procedure applies to all patio surfaces. Surface-specific adjustments for PSI, nozzle, and technique come in the sections below. Follow this sequence regardless of material.
- Set up and connect: connect the garden hose to the inlet, attach the high-pressure hose to the gun, and fit the appropriate nozzle before switching on. Turn the water supply on fully before starting the machine. Running a pressure washer dry, even briefly, damages the pump.
- Flush the system: with the machine on and low pressure selected (or the black soap nozzle fitted), squeeze the trigger and let water run through for 10 to 15 seconds to purge air from the line.
- Do a test patch: before cleaning the full patio, select a discreet corner and test your chosen PSI and nozzle at your intended working distance. Leave it for a few minutes and inspect for etching, surface lift, or colour change. This step takes 3 minutes and has saved me from ruining entire patio sections more than once.
- Apply detergent if needed: fit the black low-pressure soap nozzle and apply detergent in overlapping passes. Work from the top of any slope downward. Allow the detergent to dwell for 5 to 10 minutes (check product label), but do not let it dry on the surface.
- Switch to your cleaning nozzle: change to the appropriate nozzle for the surface (see recommendations below). Start at the highest point of the patio or at the end furthest from the drain outlet.
- Wash in overlapping passes: hold the wand at a consistent distance (usually 12 to 18 inches for concrete, 18 to 24 inches for softer or jointed surfaces) and move in smooth, overlapping strokes about 50 percent overlapping the previous pass. Keep the nozzle angled slightly away from joints rather than directly into them. Never hold the beam stationary on one spot.
- Work toward your exit point: always clean toward the edge or drain you are directing runoff to. Do not clean yourself into a corner where you have to walk over the wet cleaned surface.
- Rinse thoroughly: swap to the 40-degree white nozzle and rinse the entire surface completely, directing runoff away from plants and drains (or into a contained area if you used chemical cleaners). Two full passes over the whole area is the minimum.
- Flush the detergent system: if you used the machine's chemical injector, run clean water through it on the final rinse cycle to prevent residue build-up in the injector and pump.
- Post-wash inspection: once the surface is dry enough to walk on, check for areas needing a second pass, any newly visible damage (previously hidden cracks, lifted pointing), and whether joints need re-sanding.
Surface-specific settings at a glance
This table summarises the recommended starting settings for each common patio surface. These are starting points, not fixed rules. Always do a test patch first and adjust based on results.
| Surface | Max PSI (starting point) | Recommended GPM | Best Nozzle | Working Distance | Key Caution |
|---|---|---|---|---|---|
| Concrete (poured or precast) | 2,500–3,000 PSI | 2.0–4.0 GPM | 25° green or surface cleaner | 12–18 inches | Avoid 0°/15° on stamped or coloured concrete |
| Concrete pavers / block paving | 1,200–1,500 PSI | 2.0–2.5 GPM | 25–40° or surface cleaner | 18–24 inches | Sand will be displaced from joints — plan to re-sand |
| Clay brick | 200–500 PSI | 1.5–2.5 GPM | 40° white, fan nozzle | 18–24 inches | Low pressure only; mortar and brick face erode easily |
| Natural stone (sandstone, limestone) | 500–800 PSI | 1.5–2.0 GPM | 40° white at distance | 24–36 inches | Highly variable by stone hardness; test patch is essential |
| Slate | 800–1,200 PSI | 1.5–2.0 GPM | 25–40° at distance | 18–24 inches | Test first; some slate is very friable |
| Porcelain / ceramic tile | 1,000–1,500 PSI | 1.5–2.0 GPM | 40° white, surface cleaner | 18–24 inches | Keep beam off grout lines; wide fan only |
| Granite / hard quarried stone | 1,500–2,000 PSI | 2.0–2.5 GPM | 25–40° | 12–18 inches | Generally robust; still avoid 0°/15° on polished finishes |
Cleaning concrete patios
Concrete is the most forgiving patio material for pressure washing, which is probably why it is where most people start. Standard poured or precast concrete can handle 2,500 to 3,000 PSI with a 25-degree nozzle at about 12 to 18 inches, and a surface cleaner attachment at this pressure range will give you a dramatically more even finish than a wand alone. For serious work (large driveways, heavily soiled patios), contractor guidance recommends around 3,000 PSI at 4.0 GPM as a highly effective starting point, and that is where petrol machines earn their place.
Detergents and stain removal on concrete
For general grime, algae, and moss, a diluted alkaline patio cleaner applied with the soap nozzle and allowed to dwell for 5 to 10 minutes before pressure rinsing works well. For black spot and lichen, you need a product containing sodium hypochlorite or a dedicated lichen killer, applied by brush and left for 20 to 30 minutes before washing. For oil and grease stains, a degreaser pre-soak is important, and if you have access to a hot-water machine, use it here because hot water emulsifies grease far more effectively than cold water at any pressure. For rust stains (often from garden furniture legs or metal fixings), an oxalic acid-based cleaner applied manually before pressure rinsing is the standard approach. Do not use strong acids through the pressure washer pump itself.
Common concrete problems and fixes
- Tiger striping (streak marks): caused by inconsistent nozzle distance or speed. Switch to a surface cleaner, or slow down and overlap passes by at least 50 percent.
- White residue (efflorescence) returning after cleaning: this is mineral salt migration and needs an efflorescence cleaner (dilute acid-based) rather than more pressure. Apply chemically, then rinse. Sealing the surface afterward slows recurrence.
- Pitting or surface etching: usually caused by using a 0° or 15° nozzle too close, or holding the wand stationary. If this happens, the only real fix is resurfacing or accepting it as cosmetic damage.
- Patchy discolouration after cleaning: often means uneven detergent dwell time, or that some areas were more heavily contaminated. A second targeted pass with detergent usually resolves it.
Sealing concrete after washing
Applying a penetrating concrete sealer after washing protects against future staining and slows algae regrowth significantly. Wait at least 48 hours after washing for the surface to fully dry, and longer in cool or damp conditions. Film-forming sealers (acrylic or polyurethane) change the surface appearance and can become slippery when wet, so choose a non-slip formulation or use a penetrating silicate sealer instead, which does not alter the surface finish.
Cleaning brick, pavers, and natural stone patios
Clay brick and hard brick pavers
This is where I see the most damage caused by overconfident DIYers, and it is where the research is most clear. The Brick Industry Association recommends cleaning pressures as low as 200 to 300 PSI for brick face cleaning, using a wide fan nozzle (25 to 50 degrees) and conducting test panels before proceeding. That is a very significant step down from concrete settings, and for good reason: mortar joints erode quickly at higher pressures, and brick faces, especially on older or softer bricks, can spall or lose their surface texture permanently. Use the 40-degree white nozzle, stand 18 to 24 inches back, and keep the beam moving constantly. Apply cleaning chemicals (dilute alkaline cleaners or diluted bleach solution for algae and moss) by brush or low-pressure application rather than through the pressure washer, as per CMHA guidance that recommends application at under 50 PSI for chemical wetting. CMHA TEK 08-04A (Cleaning Concrete Masonry) recommends applying chemical cleaners at low spray pressure (under 50 PSI) or by brush for masonry application, pressure‑rinsing at controlled low pressure, and using test panels; it also warns against using strong acids without specialist oversight. Rinse at controlled low pressure and work in small sections.
Concrete block paving and interlock pavers
Concrete pavers are more pressure-tolerant than clay brick but the big challenge is the joints. Keeping pressure below 1,500 PSI, using a 25 to 40-degree nozzle, and holding the wand 18 to 24 inches from the surface at a shallow angle (not perpendicular to joints) reduces sand loss from the joints. Even with careful technique, you will almost always displace some kiln-dried or polymeric sand from the joints, which is why re-sanding is a standard part of the job, not an optional extra. A surface cleaner is worth using here too, both for speed and because the shrouded nozzles stay at a consistent angle relative to the surface.
Re-sanding joints after pressure washing
Once the patio is fully dry (24 to 48 hours minimum), brush dry kiln-dried sand or polymeric sand into the joints with a stiff broom and compact it in. Polymeric sand is more durable and resists weed growth, but the application process is specific: the joints and surface must be completely dry before application, the sand needs to be compacted into joints with a plate compactor or firm tamping, excess sand swept off the surface fully, and then lightly misted to activate the polymers. Follow the manufacturer's specific instructions on misting and curing time. Most manufacturers require 24 hours with no rain after the final misting. Do not rush this step and do not apply polymeric sand to damp joints.
Natural stone: sandstone, limestone, slate, and granite
Natural stone requires the most conservative approach of any patio material. Sandstone and limestone are soft, porous, and highly susceptible to surface erosion from direct high-pressure jets. Conservation and preservation specifications typically limit water jet pressure to 800 to 1,000 PSI maximum for stone cleaning, using fan nozzles only and maintaining maximum standoff distances. For detailed conservation guidance on safe pressures for cleaning softer natural stone, see Best Practice Recommendations for Cleaning Government Issued Headstones (NPS). For a homeowner, that means the 40-degree white nozzle, standing at least 24 to 36 inches back, and working at the lower end of your machine's pressure range. Test patches are not optional on natural stone; they are mandatory. Apply any cleaning products (dilute pH-neutral stone cleaner for general grime, a dedicated biological cleaner for algae and moss) by hand or low-pressure application and rinse at minimum effective pressure. Never use acid-based cleaners on limestone or calcite-rich stones without specialist advice. Slate is generally more robust than sandstone but varies widely by origin and cut, so test first. Granite is the hardest common natural stone and tolerates higher pressures, though polished granite should still be treated carefully.
Porcelain and ceramic patio tiles
Porcelain tiles themselves are extremely dense and durable, but the grout and adhesive joints between them are not. The TCNA guidance is clear: use low pressure with a wide fan nozzle or a surface cleaning attachment, and keep the beam away from grout lines. Direct high-pressure jetting into grout lines loosens the bond between tile and base over time, which is expensive to fix. Work at 1,000 to 1,500 PSI with the 40-degree white nozzle or a surface cleaner, and direct passes along the tile faces rather than across the joints. pH-neutral cleaners are recommended for porcelain; avoid highly alkaline or acid products unless they are specifically formulated for porcelain tile use.
Dealing with specific stains
| Stain Type | Pre-Treatment | Safe On | Avoid On | Notes |
|---|---|---|---|---|
| Algae / green slime | Alkaline patio cleaner or dilute bleach by brush, 10–20 min dwell | Concrete, pavers, hard stone | Direct bleach application through machine pump | Rinse very thoroughly; bleach damages plants |
| Moss / lichen | Dedicated moss killer or sodium hypochlorite, 20–30 min dwell | Concrete, hard stone, brick | Acid cleaners on limestone | May need second treatment for heavy growth; dead moss still needs rinsing off |
| Oil / grease | Degreaser pre-soak 15–30 min; hot water if available | Concrete, hard pavers | Soft stone (degreaser can stain) | Hot-water machine significantly more effective than cold |
| Rust | Oxalic acid-based cleaner applied by hand, 10–15 min | Concrete, porcelain | Natural stone, brick (can stain) | Apply manually, not through machine; rinse thoroughly |
| Efflorescence (white salt deposits) | Dilute acid cleaner (muriatic or phosphoric acid products) | Concrete, concrete pavers | Limestone, sandstone, any calcium-rich stone | Follow product dilution exactly; test patch first |
| Pet stains / urine | Enzyme-based cleaner, 15–20 min dwell | All surfaces | Nothing specific, but avoid very hot water on stained porous stone | Enzyme cleaners break down organic residue; pressure washing alone rarely eliminates odour |
| Bird droppings | Pre-soak with water to soften, then pH-neutral cleaner | All surfaces | Do not use high pressure dry on bird droppings (aerosolises pathogens) | Wet first, then clean |
| Black spot (tar or petrol marks) | Solvent degreaser (check pump compatibility) | Hard concrete, hard pavers | Soft stone, painted or coloured surfaces | Check machine manual before using solvent-based products through the injector |
How does power washing compare to other cleaning methods?
Power washing is the right tool for a thorough annual or biannual clean on most patios, but it is not the only option and it is not always the best one. Steam cleaning, for example, uses very high temperature at relatively low pressure to kill bacteria, mould spores, and algae without chemicals. For detailed guidance on when and how to steam clean a patio, see our can you steam clean a patio guide. It is a good choice for surfaces where chemical runoff is a concern or where the surface is too delicate for pressure, though steam cleaners are generally slower and the equipment is less widely available. Vacuuming, meanwhile, is useful for removing loose debris, dry grit, and light leaf litter from patios with textured or permeable surfaces, but it does not address biological growth or embedded staining. If you’re asking "can I vacuum my patio", vacuuming is useful for loose debris and grit but won’t remove biological growth or embedded stains, see the guide on when vacuuming helps and what to use instead. For day-to-day maintenance between power washes, a stiff broom and a bucket of diluted patio cleaner applied by hand will extend the time between full washes significantly. A good ongoing maintenance routine is genuinely more effective than more frequent power washing, which does cause gradual surface wear over time.
Aftercare and a simple maintenance plan
The work you do after washing is what determines how long the results last. A patio that has been cleaned and then sealed, re-sanded, and treated with a biocide inhibitor will stay cleaner for two to three years with minimal effort. One that gets washed and left bare will typically show algae and moss regrowth within a season.
- Immediately after washing: allow the surface to dry fully (at least 24 to 48 hours in dry weather) before walking on it heavily, applying sand, or applying sealer.
- Re-sand joints (pavers and block paving): once dry, sweep kiln-dried or polymeric sand into joints and compact. Polymeric sand offers better weed resistance.
- Seal the surface: once fully dry, apply a penetrating or surface sealer appropriate for the material. Wait the full manufacturer-specified dry time, which may be 48 hours to several days depending on temperature. New installations typically need to cure for 60 to 90 days before sealing.
- Apply a post-wash biocide treatment: products containing benzalkonium chloride or similar active ingredients slow algae and moss regrowth by months. Apply after the surface is dry and before sealing.
- Annual maintenance: sweep regularly to prevent leaf and organic debris build-up (decomposing leaves accelerate algae growth). Wash down with a diluted patio cleaner and a stiff brush two or three times a year to prevent heavy biological build-up.
- Spot treat as needed: address black spot, moss patches, or spills promptly with targeted treatments rather than waiting for a full annual clean.
- Re-seal every 2 to 3 years on natural stone and pavers; harder surfaces like concrete may need resealing less frequently.
Power washing a patio well is genuinely satisfying and the results can look dramatic. The technique itself is straightforward once you understand the relationship between PSI, nozzle angle, and surface type. For step-by-step power washing patio tips, see the dedicated section in this guide. The mistakes that cause real damage or disappointing results almost always come down to wrong settings for the surface, skipping the test patch, or rushing through prep and aftercare. For more detailed patio cleaning tips, consult our step-by-step guide covering settings, detergents, and aftercare. Take those steps seriously and the job is hard to get wrong.
FAQ
Quick decision checklist: should I DIY or hire a pro for power washing my patio?
DIY if: patio is small-to-medium, surface is durable (concrete, robust porcelain), stains are light–moderate, you can rent/borrow a suitable machine, and you’re comfortable following safety/testing procedures. Hire a pro if: surface is historic/soft stone (sandstone, limestone), extensive mortar/grout or delicate tile, heavy oil/paint/gum/rust requiring hot-water or specialty chemicals, large area (>500 sq ft), steep/unsafe access, or if you need warranty/insurance-backed work. Pros provide experience with PSI/nozzle selection, surface cleaners, hot‑water units, and permit/mockup requirements for sensitive materials.
Detailed prep checklist before pressure washing a patio
1) Inspect surface: note material, loose/failed joints, cracked tiles, efflorescence, or plants nearby. 2) Test patch: pick an inconspicuous area and try recommended pressure/nozzle at varying distances. 3) Clear area: remove furniture, pots, grill, and sweep debris. 4) Protect: cover nearby plants, wood, painted surfaces and windows with plastic/tarps; turn off power to exterior outlets. 5) Block drainage: identify drains and route runoff; use absorbent pads if needed. 6) Repair: re-secure loose pavers/tiles and trim vegetation that shades the patio. 7) Safety gear: eye protection, gloves, long sleeves, non-slip boots, hearing protection. 8) Choose detergents and dilution and have rinse water path planned (avoid storm drains if possible).
Step-by-step pressure-washing procedure (general)
1) Read machine manual and confirm PSI/GPM and nozzle ratings. 2) Set up machine on level ground; connect hose and detergent system. 3) Apply detergent at low pressure (soap/black tip or dedicated injector) and allow manufacturer's dwell time but don’t let chemicals dry. 4) Start cleaning with widest fan nozzle and keep 12–24 in (30–60 cm) distance; work in overlapping passes keeping wand at a shallow angle. 5) For heavy soil use narrower tips/increase pressure gradually while maintaining safe distance. 6) Rinse thoroughly with wide fan (25°–40°); finish with cross-rinse pattern to avoid streaks or pooling. 7) Inspect joints and surface; allow to dry fully before resealing or re-sanding joints. 8) Flush detergent and winterize/park machine per manual.
Recommended PSI, GPM and nozzle settings by patio material
Concrete: 2,000–3,000 PSI and 2.5–4.0 GPM (contractor units for heavy stains); start with 25° (green) 12–18 in distance; use surface cleaner for large areas. Brick (masonry faces): be conservative — use low pressure: 200–600 PSI; 1.5–3.0 GPM; 25°–40° (green/white) fan; test patch and avoid directing jet into mortar joints. Pavers/concrete interlock: 1,000–1,500 PSI; 1.5–3.5 GPM; 25°–40°; keep wand 18–24 in and shallow angle to avoid blowing out joint sand; expect to re-sand joints. Sandstone/soft natural stone: soft-wash or low-pressure approach — typically ≤500–1,000 PSI; wide fan (25°–40°); 1.5–3.0 GPM; maintain distance and test first. Slate/denser natural stone: 800–1,500 PSI depending on robustness; 25°–40°; test first. Porcelain/glazed tiles: low to moderate pressure (500–1,500 PSI) with wide fan (25°–40°); avoid blasting grout lines; use surface cleaner for even results. Always begin at lower pressure and increase only if safe; never use 0° (red) on patios.
Nozzle color/angle quick guide and safe use tips
0° (red): pinpoint — very high risk; avoid on patios. 15° (yellow): heavy-duty cleaning (tire marks); use with caution and at distance. 25° (green): general cleaning for concrete and pavers. 40° (white): rinsing and delicate surfaces. Soap/low-pressure (black/blue): apply detergents only at low pressure. Always check nozzle PSI rating vs machine PSI, keep wand moving, and maintain recommended stand-off distance to prevent surface etching or joint damage.
Detergent and chemical advice (what to use and what to avoid)
Use manufacturer-approved detergents or masonry/paver cleaners designed for the stain type (alkaline cleaners for grease, oxygen bleach or specialized cleaners for algae/mold). For oil/grease consider a degreaser or rent a hot-water washer (hot water greatly improves results). Use masonry rust removers where appropriate (follow label). Avoid strong acids unless you have explicit product instructions and PPE — acids can damage stone, mortar and plants. Don’t use concentrated bleach or solvents that can harm pumps — follow pressure washer manual on approved chemicals. Rinse runoff thoroughly and neutralize detergents when required.
Next Article
Power Washing Patio Tips: Complete Guide for Homeowners
Power washing patio tips: step-by-step cleaning, equipment choices, stain fixes, safety, and sealing advice.