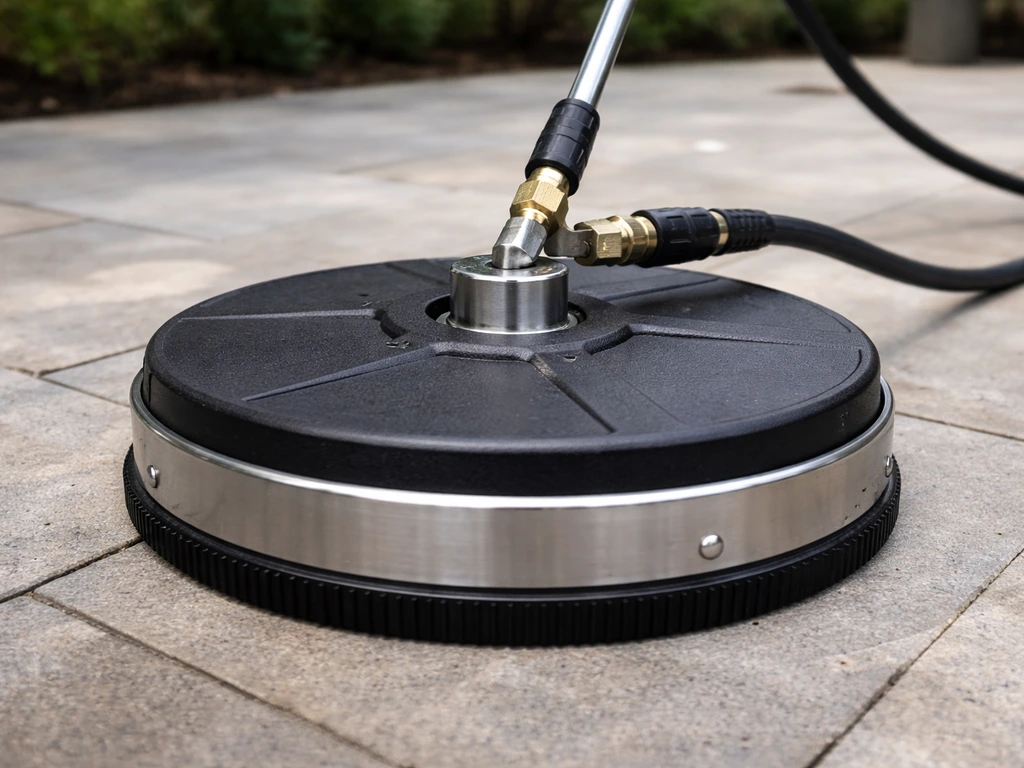
Attach the Ryobi surface cleaner to your pressure washer's 1/4" quick-connect wand, pull back the collar, push the inlet plug in until it clicks, then walk slowly and steadily across your patio while keeping the head flat on the surface. The manual describes the quick-connect nozzle/wand coupling steps: pull back the collar, insert the preferred nozzle until it clicks, and then you are connected. That's the core of it.
How to Use Ryobi Patio Cleaner: Step by Step Guide

Rhea Lang
8 Jul 2026
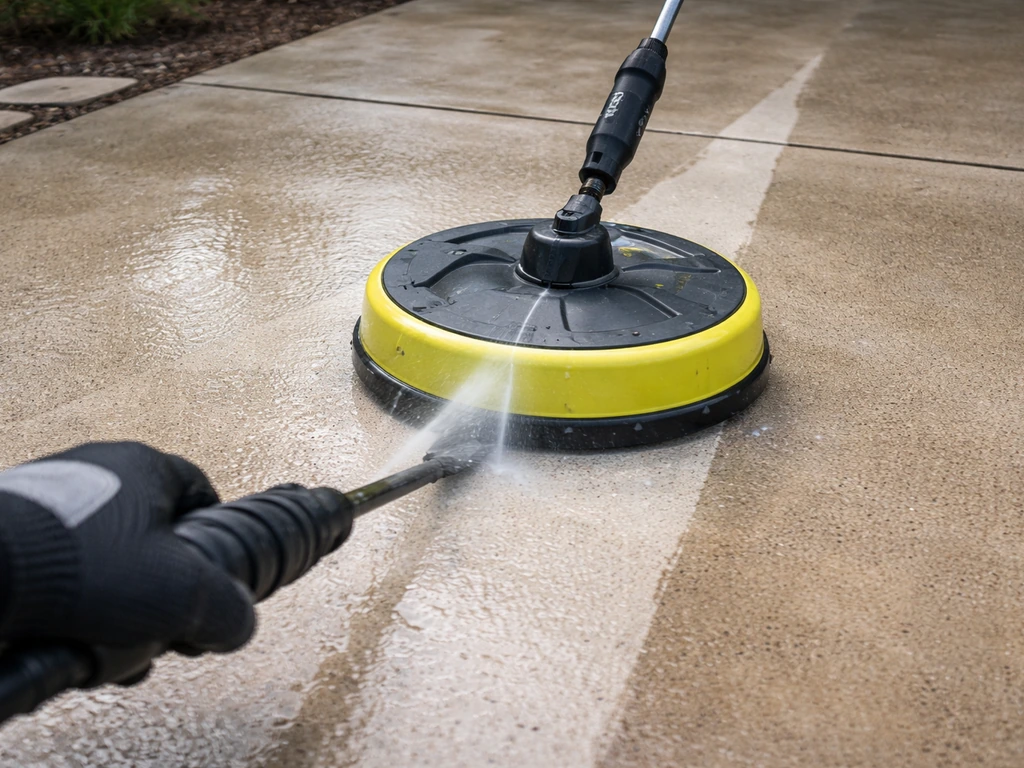
But getting a streak-free, evenly cleaned patio every time comes down to a few details around setup, speed, cleaning solution choice, and surface type, and that's exactly what this guide covers. If you are wondering how to attach a Ryobi patio cleaner to your pressure washer, follow the quick-connect steps outlined in the setup section how to attach Ryobi patio cleaner to pressure washer.
Know which Ryobi patio cleaner you have and what it works with
The most common Ryobi patio cleaner setup is a surface cleaner attachment, not a standalone machine. You're looking at either the RY31SC12 (a 12-inch surface cleaner rated up to 2300 PSI and 5.3 LPM/1.4 GPM) or the RAC772 (a 25 cm/10-12 inch model rated up to 140 BAR, sold mainly through Ryobi's regional pages in Europe and Australia). Both connect to a compatible Ryobi pressure washer via a 1/4" quick-connect fitting and use two preassembled rotating nozzles under the cover to blast a flat surface.
Before you do anything else, check two things: your pressure washer's PSI and flow rate. The RY31SC12 is rated up to 2300 PSI and 1.4 GPM. If your washer exceeds those limits, the attachment may be damaged or give unpredictable results. If your washer is significantly underpowered (say, under 1200 PSI), the spinning bar won't get enough flow to rotate properly, and you'll end up with patchy cleaning and frustrated walking around your patio for nothing. I learned this the hard way trying to run a surface cleaner on a basic 1300 PSI machine, and the bar barely spun.
Also worth knowing: the RY31SC12 is designed for cold water only, with a maximum inlet temperature of 60°C (140°F). Don't connect it to a hot-water system or a machine that heats water above that, or you risk damaging the internal seals. Most domestic electric pressure washers are cold water anyway, so this usually isn't an issue, but it's worth double-checking if you're using a gas-powered unit.
| Model | Size | Max PSI / BAR | Max Flow | Connection | Region |
|---|---|---|---|---|---|
| RY31SC12 | 12 in (30 cm) | 2300 PSI | 5.3 LPM / 1.4 GPM | 1/4" quick-connect | US / North America |
| RAC772 | 25 cm (approx 10 in) | 140 BAR (~2030 PSI) | Not specified | 1/4" quick-connect | UK / Europe / AUS |
Prep your patio and protect plants and surroundings
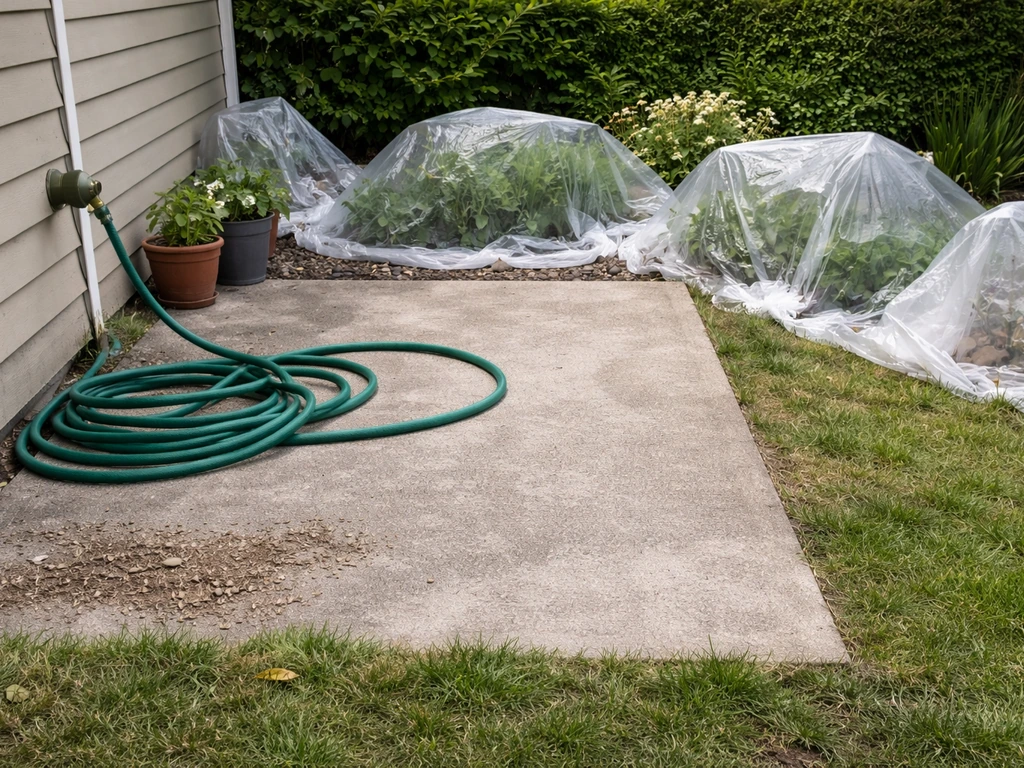
Skipping the prep is the number one reason people end up with patchy results or blocked nozzles. Ryobi's own instructions specifically state that outdoor surfaces should be swept before using the surface cleaner, because loose grit and debris can get pulled into the nozzle jets and clog them. Do a thorough sweep, get the large debris off, and remove any furniture, planters, or garden ornaments from the work area.
Next, think about your plants and grass. The spray from a rotating surface cleaner stays mostly contained under the cover, but water and cleaning chemicals will run off the edges and drain somewhere. If you're using a detergent or algaecide, soak nearby grass and plants with plain water first, this dilutes any runoff that lands on them. After you're done, rinse the surrounding soil and grass again. On hard-bounded patios with a drain, this is less of a worry, but on patios that border garden beds, it matters.
It's also the right moment to identify your surface type, because this affects both pressure settings and chemical choice later. Concrete and brick can handle higher pressure. Sandstone, slate, and softer natural stone need a gentler approach. Porcelain tiles are durable but can have grout that's vulnerable to aggressive cleaning. If you're not sure about a material, do a small test patch in an inconspicuous corner before going all in.
Set up and connect the patio cleaner correctly
The connection process is straightforward, but it has to be done right or you'll get leaks or the attachment won't spin. Here's the exact sequence: In Lowe’s-hosted Ryobi surface cleaner instructions for the 1/4" quick-connect spray wand, you fasten the cleaner by pulling back the quick-connect collar, pushing the inlet plug in until it clicks, and pushing the collar forward to lock it in place here's the exact sequence:.
- Make sure your pressure washer is OFF and the system pressure is fully relieved before touching any connections.
- Take the surface cleaner inlet plug and locate the 1/4" quick-connect coupler on your spray wand.
- Pull back the quick-connect collar on the wand coupler.
- Insert the surface cleaner's inlet plug firmly into the coupler.
- Push the collar forward until it clicks and locks in place.
- Give the connection a firm tug to confirm it's seated, it shouldn't pull free.
- Before starting, check that the surface cleaner is the right way up and the flat cover is facing down toward the surface.
Once connected, lay the surface cleaner flat on the patio surface. Don't start the pressure washer with the attachment lifted in the air, the rotating bar will spin freely and could throw debris or cause the unit to jump. Position it on the ground, then start the washer and squeeze the trigger gun to begin flow. You'll hear the bar start spinning when pressure builds up properly.
One practical note: if you're working with the RAC772 or another Ryobi surface cleaner model outside North America, the connection process is identical (1/4" quick-connect), just confirm your regional pressure washer's wand coupler matches. Most Ryobi pressure washers sold globally use the same 1/4" quick-connect standard, but it's worth a visual check before you start.
How to clean: technique, pass patterns, and working time
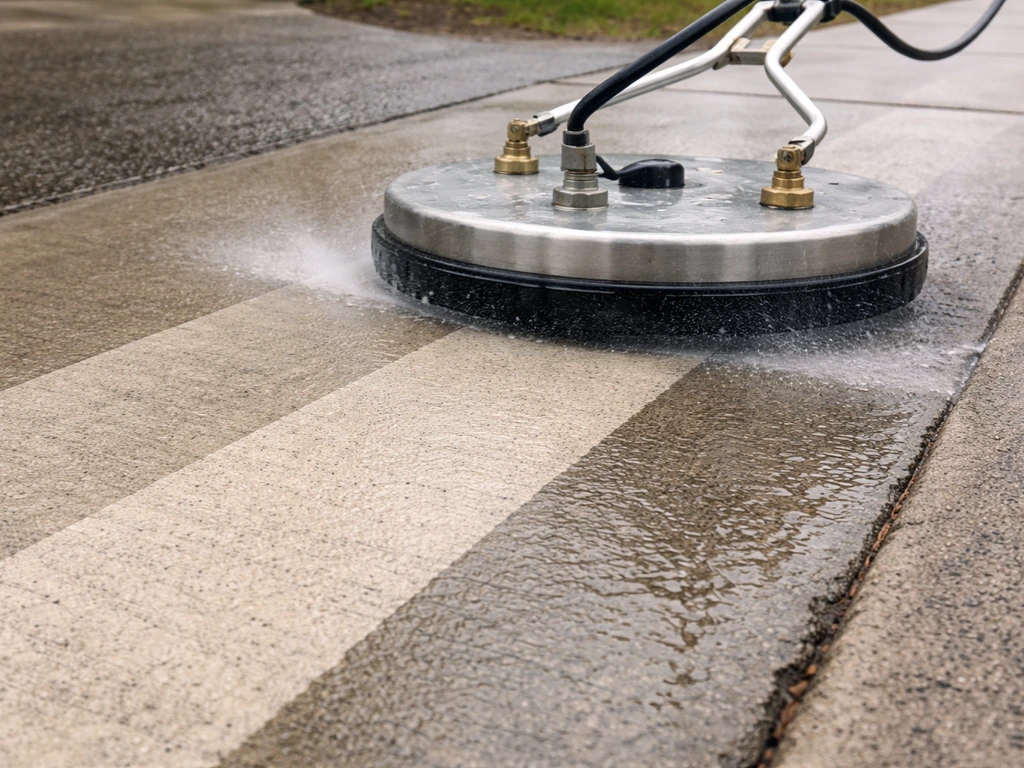
The key instruction from Ryobi's own manual is to walk slowly and keep the head moving. That's it in a sentence, but the detail matters. Walking too fast leaves dirty stripes. Walking too slow in one spot can over-saturate or mark the surface. A steady, deliberate walking pace, roughly similar to a slow stroll, is the target.
Work in overlapping straight passes, like mowing a lawn. Each pass should overlap the previous one by about 2 to 3 inches. This is what prevents the visible 'tramlines' that many people complain about. The overlap compensates for the fact that the outer edge of the cleaning arc has slightly less pressure than the center. If you see faint lines forming, slow down and tighten your overlapping passes.
Keep the surface cleaner flat on the ground throughout. The RY31SC12 instructions specifically warn against lifting the unit off the cleaning surface during operation, for good reason: the spinning nozzles will mark the surface badly if they're even slightly elevated and the water stream becomes concentrated on one spot. Think of it like keeping an iron flat against a shirt, any tilting causes issues.
Don't rush corners and edges. The round cover of the surface cleaner can't reach flush to walls or tight edges. You'll need to go back with a separate fan or rotary nozzle on your wand to clean the last few inches near borders and walls. Factor this into your plan before you start.
On dwell time: the surface cleaner doesn't really 'dwell' the way a chemical treatment does. You're continuously moving. If you've applied a detergent beforehand, let it sit on the surface for 5 to 10 minutes before you start the surface cleaner pass, that's where dwell time counts. During the surface cleaner pass itself, just keep moving consistently.
Best cleaning solutions for common patio stains and problems
For a lightly soiled concrete or paver patio with just general dirt and grime, water alone through the surface cleaner will often do the job. It's worth trying a plain water pass first before reaching for chemicals, especially on natural stone where some cleaners can cause discolouration or strip sealant.
When you do need a cleaner, match it to the problem. Here's a practical breakdown by common patio issue:
| Problem | Recommended approach | Notes for sensitive surfaces |
|---|---|---|
| Green algae / moss / lichen | Patio algaecide or diluted sodium hypochlorite (bleach-based patio cleaner) | Avoid bleach on sandstone and limestone, use pH-neutral algaecide instead |
| Black mould / mildew | Fungicidal patio cleaner or diluted bleach solution | Test on a small area first on natural stone |
| Rust stains | Oxalic acid-based cleaner or dedicated rust remover | Never use on natural stone, can etch; safe on concrete and most porcelain |
| Grease / oil | Alkaline degreaser applied before surface cleaning | Work into surface and let dwell 10 min before using surface cleaner |
| Pet urine / organic stains | Enzyme-based cleaner pre-treatment | Rinse thoroughly after; enzyme cleaners are generally surface-safe |
| General dirt / grime | Water only, or mild all-purpose patio cleaner | Use pH-neutral cleaner on slate, sandstone, and porcelain |
Apply your chosen solution with a garden sprayer or the detergent dispenser on your pressure washer (using a low-pressure soap nozzle, not the surface cleaner) before the surface cleaning pass. Don't try to apply detergent through the surface cleaner itself as it's not designed for that. Let the chemical do the work first, then use the surface cleaner to blast it away.
A word on softer surfaces like sandstone, slate, and aged brick: drop your pressure washer to the lower end of its range before using the surface cleaner. On sandstone especially, even a 2000 PSI surface cleaner pass can pull out the surface if the stone is soft or weathered. Test a small patch first, and if you see any surface pitting or roughening, reduce pressure further or switch to a wider fan nozzle on the wand instead.
Troubleshooting streaks, missed spots, and surface damage
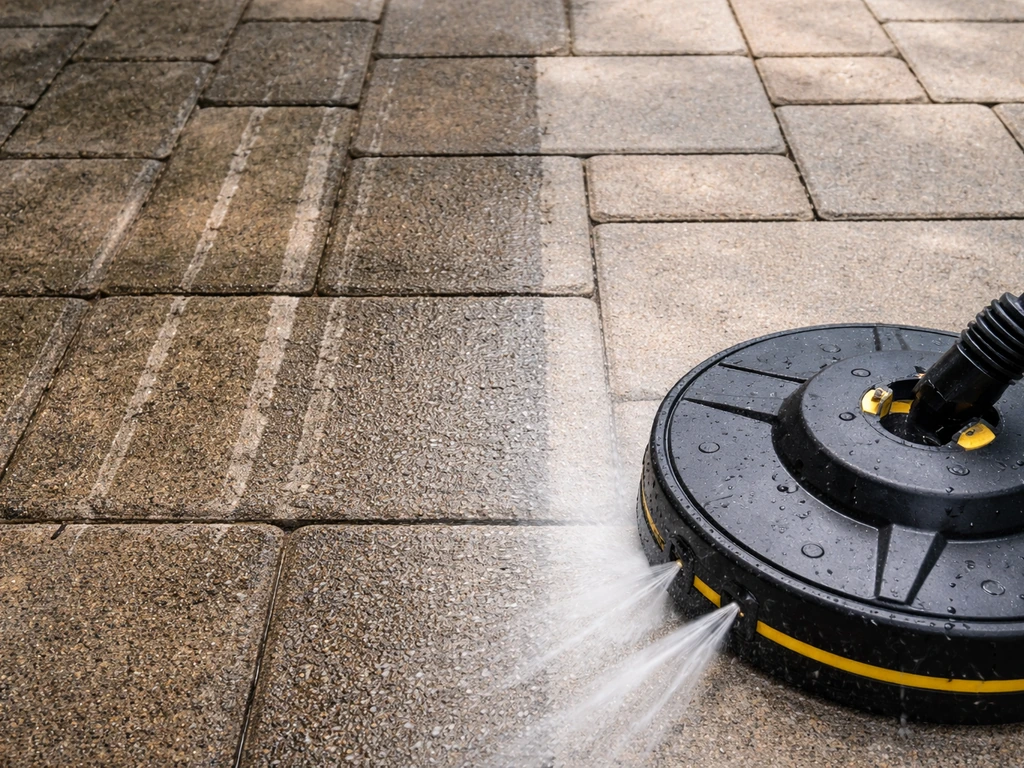
Streaks and lines are the most common complaint, and Ryobi's own manual addresses this directly: if the unit is leaving lines or rotating in a spiral pattern, the first fix is to reduce your walking speed. If slowing down doesn't cure it, the nozzles are likely partially clogged. A blocked nozzle throws off the balance of the spinning bar, which means one side is cleaning harder than the other, creating that striped effect.
Other issues and their fixes:
- Missed patches or uneven cleaning: Check your pass overlap, aim for 2-3 inches. Also check your washer is reaching the minimum recommended flow for the attachment (at least 1.4 GPM for the RY31SC12).
- Surface cleaner not spinning: Usually a flow problem. Check your washer's GPM output, ensure the quick-connect is fully locked, and check for kinks in the hose. If nozzles are completely blocked, it won't spin at all.
- Etching or surface damage: You're either using too high a PSI for the surface type, moving too slowly, or the surface is already degraded. Back off the pressure and increase walking speed.
- Residue left on surface after cleaning: Either the detergent wasn't fully rinsed (do an extra rinse pass with the wand), or the surface cleaner is running too fast and not giving enough cleaning contact. Slow down.
- Water pooling under cover and not draining: Normal on very smooth surfaces like porcelain, just keep moving and the drainage channels will clear. Don't stop and hover.
- Loud rattling or vibration from the unit: You may have hit an obstacle or a raised edge. Stop immediately, relieve pressure, and inspect the nozzle bar and housing for damage before continuing.
One thing I've noticed is that people often blame the surface cleaner when the real issue is the pressure washer's flow rate being too low. If you're comparing options, this nilfisk power patio cleaner review can help you judge performance, ease of use, and results on real patios. The surface cleaner needs consistent flow to keep that rotating bar spinning evenly. If your washer is electric and lower-end (under 1.3 GPM), you may find the cleaning is genuinely patchy regardless of technique. In that case, a slower pace and tighter pass overlaps help compensate.
Rinse, finish steps, and patio cleaner maintenance
Once you've completed your surface cleaner passes, go over the whole patio with a plain water rinse using your wand and a fan nozzle. This washes away any detergent residue, loosened grime, and the fine debris the surface cleaner kicked up at the edges. Don't skip this step, dried detergent residue on concrete or stone will leave a white haze that's annoying to deal with later.
Check for any spots the round surface cleaner head couldn't reach (borders, corners, tight edges near walls) and go over them manually with the wand. Let the patio dry fully before walking on it or replacing furniture, usually a few hours in warm weather, longer in cooler or damp conditions.
If your patio is concrete or porcelain and was badly stained before cleaning, this is a good time to consider applying a patio sealant once the surface is fully dry. Sealing concrete after a thorough clean helps prevent algae and moss from getting a foothold again and makes future cleans much easier.
Cleaning and storing the surface cleaner after use
Maintaining the surface cleaner takes about five minutes and will keep it working properly for years. Here's the post-use routine:
- Turn off the pressure washer and squeeze the trigger gun to relieve all residual pressure in the system.
- Disconnect the surface cleaner from the wand by pulling back the quick-connect collar and removing the inlet plug.
- Flip the unit over and inspect the nozzle bar and the two nozzle jets for debris or grit.
- To clean a blocked nozzle: use the U-hook tool (usually included) to remove the nozzle, then use a fine needle or pin to clear the jet opening. Flush the nozzle by running garden hose water through it in reverse (backflush) to push debris out.
- Reinstall nozzles securely, making sure they're fully seated and locked.
- Rinse the underside of the surface cleaner cover with a garden hose to clear any grit or chemical residue from the housing.
- Check the wheels (if fitted) and any seals or O-rings for wear or cracking. Replace if damaged.
- Store in a dry place, off the ground if possible, away from direct sunlight which degrades plastic and rubber seals over time.
If you're putting the surface cleaner away for winter, run clean water through it before storage and make sure no detergent residue is sitting inside the housing. Dried chemical residue is one of the most common reasons for nozzle blockages when you pull it out again the following spring.
Compared to other surface cleaner attachments on the market, the Ryobi setup is genuinely easy to maintain because the nozzle removal and cleaning process is straightforward and doesn't require special tools beyond the included hook. If you're curious how it stacks up against alternatives like the Nilfisk patio cleaner attachments, which use a slightly different coupling system, that's worth exploring separately before you decide on your next purchase. If you're weighing options, this Ryobi patio cleaner review will help you see where it performs best and where to be cautious.
FAQ
Can I run the Ryobi patio cleaner with a pressure washer that has a higher PSI than the attachment rating?
Do not. If your washer exceeds the attachment’s maximum (for example, above the RY31SC12’s 2300 PSI rating), reduce pressure if your washer allows it and confirm the effective operating pressure at the wand is within limits. If you cannot dial it down, skip the surface cleaner attachment to avoid seal damage and unpredictable cleaning patterns.
My surface cleaner won’t spin, even though the connections seem fine. What should I check first?
Verify you have enough flow rate, not just pressure. If your washer is below the attachment’s flow requirement, the spinning bar may barely rotate, causing patchy results. Also confirm you started with the head flat on the surface before triggering, because operating while lifted can look like it is spinning incorrectly or throwing debris.
Do I use detergent through the surface cleaner, or only before I attach it?
Only apply detergent before the surface cleaner pass, using a low-pressure soap method (garden sprayer or your washer’s detergent dispenser). The surface cleaner is for blasting off grime, not for delivering chemicals. Let the detergent dwell (about 5 to 10 minutes) before you begin the surface cleaning, then rinse after.
What overlap and pass pattern should I use to avoid streaks and tramlines?
Use overlapping straight passes like mowing, overlap about 2 to 3 inches, and keep a steady walking pace. If you still see faint lines, tighten the overlap slightly and slow down. Uneven patterns often come from speed changes during the pass or inconsistent overlap, not the attachment alone.
How do I tell if streaks are caused by clogged nozzles versus my walking speed?
First slow your pace and keep it consistent. If the spiral or striped pattern remains, then inspect and clean the rotating nozzle jets, because partial blockage can unbalance the spinning bar and create one-sided cleaning. After cleaning the nozzles, test on a small area before continuing across the whole patio.
Is it safe to use the Ryobi patio cleaner on natural stone like sandstone or slate?
Be cautious. Natural stones such as sandstone, slate, and weathered or soft brick can pit or roughen at higher pressure. Do a test patch in a hidden corner, then reduce pressure to the lower end of your washer’s range if you see any surface damage. If it still looks aggressive, consider switching to a wider fan nozzle for those areas.
Will using the surface cleaner on hot water damage it?
Yes, risk is real if hot water exceeds the attachment limit. The RY31SC12 is cold-water only, with a maximum inlet temperature around 60°C (140°F). If your washer heats water or you have a hot-water setup, confirm it stays under that threshold before connecting the surface cleaner.
How do I clean corners, edges, and areas the round head cannot reach?
Plan for manual touch-up. The round cover cannot reach flush against walls or tight edges, so after the main passes, switch to a fan or rotary nozzle on the wand and clean the last few inches by hand. This avoids missed bands that look like streaking but are actually unreachable areas.
Do I need to rinse with plain water after using detergent?
Yes. Even if the patio looks clean, detergent residue can leave a white haze on concrete or stone after drying. After the surface cleaner passes, do a full plain water rinse with a wand fan nozzle, then allow the patio to dry completely before walking on it or replacing furniture.
What should I do about runoff so I do not kill nearby grass and plants?
If you use detergent or algaecide, pre-soak nearby plants and grass with plain water first. This helps dilute runoff that reaches the edges. After cleaning, rinse the surrounding soil and grass again. If your patio drains to garden beds, be extra careful because runoff is more noticeable there.
How do I avoid marking the patio when starting or stopping during a pass?
Start with the head already flat on the surface, then begin flow and maintain movement. Avoid lifting the unit, pausing in one spot, or tilting, since the concentrated streams can create visible marks. If you must reposition, stop flow, reposition carefully, then resume with smooth, continuous overlap.
How should I store the Ryobi patio cleaner for winter to prevent clogs?
Run clean water through it before storage and make sure no detergent residue remains inside the housing. Dried chemical residue is a common cause of clogged jets at the next use. Store it in a way that keeps it protected from freezing if you are in a cold climate.
Next Article
Nilfisk Patio Plus Manual Guide: Setup, Use, and Care
Find the right Nilfisk Patio Plus manual, then set up, operate, troubleshoot, and maintain your patio washer safely.