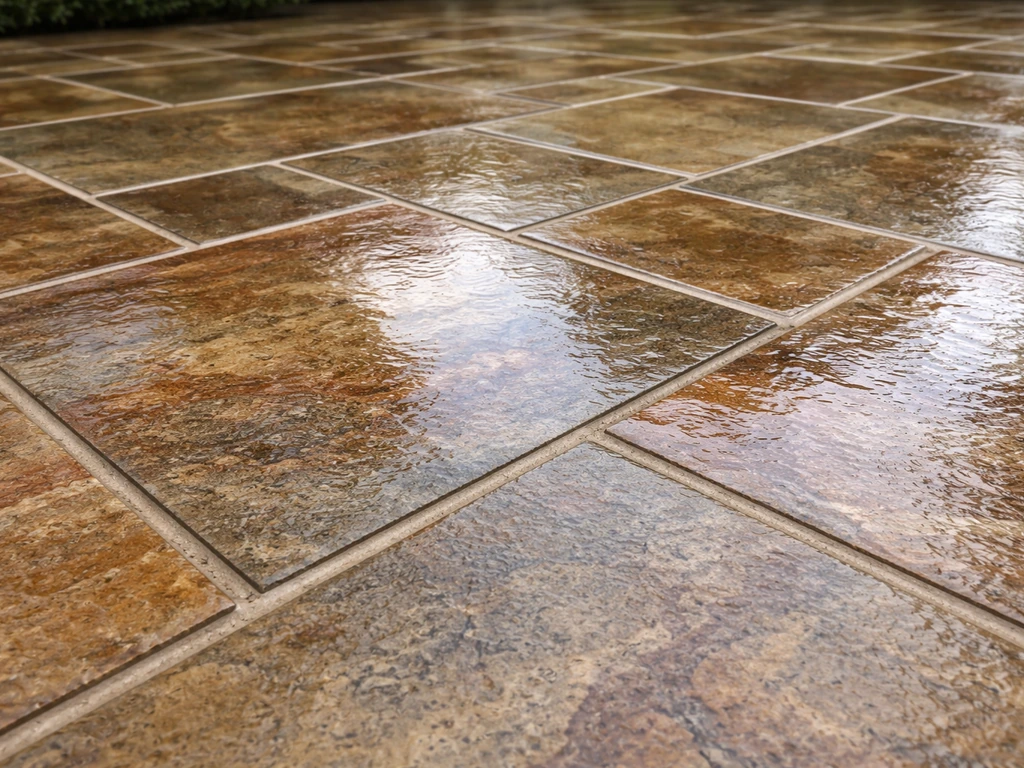
A wet look patio sealer does exactly what the name says: it makes your patio look like it's permanently damp, deepening the color and adding a glossy sheen that really shows off the stone, concrete, or brick underneath. The best ones on the market right now are solvent-based acrylic or polyurethane film-formers, and they work brilliantly on concrete, pavers, and natural stone when the surface is properly prepped. The catch is that 90% of the bad reviews you'll read online come down to one of three things: applying over a dirty or damp surface, putting on too thick a coat, or using a water-based formula on a surface that needed solvent. Get those three things right and you'll get the glossy, deepened finish you're after.
Wet Look Patio Sealer Reviews: How to Choose and Apply
Rhea Lang
30 Jun 2026
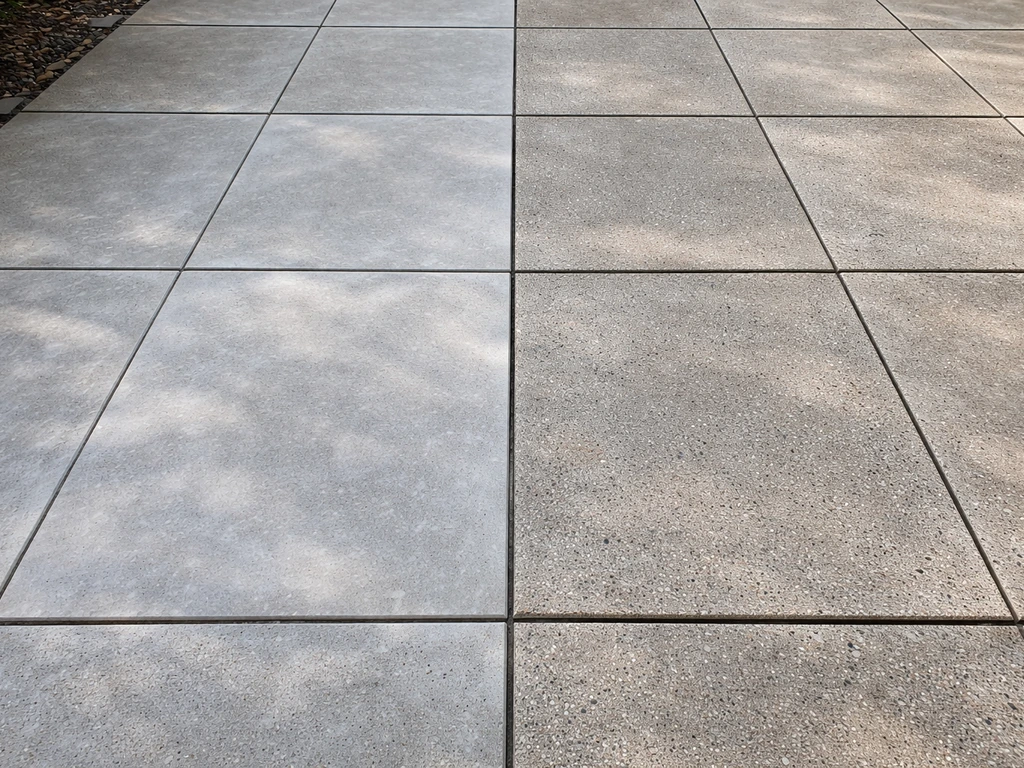
What wet look sealers actually do (and how they look)
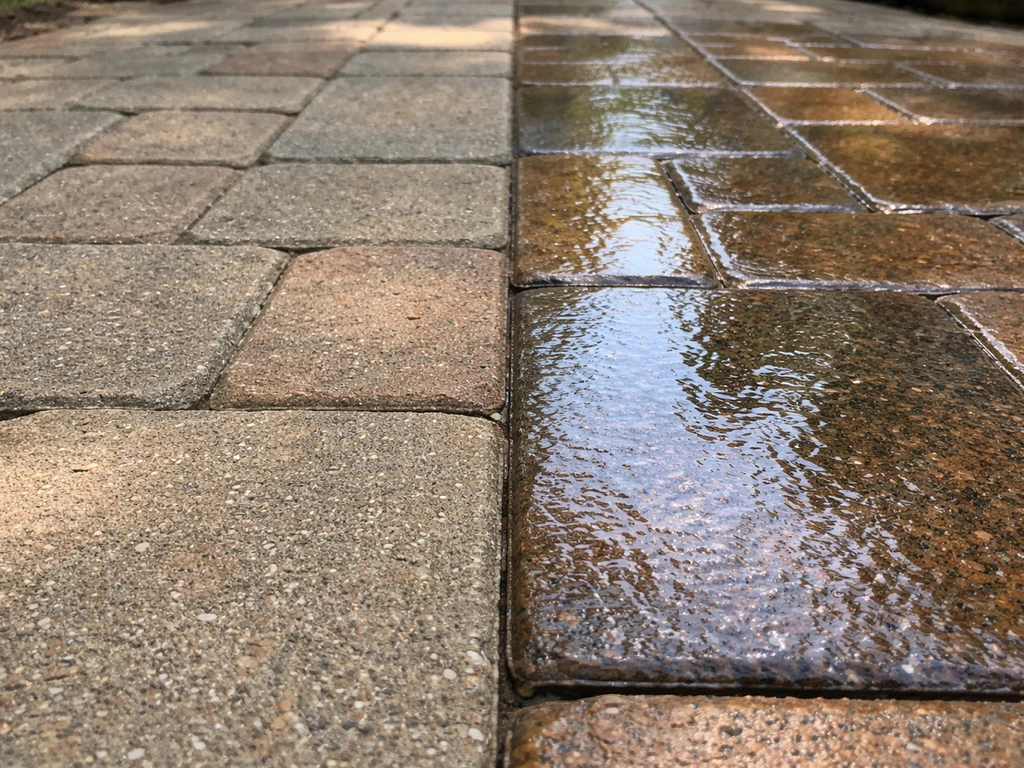
Most sealers sit on a spectrum from flat/matte at one end to high-gloss wet look at the other. A true wet look sealer is a blank" rel="noopener noreferrer">film-forming product, meaning it sits on top of the surface rather than soaking in like a penetrating/breathable sealer. That film is what creates the glossy appearance. Penetrating sealers protect from within but leave the surface looking essentially the same as it did when dry. If you want that darkened, just-rained-on look, you need a film-former.
The gloss level also depends on the formula. Solvent-based acrylics tend to give a deeper, more liquid-looking shine than water-based equivalents. Water-based wet look sealers are more environmentally friendly and easier to clean up, but on dense or dark materials the wet look effect is noticeably more subtle. That's worth knowing when you're reading reviews, because a product rated five stars by someone sealing a light-coloured concrete patio might disappoint you on dark slate.
Matching the sealer to your patio material
This is the most important decision you'll make, and it's the one most homeowners skip. Different surfaces have very different porosity levels, and a sealer that bonds beautifully on concrete can peel, cloud, or refuse to cure on the wrong stone. Here's how to think about it by surface type.
Concrete and concrete pavers
Concrete is the easiest surface to seal with a wet look product. It's porous, it accepts both solvent and water-based acrylics well, and you'll get a strong gloss with most quality products. Solvent-based acrylic is the go-to here. A product like BEHR PREMIUM Concrete, Brick and Tile Wet-Look Sealer covers 200 to 450 sq ft per gallon depending on porosity, and allows recoating after 4 hours. That wide coverage range tells you something important: very porous concrete will drink the first coat, so budget for more product than the label suggests.
Clay brick and block paving
Brick and block paving respond well to wet look sealers, but the texture matters. Heavily textured or rough brick will look great because the sealer settles into the recesses and the wet look effect is very pronounced. Smooth or glazed brick is trickier. The surface is less porous and the sealer can sit on top unevenly, which is a recipe for the streaky finish you'll see complained about in reviews. On brick and block, thin coats and a brush or low-pressure sprayer almost always give better results than a roller.
Natural stone (limestone, sandstone, slate)
Natural stone is where you have to be most careful. Sandstone is very porous and will absorb sealer quickly. Limestone is similar. Slate is denser and often less absorbent, which can lead to the sealer pooling rather than bonding if you apply too much. On all natural stone, check whether the product is compatible with calcium-rich surfaces before buying. Some sealers react with the calcium carbonate in limestone and sandstone, causing a blank" rel="noopener noreferrer">white haze. For slate, a solvent-based product usually gives a deeper, more dramatic wet look. Many UK homeowners specifically search for the best wet look patio sealer for natural stone surfaces, and the honest answer is that solvent-based acrylic still dominates for results, despite the VOC concerns.
Porcelain
Porcelain is the odd one out. It's essentially non-porous, so penetrating sealers do nothing, and film-forming sealers have almost nothing to grip onto. Most standard wet look sealers are not recommended for porcelain. A specialist porcelain sealer or impregnator designed for very low-porosity surfaces is what you need. Read this section carefully in any review for porcelain patios, because reviewers frequently complain that the sealer 'didn't work' on porcelain when the real issue is they used the wrong product type.
How to read wet look sealer reviews without being misled
Most online reviews for wet look patio sealers are useful if you know what to look for, but they're easy to misread if you don't filter by surface type and application conditions. Here are the five things I always look for when working through product reviews.
| What to look for | Why it matters | Red flag in reviews |
|---|---|---|
| Finish/gloss level | High gloss vs satin vs low sheen varies by formula and surface | Reviewer doesn't mention their surface type |
| Slip resistance (ASTM D2047) | Film-forming sealers reduce friction; look for slip resistance data or non-slip additive option | No mention of texture or grip after application |
| UV stability / yellowing | Solvent acrylics can yellow in direct sun over 1-2 years; UV-stabilised formulas resist this | Reviewer only tested indoors or in shade |
| Coverage rate | Honest reviews mention actual coverage achieved, not just label figures | Coverage wildly different from spec suggests wrong surface or poor prep |
| Dry and cure time | Dry to touch in 1-2 hours is common, but full cure (when you can use the patio normally) is 24-72 hours | Reviewer complained of tackiness after only a few hours |
On slip resistance: this is genuinely important and something reviews often gloss over. A glossy film-forming sealer will always make a smooth surface more slippery when wet. ASTM D2047 is the standard test used to measure static coefficient of friction on coated surfaces, though it's primarily designed for dry conditions. If you're sealing a patio that gets rained on (which is all of them), look specifically for products that offer a non-slip additive or have anti-slip granules you can broadcast into the wet sealer. This is non-negotiable around pools, steps, or anywhere elderly people or kids will be walking.
Surface prep: the step that makes or breaks the wet look
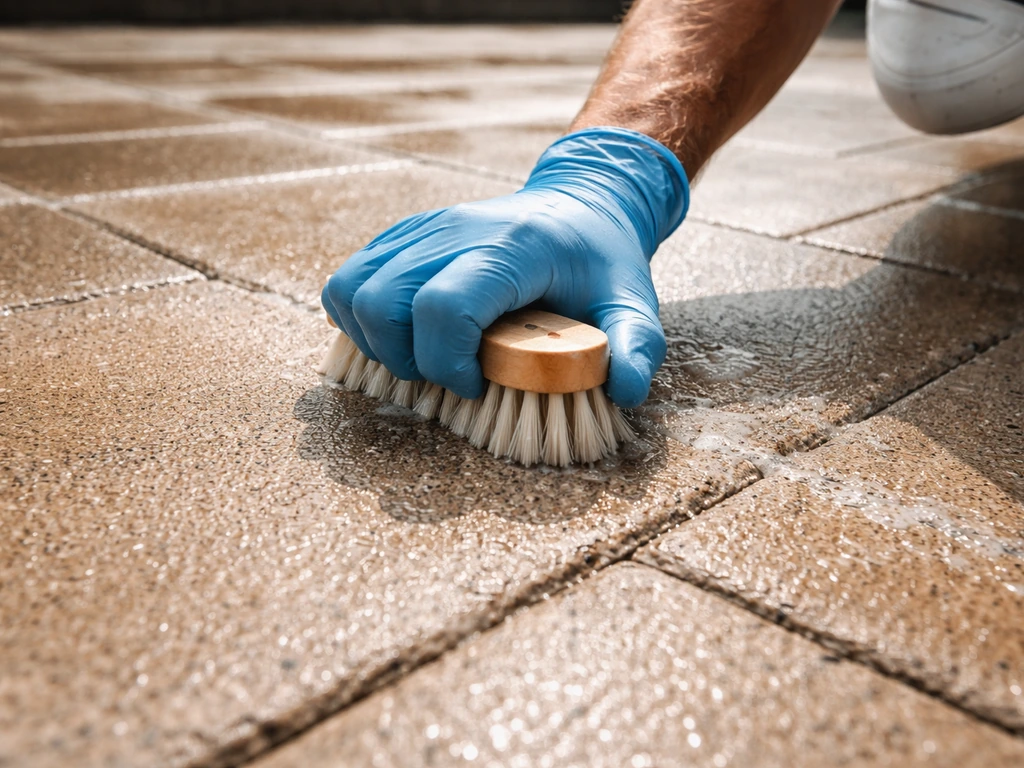
I've said it already but it's worth a dedicated section: poor prep is the single biggest cause of failed sealers. The surface needs to be bone dry, free of organic growth, and free of any existing sealer or contamination. Here's the sequence I follow.
- Clear the patio of furniture and any loose debris.
- Treat mold, algae, and moss with a dedicated patio biocide or diluted bleach solution. Let it dwell for 20-30 minutes, then brush off the dead growth. Do not skip this step and expect the pressure washer to do the job alone.
- Deal with efflorescence (the white chalky deposits you sometimes see on concrete or brick) using a dilute acid cleaner or dedicated efflorescence remover. Rinse thoroughly.
- Remove rust, grease, or oil stains with a targeted cleaner before the pressure wash. Oil contamination will stop a sealer from bonding and cause peeling.
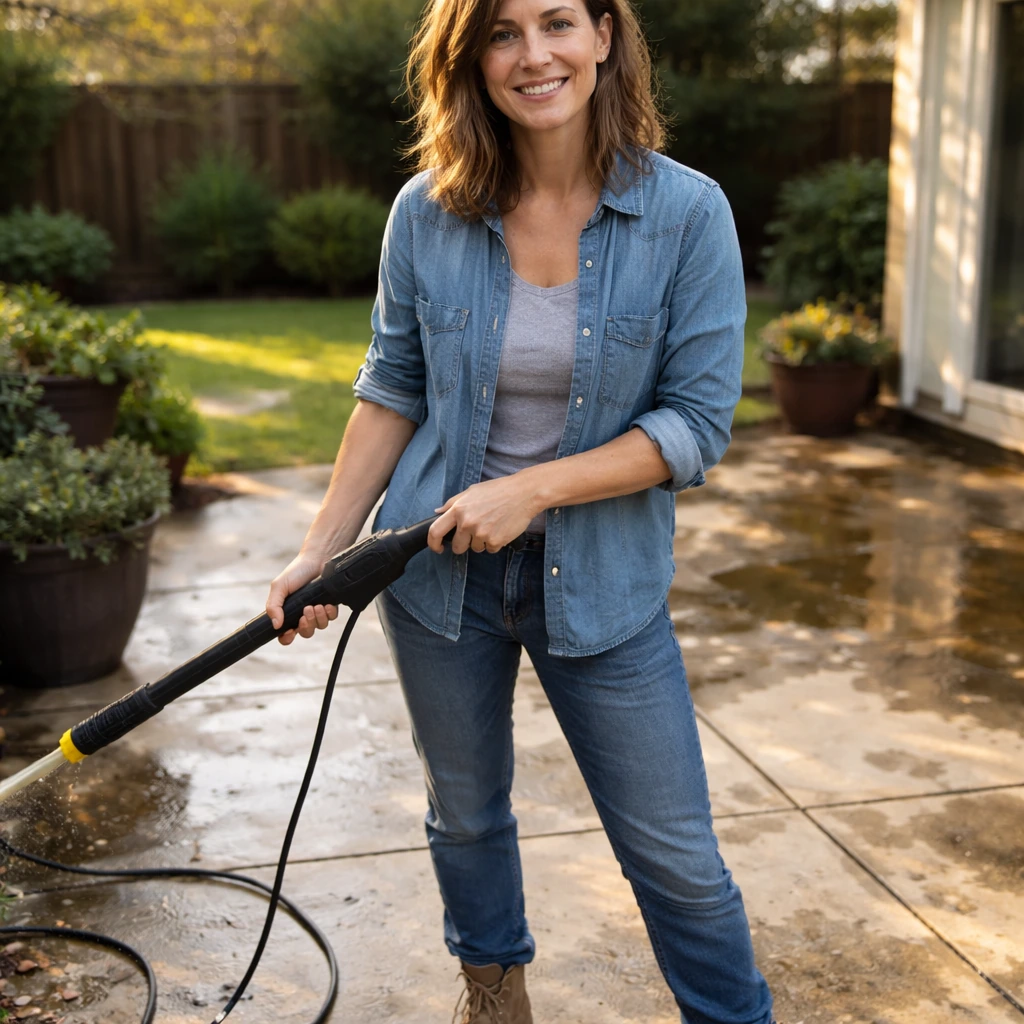
- Pressure wash the entire surface. On concrete, 2000-2500 PSI is usually enough. On softer sandstone or limestone, drop to 1000-1500 PSI to avoid surface damage.
- Allow the patio to dry completely. In summer that might be 24 hours. In cooler or humid conditions, allow 48-72 hours. Applying sealer to damp concrete is one of the most reliable ways to get the white haze that ruins so many DIY jobs. Concrete Network specifically flags this as the most common cause of sealer failures.
- If you have an existing sealer, test a small area with solvent to check compatibility, or strip the old sealer entirely before applying the new product.
If your patio has persistent mold or algae problems, a biocide pre-treatment before sealing is a worthwhile step. If you have rust stains on your patio, remove them first with the best patio rust remover before applying any wet look sealer. The sealer itself will slow down regrowth because it reduces the porosity of the surface, but it won't kill existing spores. Skip the biocide and you'll be resealing within a year because the growth lifts the film from underneath.
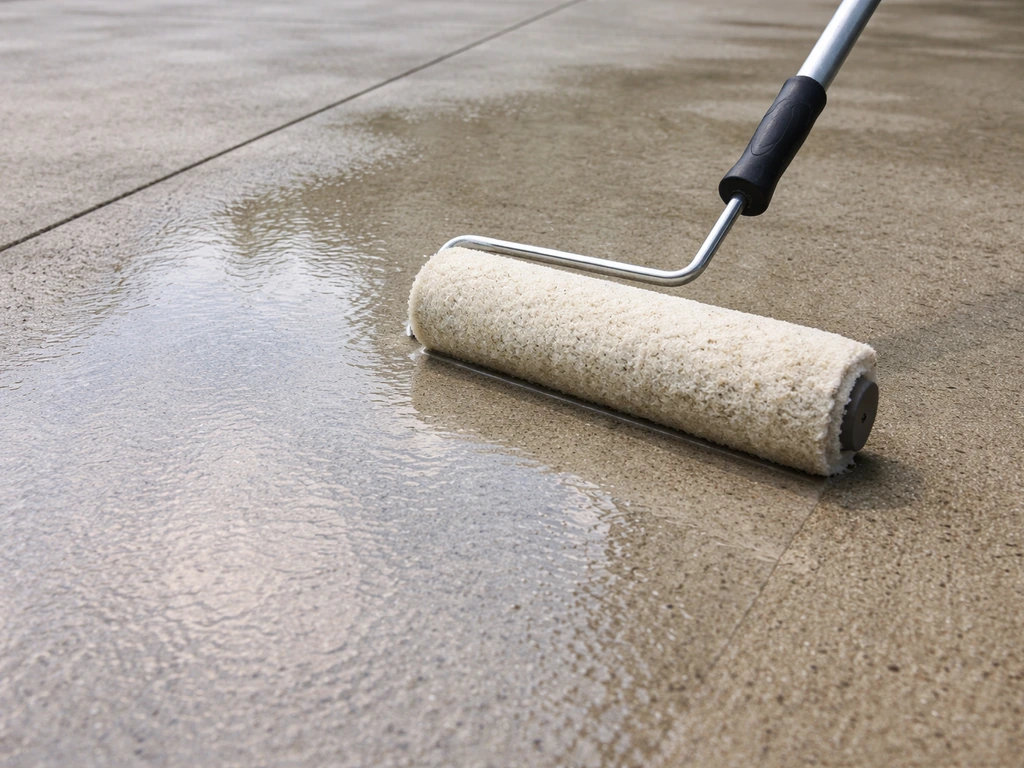
How to apply wet look sealer for an even, glossy finish
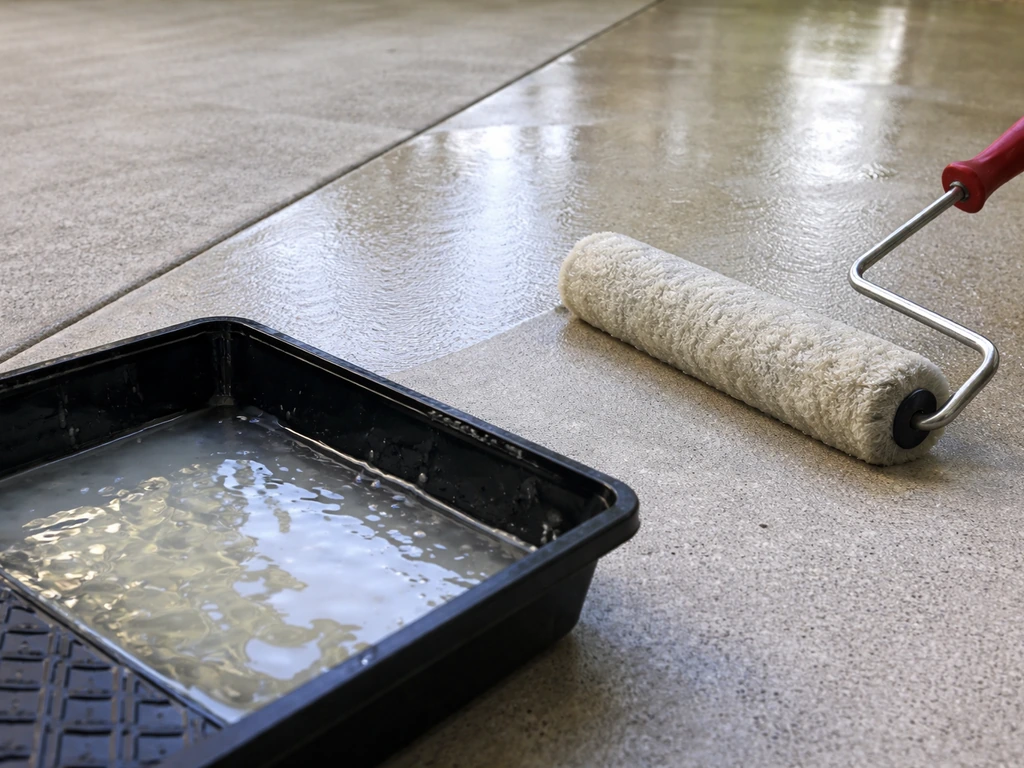
Roller vs sprayer
For large flat surfaces like a plain concrete patio, a low-nap roller (6mm) is my preferred tool. It gives good control over coat thickness and avoids the overspray waste you get with a pump sprayer. A pump-up garden sprayer works well on textured surfaces like exposed aggregate or rough stone, because it gets into the recesses better than a roller. For brick or block paving with deep joints, a combination approach works well: spray first to get coverage into the joints, then back-roll to even out the surface coat.
Coat count and thickness
Two thin coats almost always beat one thick coat. This is the most consistent piece of advice across every professional application guide I've read, and it's consistently the thing DIYers ignore. A thick coat traps solvent or moisture underneath the film as it dries, which causes blistering, cloudiness, or that maddening tacky surface that never seems to fully harden. Apply the first coat, let it dry to touch (usually 1-2 hours in warm dry conditions), then apply the second coat at 90 degrees to the first. The crosshatch pattern helps eliminate streaks.
Temperature and humidity
Apply between 10°C and 25°C (50°F to 77°F). Below 10°C the sealer won't cure properly and you'll get a soft, easily marked film. Above 25°C on a surface in direct sun, the solvent flashes off too quickly, leaving lap marks and an uneven gloss. Avoid applying in direct sun if you can. Early morning on a dry day is usually the sweet spot. If you want the best wet look patio sealer uk options, focus on the type of formula and the surface it is designed for. Humidity above 80% is a problem, particularly with solvent-based products. In the UK, this is genuinely relevant from October through March. I'd recommend delaying any sealing job if rain is forecast within 24 hours, or if the surface temperature is below 10°C.
Common failures and how to fix them
These are the problems that come up again and again in one-star reviews. Most of them are preventable, but some can be fixed after the fact.
- White haze or milky cloudiness: Almost always caused by moisture trapped under the film. Either the surface wasn't fully dry before application, or humidity was too high, or the coat was too thick. Fix: strip the sealer with a solvent-based remover and start again. Prevention: wait for genuinely dry conditions and never apply to green or recently wetted concrete.
- Peeling or flaking: Usually adhesion failure caused by an incompatible existing sealer, surface contamination (oil, mold residue), or applying over a surface that was too smooth. Fix: mechanical abrasion or chemical stripping, then re-apply. Prevention: always test a small patch on any surface you haven't sealed before.
- Streaking: Caused by uneven application, a roller that's too saturated, or applying in direct sun so the leading edge dries before you blend the next pass. Fix: a second thin coat applied perpendicular to the first will often blend out mild streaks. Severe streaking may need stripping.
- Tacky or soft surface that won't harden: Too thick a coat, or applied in cold or humid conditions. Give it more time. If it's still tacky after 72 hours in reasonable conditions, the coat was too thick or the product wasn't suitable for the surface.
- Slippery surface when wet: This is a characteristic of glossy film-forming sealers, not a defect. Add a non-slip aggregate to the second coat or use a sealer that includes anti-slip properties. Do not try to resolve this with cleaning products after the fact.
- White bloom or efflorescence coming through after sealing: The surface had salt deposits that weren't fully removed before sealing. Strip, treat the efflorescence properly, and reseal.
Keeping the wet look: maintenance and reapplication
A well-applied solvent-based acrylic wet look sealer on concrete will typically last 2-3 years before it needs a recoat. On heavily trafficked areas or patios exposed to harsh weather, budget for recoating every 18 months. Water-based formulas tend to need more frequent attention, often every 12-18 months. If you later need to remove or strip an old wet look layer, look for the best patio sealer remover so you don't damage the surface during cleanup.
For day-to-day cleaning, use a mild pH-neutral detergent and a soft brush or mop. Avoid anything strongly acidic or strongly alkaline. Bleach-based cleaners and strong patio cleaners will break down the sealer film over time, dulling the wet look and reducing the protective properties. If you're dealing with mold or algae returning on a sealed surface, use a diluted biocide at the lowest effective concentration rather than a high-strength blast of bleach. Pressure washing a sealed surface is fine, but keep the PSI below 1500 and use a fan tip rather than a zero-degree jet directly on the film. If you also use products like WD-40 on outdoor surfaces, it can stain a patio, so clean up spills quickly and test first does wd40 stain patio. You can extend the life of the sealer significantly just by cleaning it gently rather than aggressively.
When the gloss starts to look patchy or the surface is clearly losing its enhanced colour depth, it's time to recoat. You don't need to strip a compatible sealer each time. Clean the surface thoroughly, degrease it, let it dry, and apply a fresh coat. The new coat bonds well to the existing film if the existing film is still intact and adhering. If you're seeing areas of peeling or lifting, those sections need to be stripped back before you recoat.
Safety, ventilation, and what to budget
VOCs and ventilation
Solvent-based wet look sealers have significant VOC content. In an open outdoor setting this is manageable, but you should still wear an appropriate respirator (not just a dust mask) during application, especially if applying on a still day. Keep children and pets off the area until the surface is fully cured, typically 24-48 hours after application. The fumes can be intense in the first few hours. If any of the sealer gets into a drainage channel or water feature, it can be harmful. Keep a container of solvent on hand to clean tools immediately after use before the product hardens.
Curing hazards
The surface will be dry to the touch in 1-4 hours but it is not cured. Walking on it too soon leaves footprints and scuffs that are very difficult to correct. Light foot traffic is usually safe after 24 hours. Furniture should stay off for 48-72 hours. For a garage apron or driveway, wait 72 hours before light vehicle traffic and a full week before anything heavy.
Realistic cost expectations
Mid-range solvent-based wet look sealers typically cost between £15 and £35 per litre (or roughly $20-$45 per US gallon for equivalent products). At a coverage rate of around 5-8 square metres per litre on porous surfaces, a 50 square metre patio will need 7-10 litres for two coats. Budget around £120-£300 for the sealer product alone on a mid-sized patio. Premium UV-stable or polyurethane-modified formulas cost more but will last noticeably longer. If you're comparing that cost to a professional application, most contractors charge between £3 and £6 per square metre just for labour, so DIY makes strong financial sense as long as you don't rush the prep. Always follow the sika patio seal instructions for surface prep, coat thickness, curing time, and safety so the finish cures evenly.
FAQ
Do I need to remove the old wet look sealer before recoating, or can I apply on top?
Often you can recoat without stripping if the existing layer is still firmly bonded (no lifting, peeling, or sticky areas). The safe decision aid is a fingernail test in several spots and a clean-water wipe test, if it smears or the surface feels tacky, you should strip or thoroughly decontaminate first.
Will a wet look sealer make my patio waterproof or stop all water penetration?
It will reduce water absorption for a while, but it is not the same as a true waterproofing system. Film-forming sealers can trap moisture in the slab if the surface was sealed while damp, so always verify the patio is fully dry before application and do not rely on sealing to fix existing dampness issues.
How can I tell if my sealer is incompatible with my stone, especially limestone or calcium-rich materials?
Look for product labels that mention compatibility with calcium carbonate surfaces and do a small test patch in an inconspicuous area. A quick indicator of incompatibility is hazing or whitening after drying, if you see that, stop and switch products rather than trying to “burn it in” with additional coats.
Why do I get streaks or cloudy patches after applying wet look sealer?
The most common causes are uneven coat thickness, applying too thick in one pass, applying in direct sun, or using the wrong tool on textured surfaces. If you already have streaking, the practical fix is to let it cure fully, then lightly degrease and apply a second thin coat crosswise, avoid sanding unless the manufacturer explicitly recommends it.
Can I apply wet look sealer over a pressure-washed patio?
Yes, but only after the surface has completely dried and any detergent residue is removed. If you seal while the pores still hold moisture or soap residue remains, you can get bubbling, adhesion failure, or premature loss of gloss, so do a thorough rinse and allow extra dry time beyond “dry to touch.”
Is there a trick to preventing peeling, especially on older or previously sealed patios?
Peeling usually means the film could not bond to what is underneath. Always remove all organic growth, strip any remaining old sealer that is failing, degrease, and ensure the surface is bone dry. If the patio has been sealed multiple times, consider solvent testing in a corner to see whether the new layer will “melt into” the old film or lift it.
Which is safer for slips, a higher-gloss wet look or a lower-gloss finish?
Higher gloss generally increases slipperiness when wet because the smooth film reduces friction. The best approach is to choose a wet look product specifically offering anti-slip granules or a non-slip additive, then follow the label curing time, since the slip resistance can be worse before the film fully hardens.
How do I clean tools and avoid damaging the surface during cleanup?
For solvent-based sealers, clean tools immediately after use, once cured it becomes extremely difficult to remove without abrasion. Also, wipe drips from edges and drainage paths before the first set, because runoff can leave darker or potentially harmful residue in those areas.
What’s the right way to schedule a sealing job around rain and dew?
Plan so the patio has time to cure before it gets wet again. A common mistake is sealing just before evening dew forms, even if rain is not forecast, choose early morning, check surface temperature, and avoid sealing if rain is expected within about 24 hours or if humidity is very high.
How long until I can walk, move furniture, or park a car on a newly sealed patio?
Dry-to-touch time is not the same as full cure. As a rule, avoid walking for at least 24 hours to prevent footprints, keep furniture off longer (often 48 to 72 hours), and for driveways or vehicle traffic allow around 72 hours for light use and about a week before heavy loads, unless the specific product label states different times.
Do wet look sealers work on porcelain tile or pavers at all?
Most standard wet look film-formers will not bond reliably to porcelain because it is essentially non-porous. If you seal porcelain with the wrong type, you may see peeling or a “no effect” finish, use a porcelain specialist product designed for very low-porosity surfaces instead.
How do I know when it’s time to recoat my wet look sealer?
Recoat when the enhanced color deepening fades, gloss becomes patchy, or water no longer beads as before. If you see isolated peeling, you should address those lifted sections first before applying a full new coat to avoid trapping failure areas.
Next Article
Best Patio Sealer Remover: How to Remove and Prep Safely
Choose the best patio sealer remover by surface, use it safely step-by-step, and prep for re-sealing without damage.