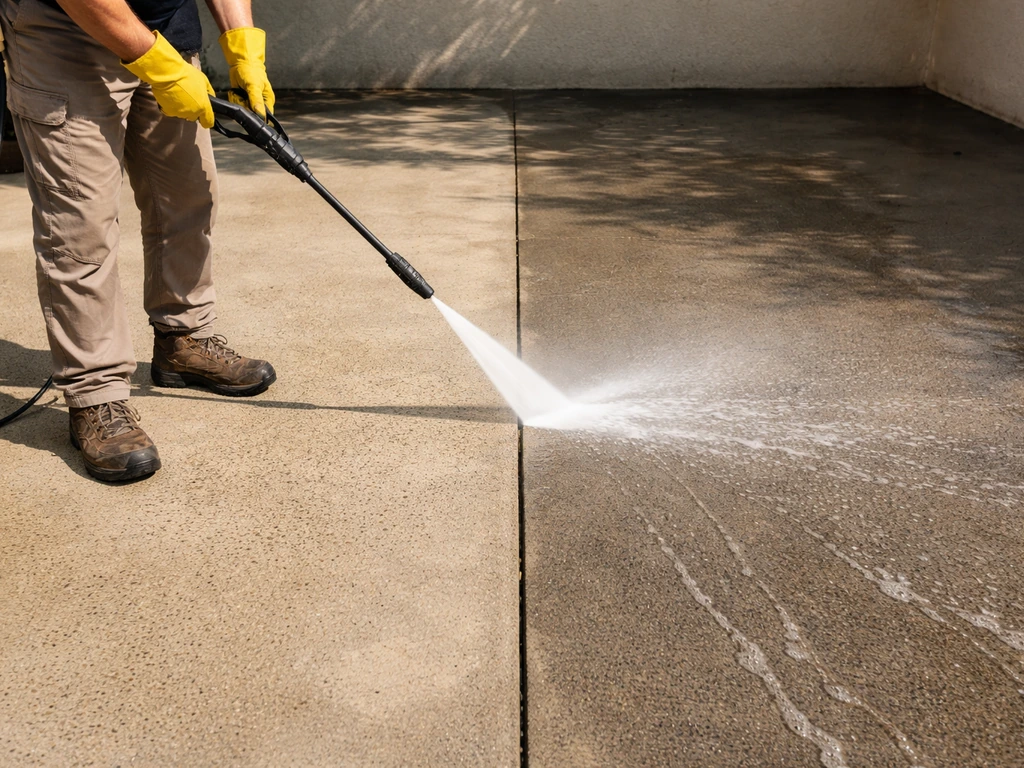
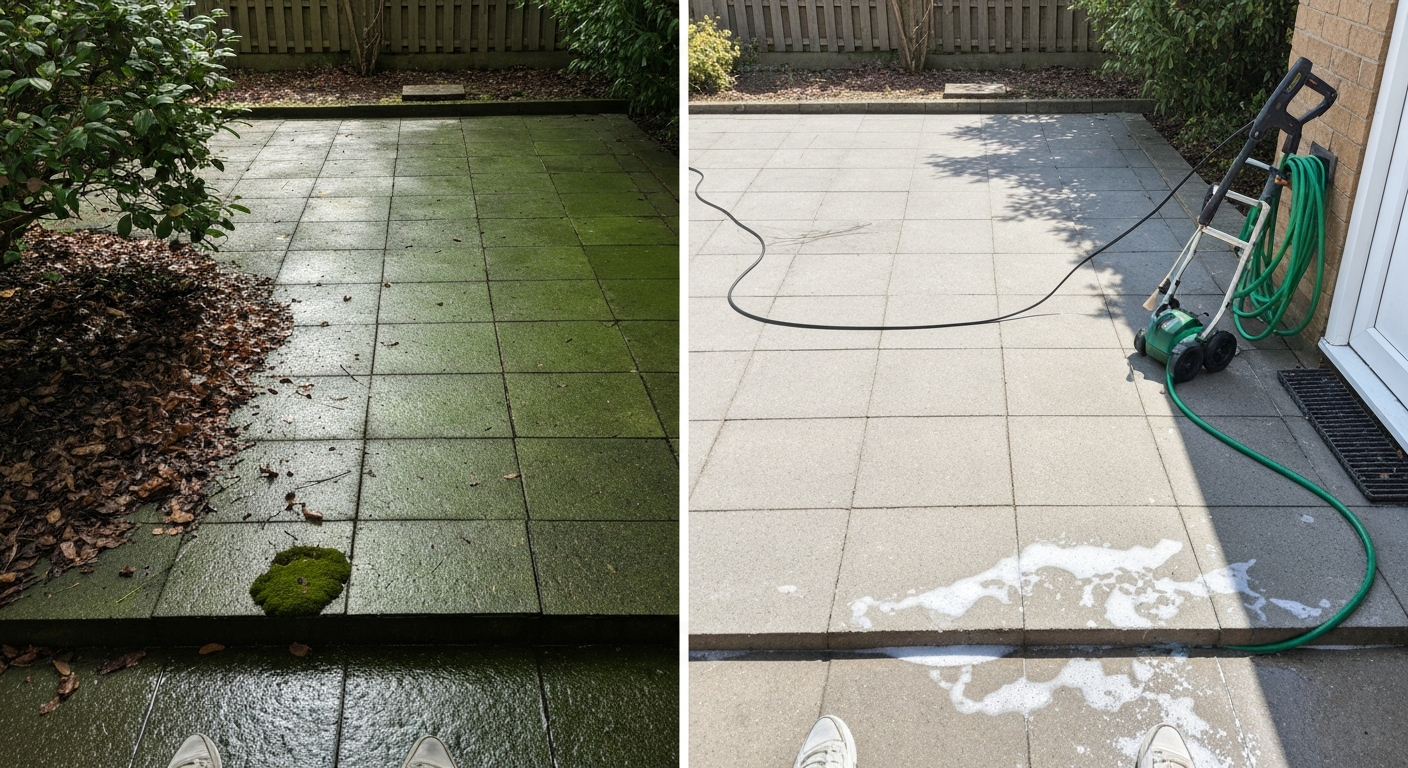
For most patios, once a year is the right baseline for a full pressure wash, typically in spring after winter grime has built up. But that single number does a lot of work. Concrete can often go every 12–18 months without issue, while a shaded sandstone or brick patio in a damp UK climate might need attention twice a year to stay safe and look presentable. The surface material, your local climate, and what the patio is actually used for all push that number up or down. What follows is a practical breakdown of exactly how often to clean, what equipment to use at what settings, and how to do it without wrecking your paving.
How Often to Pressure Wash Patio: Schedules by Surface

Rhea Lang
16 Jul 2026
Quick summary: how often to pressure wash your patio
If you want a fast reference before diving into the detail, here is the general guidance. Most patios benefit from one deep pressure wash per year (spring is ideal), a light rinse or scrub every 1–3 months during the outdoor season, and spot treatments applied as problems appear. For a focused discussion on how often to jet wash a patio, see our dedicated guide on the topic. Sandstone and slate are exceptions because they need a gentler approach than a standard pressure wash at any frequency. New pavers of any type should be left for at least 90 days before the first clean to allow jointing sand and any sealant to cure properly.
| Surface | Deep pressure wash | Light clean / rinse | Notes |
|---|---|---|---|
| Concrete | Once a year | Every 1–2 months | Tough surface; tolerates higher PSI |
| Brick | Once a year | Every 1–3 months | Watch mortar joints; lower PSI at joints |
| Natural stone (general) | Once a year | Every 1–3 months | Test pressure on small area first |
| Sandstone | Avoid; low-pressure or hand-wash only | Monthly brush/rinse in damp climates | High risk of surface erosion with pressure washing |
| Slate | Once a year at low PSI | Every 1–3 months | Can be slippery; treat for algae promptly |
| Porcelain | Once a year | Every 1–3 months | Low maintenance; no sealing usually needed |
Why cleaning frequency matters more than you think
The obvious reason to clean a patio is appearance, but the safety and longevity arguments are actually more compelling. Algae, moss, and biofilm build up fastest in shaded, damp conditions and can make a smooth patio seriously slippery within a single season. A slate or porcelain patio with a thin green film on it is a slip hazard, full stop. If someone goes down on your property, that matters beyond the inconvenience.
From a longevity standpoint, biological growth is not just sitting on top of the surface. Moss roots and algae work into the micro-pores of stone and concrete, and in freeze-thaw conditions those organic materials hold moisture that expands and contracts, gradually weakening the surface. Letting moss take hold in paving joints can undermine the bedding below within a few seasons. I have seen patios that looked fine from a distance but had badly eroded joints because moss had been left unchecked for two or three years. Cleaning on a regular schedule keeps all of that in check and extends the life of both the paving and the jointing material significantly.
The four types of patio cleaning (and which one you actually need)
Not every clean requires dragging out a pressure washer. Understanding what level of clean you actually need saves time, reduces wear on the paving, and cuts water use.
- Routine rinsing: a garden hose or light pressure wash (under 600 PSI) to clear dust, loose debris, pollen, and light soiling. Do this every 4–8 weeks during the outdoor season. Takes 5–15 minutes for an average patio.
- Light cleaning: a low-pressure wash with a patio detergent or diluted cleaner and a brush or broom. Removes light staining, surface algae, and general dullness. Every 1–3 months depending on use and conditions.
- Deep pressure washing: a full wash at the appropriate PSI for your surface type, working methodically across the whole patio, clearing joints, and rinsing thoroughly. Once or twice a year for most surfaces.
- Spot treatments: targeted application of a specialist cleaner (rust remover, moss killer, degreaser) to a specific area as soon as the problem appears, rather than waiting for the scheduled clean. Treat immediately when you notice rust bleed, grease drips, or concentrated algae.
Most homeowners skip straight from doing nothing to a full annual blast when the patio looks bad. A bit of routine rinsing through the season keeps that annual job much faster and easier, and it means stains are less likely to set in.
Signs your patio needs cleaning right now
Rather than going purely by a calendar, let the patio tell you when it needs attention. Any of the following should trigger a clean, regardless of when you last washed it.
- Slipperiness underfoot: a green or dark film making surfaces slick, especially in shaded areas or after rain. This is the most urgent trigger — deal with it immediately.
- Visible staining: rust bleed from metal furniture, grease marks from a barbecue, oil drips, or general darkening and discolouration that a hose-down won't shift.
- Visible plant growth: any moss, lichen, or weed growth in joints or on the surface. The earlier you tackle it, the easier it is to remove and the less joint damage occurs.
- Odours: pet urine, rotting organic matter trapped in joints, or a musty smell from heavy algae — all require a proper clean with appropriate products.
- Joint deterioration: loose, crumbling, or missing pointing or jointing sand. This is often caused by unchecked biological growth or water ingress, and it needs addressing as part of the cleaning process.
- After significant events: heavy storms, flooding, a party with food and drink spillage, or autumn leaf fall left sitting for weeks all warrant a prompt clean rather than waiting for the schedule.
How often to pressure wash by patio surface
Surface material is the single biggest factor in deciding frequency and method. Get this wrong and you can do real, permanent damage. I learned this the hard way testing high-pressure settings on a sandstone sample: the surface visibly roughened after a single pass at 1,500 PSI, which is exactly what conservation bodies warn about.
Concrete patios
Concrete is the most forgiving surface for pressure washing. A deep clean once a year is the standard recommendation, and twice a year is reasonable if the patio is under heavy tree cover or sees a lot of foot traffic. Concrete can handle 1,500–3,000 PSI depending on condition, though 1,500–2,000 PSI with a 25-degree nozzle is perfectly adequate for standard residential concrete and carries less risk of surface etching. New concrete should be left for at least 90 days (ideally longer) before the first pressure wash, and sealed concrete should be cleaned at lower pressure to avoid stripping the sealant prematurely.
Brick patios
Brick is durable but mortar joints are the vulnerability. Clean once a year with a deep wash, and do a light rinse or brush every couple of months during the growing season when algae is active. Keep pressure at 1,200–1,500 PSI maximum and switch to a 40-degree nozzle when working over joints. Avoid directing the jet straight into joints at any angle, and check joint condition before and after each clean. If pointing is soft or crumbling, clean the surface gently and then repoint before any further pressure washing.
Natural stone (general)
Natural stone covers a wide range of materials with very different hardness and porosity. Once a year for a deep clean is the starting point, but always do a test patch first on a hidden area. Keep pressure below 1,200 PSI for most natural stone and use wide-angle nozzles (25–40 degrees). Porous stones absorb staining more quickly and may need twice-yearly treatment if in a shaded or heavily vegetated environment.
Sandstone patios
Sandstone is where I urge the most caution. Both Historic Environment Scotland and Historic England are unambiguous: sandstone is particularly vulnerable to aggressive cleaning. High pressure roughens and erodes the surface permanently, opens up porosity, and can cause progressive damage with repeated cleaning. If you have sandstone, the right approach is low-pressure water (well under 400 PSI, ideally 100–200 PSI with a fan tip at 18 inches minimum distance), soft brushes, a mild pH-neutral cleaner, and biocide treatment for biological growth. Do this once or twice a year. If you are hiring a professional for sandstone, ask explicitly about their approach and pressure settings before letting them start.
Slate patios
Slate is harder than sandstone but still a soft stone in pressure-washing terms. Clean once a year at 800–1,200 PSI maximum using a 40-degree nozzle. Slate tends to stay damp longer than other surfaces and algae colonises it quickly, so bi-monthly rinsing during spring and summer is worth doing to prevent the film from taking hold. A post-clean anti-algae treatment makes a real difference to how long the surface stays clean between washes.
Porcelain patios
Porcelain is the easiest surface to maintain. It is dense, non-porous, and does not stain easily. An annual pressure wash is usually enough, and for most porcelain patios a thorough scrub with a patio detergent and a light rinse handles routine maintenance between annual cleans. Keep pressure at 1,200–1,500 PSI with a 25-degree nozzle and avoid high-pressure on grout lines. Unlike concrete pavers, porcelain generally does not need sealing, which removes one maintenance step entirely.
Adjusting for climate, season, and UK timing
Climate changes everything about how often your patio needs cleaning. In the UK especially, the combination of mild winters, high rainfall, and limited sunshine creates ideal conditions for algae and moss year-round, not just in summer. A patio in the north of England or Scotland in a shaded garden can develop a slippery green film within weeks of a deep clean during autumn. In contrast, a patio in a dry, sunny region can go 18 months without looking noticeably dirty.
- Wet or humid climates (UK, Pacific Northwest US, coastal areas): increase to two deep cleans per year (spring and early autumn) and plan monthly rinsing or brushing through the growing season. Apply an anti-moss or biocide treatment after each clean.
- Cold climates with hard winters: avoid pressure washing when temperatures are at or below 4°C (40°F). Water in surface pores and joints can freeze and cause damage. Do your deep clean in late spring once the risk of frost has passed, and again in early autumn before temperatures drop.
- Hot, dry climates: once a year is usually sufficient. The main challenges are dust, pollen, and UV-related fading rather than biological growth.
- Shaded patios in any climate: increase frequency. Shade keeps surfaces damp and prevents natural UV killing of algae and moss spores. A shaded patio may need twice-yearly deep cleans regardless of climate.
For UK homeowners specifically, the best window for the main annual pressure wash is late March through May. The worst of the winter grime has settled, temperatures are consistently above 5°C, and you have the whole outdoor season ahead of you to enjoy a clean patio. A second lighter clean in September or October before leaf fall season is valuable for maintaining grip and preventing winter moss establishing itself. The topic of best timing within the year is worth its own detailed look for both UK and general audiences, so it is worth exploring the timing question in more depth alongside this frequency guidance. For a focused guide on seasonal timing, see our piece on the best time to jet wash patio. For detailed timing guidance specific to the UK, see our guide on the best time to clean a patio in the UK. For a deeper dive on scheduling, see our guide to the best time of year to power wash patio. For a focused guide to choosing the best time of year to clean a patio, see our detailed timing recommendations.
Cleaning frequency for specific stains and growths
Some problems need a different approach from a general pressure wash, both in terms of timing and method. Here is how to handle the most common ones.
Mold and algae
Both can become established within a single wet season. For algae, a diluted sodium hypochlorite solution (around 1–1.5% at the surface, achieved by downstream injection or pre-diluted application) works well on concrete and brick. Apply, allow a dwell time of 10–15 minutes, then rinse. For heavy algae on porous stone, a longer dwell and soft brush agitation is more effective than high pressure. Treat at the first sign of growth rather than waiting for the annual clean, especially on surfaces that are a slip risk. Post-clean, apply an algaecide or biocide preventative treatment.
Moss and lichen
The GSA's guidance on biological growth on masonry is clear: kill it with an approved biocide first, let it dry and die back, then remove it mechanically with soft bristle brushes and low-pressure rinsing. Do not blast living moss directly with high pressure; this spreads spores across the surface and into joints, compounding the problem. Treat moss as soon as it appears. In a damp UK garden you may need to do this two or three times a year in persistent spots.
Rust stains
Rust from metal furniture, planters, or fixings will not shift with water pressure alone. You need a dedicated rust remover (oxalic acid-based products work well on concrete and stone; check compatibility before applying to natural stone). Apply, dwell, agitate gently, rinse. Treat as soon as you see rust bleed appearing, the longer it sits, the deeper it penetrates. Move metal furniture or use furniture pads to prevent recurrence.
Grease and oil
Barbecue grease and cooking oil stains need a degreaser applied before pressure washing. A concentrated alkaline patio degreaser works on concrete and porcelain. Apply to the dry surface, work in with a stiff brush, then pressure wash. Trying to blast greasy areas with water alone just spreads the film. For natural stone, use a pH-neutral degreaser and check compatibility first. Fresh grease stains should be blotted and treated immediately, do not leave them to soak in.
Pet stains and odours
Urine soaks into porous surfaces quickly and the odour-causing compounds need an enzymatic cleaner to break them down, not just water. Pressure washing a pet-stained area without pre-treating it with an enzyme cleaner will simply push the contamination deeper. Apply the enzymatic cleaner, allow the full recommended dwell time (usually 15–30 minutes), then rinse with low-to-medium pressure. In households with pets, do this monthly on affected areas as part of routine light cleaning.
Pressure washer settings by surface type
Getting pressure, nozzle angle, and distance right is what separates a clean that improves your patio from one that damages it. These are the settings I use and recommend based on testing across different surfaces.
| Surface | PSI range | Nozzle tip | Minimum distance | Flow rate (GPM) |
|---|---|---|---|---|
| Concrete | 1,500–3,000 PSI | 25° (green) | 6–12 inches | 2.0–4.0 |
| Brick | 1,200–1,500 PSI | 25–40° (green/white) | 12 inches; 18+ over joints | 1.5–3.0 |
| Natural stone (hard) | 800–1,200 PSI | 40° (white) | 12–18 inches | 1.5–2.5 |
| Sandstone | 100–400 PSI max | 40–45° fan tip | 18 inches minimum | 1.0–1.5 |
| Slate | 800–1,200 PSI | 40° (white) | 12–18 inches | 1.5–2.5 |
| Porcelain | 1,200–1,500 PSI | 25° (green) | 8–12 inches | 1.5–3.0 |
For residential DIY use, a machine in the 1,500–2,000 PSI range at 2.5–3.5 GPM handles the vast majority of patio cleaning tasks. This Old House testing confirms this range is the practical sweet spot for most home exterior and patio work. Higher PSI machines are available, but for patio surfaces they introduce more risk than they resolve. If you are specifically cleaning only concrete and are comfortable with the technique, up to 3,000 PSI is fine. For anything involving natural stone, stick below 1,200 PSI and err on the side of more water flow rather than more pressure.
The 0-degree (red) nozzle should not be used on patios. It concentrates the entire water force into a pencil-width jet that will scar, etch, or gouge virtually any paving surface, including concrete. The 15-degree (yellow) tip is borderline; it is useful for very stubborn spots on concrete only, held at a distance, with a sweeping motion rather than a static hold. For general patio work, 25 and 40 degrees are your practical options.
Safe technique for edges, joints, and delicate areas
Technique matters as much as settings. A 1,500 PSI machine used badly can cause more damage than a 2,500 PSI machine used correctly. Keep the nozzle moving at all times; never pause the jet on one spot. Work in overlapping passes at a consistent angle of roughly 45 degrees to the surface rather than perpendicular, which reduces the direct impact force and helps lift material rather than drive it in.
At edges and borders, reduce pressure or switch to the wider nozzle tip. Edging stones are often less firmly bedded than the main field of paving, and the turbulence from a corner pass at full pressure can destabilise them. When working near joints, direct the jet along the joint rather than across it, and use the widest nozzle at the greatest practical distance. After pressure washing any paved area with sand-filled joints, check the joint level and top up kiln-dried jointing sand where it has washed out. This is not optional; open joints invite weed germination, water ingress, and ant colonisation.
- Keep the nozzle moving in a consistent sweeping motion. Do not stop mid-pass.
- Work in overlapping 12-inch passes to avoid striping marks on the surface.
- Approach joints at a shallow angle along the joint line, not across or directly into them.
- Hold the nozzle at the manufacturer's recommended minimum distance and increase it if you see any surface marking.
- Start at the furthest point from the drain or runoff point and work toward it to avoid re-contaminating cleaned areas.
- Never use a rotary (turbo) nozzle on natural stone, brick joints, or any delicate or porous surface.
- After cleaning, walk the surface before it dries and look for any joint material that has washed out, then refill.
Detergents vs natural cleaners: what to use when
Plain water pressure washing handles a surprising amount of routine grime, but for biological growth, staining, and odours you need a cleaning agent. The choice between chemical detergents and natural alternatives comes down to the specific problem, the surface, and any concerns about plants or runoff.
Sodium hypochlorite (diluted bleach) is the most effective broad-spectrum solution for algae, mold, and mildew on concrete and brick. At around 1–1. SoftWash Systems explains downstream injectors commonly produce ≈1–1.5% sodium hypochlorite at the surface while roofs/heavy growth often need 3–6% and a dedicated pump, and provides plant‑protection and flush‑out guidance SoftWash Systems notes that downstream injectors on pressure washers typically deliver about 1–1.5% sodium hypochlorite at the surface but that roofs and heavy biological growth often require 3–6% and a dedicated pump system; it also documents pre‑wet/flush‑out and plant‑protection procedures.. 5% at the surface it is highly effective. It is cheap, widely available, and fast-acting. The downsides: it can bleach and damage certain natural stones, kills plants it contacts, and the runoff requires careful management. Always pre-wet surrounding plants and flush them with clean water after any bleach-based wash nearby. Do not use bleach-based cleaners on sandstone, limestone, or polished natural stone without checking manufacturer compatibility.
For natural stone surfaces where bleach is off the table, a pH-neutral cleaner or a proprietary stone cleaner is the right choice. White vinegar is sometimes suggested as a natural alternative, but I would avoid it on natural stone and mortar: the acid attacks calcium carbonate, which is a significant component of many stones and mortar mixes. It also does very little against established moss or algae compared to a proper biocide. For a genuinely natural approach that actually works on biological growth, oxygen-based cleaners (sodium percarbonate) are a better option: they break down into water and oxygen, are less aggressive on stone, and are effective against algae and moss.
| Cleaner type | Best for | Avoid on | Environmental concern |
|---|---|---|---|
| Sodium hypochlorite (bleach solution) | Algae, mold, mildew on concrete and brick | Natural stone, near plants, polished surfaces | High: kills aquatic organisms; contain runoff |
| Alkaline patio detergent | General grime, grease on concrete and porcelain | Unsealed natural stone | Medium: do not discharge to storm drains |
| pH-neutral stone cleaner | Natural stone, sandstone, slate, brick | Not suitable for heavy algae alone | Low to medium |
| Sodium percarbonate (oxygen cleaner) | Algae, moss, organic staining on stone and brick | Coloured concrete (may bleach) | Low: breaks down to water and oxygen |
| Enzymatic cleaner | Pet urine, organic odours on any porous surface | Not for heavy algae | Low |
| Oxalic acid rust remover | Rust stains on concrete and stone | Some sensitive stones; check first | Medium: neutralise before disposal |
| White vinegar | Light limescale on hard, non-porous surfaces only | Natural stone, mortar, jointing, brick | Low, but largely ineffective on biological growth |
Environmental and runoff precautions
This is the area most homeowners overlook, and in the UK it carries real regulatory weight. NetRegs guidance (GPP13) and the devolved environmental regulators in Scotland (SEPA), Wales (NRW), and Northern Ireland (NIEA) are explicit: washwater containing detergents, oils, suspended solids, or biocides must not be discharged to storm drains or watercourses. In practice this means if you are using any cleaning product during a pressure wash, the runoff needs to be directed to a foul sewer (which in most domestic situations means via a gully or drain connected to the sewer, not the surface water drain) or contained and disposed of properly. In the US, the EPA and many local stormwater authorities take the same position on detergent-laden washwater.
For a plain water pressure wash with no detergents, the risk is much lower, but you should still avoid directing muddy or heavily soiled water toward storm drains where possible. If you are using bleach-based cleaners, pre-wet all surrounding plants and flush them thoroughly before and after the clean. Place sandbags or temporary barriers at any drain entry points if you are working with strong chemical cleaners. For most domestic patios this does not require elaborate equipment, but it does require thinking about where the water is going before you start.
Safety gear and basic precautions
Pressure washers cause genuine injuries. The CDC and OSHA have documented pressure washer injuries that range from lacerations to serious injection wounds. None of this is meant to scare you off using one, but it does mean taking the basic precautions seriously. At minimum: safety glasses or goggles (a face shield is better above 2,000 PSI), waterproof footwear with grip, long sleeves and trousers, and chemical-resistant gloves when you are handling detergents. Never point the jet at yourself or others, even at low pressure. If you are using chemicals, add appropriate gloves to the list. Do not use a pressure washer from a ladder; the recoil force and unpredictable jets create a real fall risk.
DIY vs hiring a pro: time and cost estimates
Whether to do it yourself or hire out depends on the patio size, the surface material, and whether you already own a pressure washer. Here are realistic time and cost estimates for both routes.
DIY time estimates
A small patio of 10–20 square metres takes roughly 30–60 minutes for a basic pressure wash on a straightforward surface like concrete or porcelain. For a focused breakdown of typical cleaning durations by patio size and surface, see our guide on how long does it take to pressure wash a patio. A medium patio of 20–50 square metres takes 1–2.5 hours depending on surface type, pre-treatment requirements, and joint work. A large patio or deck over 50 square metres can take 3–5 hours or more, especially if the surface is heavily soiled or requires careful technique (natural stone, complex joint layouts). Add 30–45 minutes for detergent pre-treatment and rinse time if using cleaning agents. The full time picture on different patio sizes is something worth examining in detail separately.
DIY costs
- Entry-level electric pressure washer (1,300–1,600 PSI): £80–£150 / $100–$200. Adequate for smaller patios on less demanding surfaces.
- Mid-range electric pressure washer (1,600–2,000 PSI, 1.5–2.5 GPM): £150–£300 / $150–$300. The practical sweet spot for most homeowners.
- Petrol-powered pressure washer (2,000–3,000+ PSI): £300–£700+ / $300–$600+. Worth it for large areas or very heavy soiling.
- Patio cleaning detergent (5 litre concentrate): £10–£25 / $12–$30. Lasts multiple cleans.
- Biocide / algae treatment: £10–£20 / $12–$25 for a typical patio.
- Jointing sand (25 kg bag): £5–£12 / $10–$20 if needed after cleaning.
Professional cleaning costs
In the UK, professional patio cleaning typically costs £150–£400 for an average domestic patio (20–50 square metres), depending on surface type, level of soiling, and whether jointing sand replacement and sealing are included. In the US, professional pressure washing for a similar area typically runs $150–$400. For natural stone surfaces like sandstone that require specialist technique and lower-pressure methods, professional cleaning is genuinely worth considering: the cost of getting it wrong is a permanently damaged surface. For concrete, DIY is entirely practical and saves money within a clean or two compared to the cost of professional visits.
Sample maintenance schedules
Here are three practical schedules you can adapt to your situation.
Concrete or porcelain patio, temperate climate (UK or similar)
- March–April: Full deep pressure wash. Pre-treat with patio detergent. Wash joints, refill jointing sand where needed. Apply anti-algae treatment.
- May–August: Rinse every 4–6 weeks with a garden hose or light pressure wash. Spot-treat any new staining or algae immediately.
- September: Second light pressure wash to remove summer grime and prepare for autumn/winter. Apply biocide treatment.
- November onwards: Monitor for moss. Hand-brush or low-pressure rinse as needed. Do not full pressure wash if frost risk.
Natural stone (except sandstone), shaded garden, UK
- April: Deep clean at appropriate low-to-medium PSI. Apply biocide. Check and refill joints.
- June and August: Light rinse and brush. Apply diluted algaecide if any green film is developing.
- October: Second full clean before winter. Apply biocide treatment. Check for any joint deterioration and repair.
- Annually or every 2–3 years: Reseal if the stone is porous and was previously sealed.
Sandstone patio, any climate
- Spring and early autumn: Low-pressure rinse (under 400 PSI) with a wide fan tip at 18+ inch distance, soft brush with pH-neutral cleaner, thorough rinse.
- Monthly growing season: Soft brush and garden hose rinse to remove debris and prevent biological growth establishing.
- At first sign of algae or moss: Apply biocide, allow full dwell time, soft brush, low-pressure rinse. Do not attempt to blast off with high pressure.
- Every 2–3 years: Reseal with a breathable impregnator appropriate for sandstone.
Aftercare: sealing, jointing sand, and anti-moss treatment
Cleaning is only half the job. What you do after the pressure wash determines how long the results last and how much work the next clean requires. Allow the surface to dry completely (usually 24–48 hours in warm conditions, longer in cool or damp weather) before applying any sealant or treatment.
For porous surfaces like concrete pavers, natural stone (excluding porcelain), and brick, sealing after a deep clean makes a significant practical difference. A penetrating sealant (impregnator) fills micro-pores without leaving a surface film, making the surface harder for algae and staining to take hold. Belgard and other paver manufacturers recommend resealing approximately every 3–5 years, though this varies by product and traffic levels. Porcelain generally does not need sealing. For sandstone, use only a breathable impregnating sealant specifically rated for sandstone; film-forming sealants can trap moisture and cause damage in freeze-thaw conditions.
Jointing sand is the detail most people forget. After any pressure wash on a paved area, some jointing sand will have been displaced. Check the joints, brush in kiln-dried jointing sand (or a stabilised jointing compound if the original was a stronger mix), and tamp it down. Open joints invite weed seeds, ants, and water ingress under the bedding layer. A bag of jointing sand costs a few pounds and 20 minutes of work; skipping it costs a lot more in problems down the line.
Finally, apply a dedicated algae or moss inhibitor after every deep clean. These are usually silicone or quaternary ammonium-based treatments that make the surface inhospitable to algae and moss re-colonisation. In a UK climate they can extend the interval before significant biological growth returns from a few months to 12 months or more. They do not last forever, so reapply annually or after any deep clean.
FAQ
How often should I pressure-wash my patio overall?
For most homeowners, a routine pressure-wash (or soft-rinse) once per year is a good baseline. High-traffic or shaded, damp sites with algae/moss may need 1–2 cleans per year; low-use, sunny patios can be every 18–36 months. Spot treatments (moss, grease, rust) should be done as needed between full cleans.
How do schedules change by patio surface (concrete, stone, brick, sandstone, slate, porcelain)?
Concrete: annual to 18 months (durable; 1500–3000 psi OK for heavy stains). Brick: annual to 2 years; use lower pressure (1000–1500 psi) and wide fan tips to avoid joint damage. Natural stone (granite/slate): annual or as needed; moderate pressure (1000–2000 psi) with wide tip. Sandstone/soft stone: avoid routine high-pressure washing—use low-pressure rinse/soft-brush/manual cleaning, spot biocide and gentle wash; clean only as needed (often every 2–5 years for deep cleaning). Porcelain: low-maintenance—clean annually or as needed; use low to moderate pressure and follow manufacturer guidance (many don’t require sealing). Pavers (concrete/block): annual spring clean, reseal every 3–5 years depending on product.
What are signs that a patio needs cleaning now (triggers)?
Visible green/black growth (algae, moss, lichen), slippery surfaces after rain, persistent staining (oil, rust), efflorescence/white residue, noticeable dirt build-up, weed growth in joints, unpleasant odors, or loss of original color/finish.
What’s the difference between routine rinsing, light cleaning, deep pressure-washing, and spot treatments?
Routine rinsing: low-pressure water (garden hose or wide 40° tip) to remove loose dirt. Light cleaning: moderate pressure (1000–1500 psi) + detergent for surface grime. Deep pressure-washing: higher pressure (1500–3000 psi as appropriate) and narrower tip for ingrained stains—used sparingly and with caution. Spot treatments: targeted chemical/brush treatment for oil, rust, or biological growth; may use low-pressure rinse after dwell time. For soft stone, favor light cleaning and spot treatments over deep pressure-washing.
Recommended PSI, nozzle tips and flow for each surface (quick reference)
Concrete: 2000–3000 psi, 25°–15° tip for heavy stains; keep distance 12–24 in. Brick: 1000–1500 psi, 25°–40° tip; 18–24 in distance. Granite/Slate: 1000–2000 psi, 25°–40° tip. Sandstone/soft stone: <1000 psi (use garden hose, 40° tip or soft-brush), or soft-wash chemical + low-pressure rinse. Porcelain: 1000–2000 psi, 25°–40° tip; follow maker guidance. Flow (GPM): 1.5–4 GPM common; 2–4 GPM machines give faster cleaning. Always start with the lowest pressure/nozzle and test patch.
Safe techniques to avoid damage
Always test a small inconspicuous patch first. Keep wand moving; don’t linger in one spot. Use wider fan tips and increase distance to reduce impact. For joints/pointed areas, avoid direct jetting into mortar. Use two-person handling for higher-power machines. Wear PPE (eye protection, gloves, closed-toe shoes, hearing protection). For delicate materials (sandstone, terracotta), prefer soft-brush/manual cleaning or specialist advice.
Next Article
Best Time to Jet Wash Patio: Weather, Surface, Timing Tips
Best time to jet wash patio: choose the right day, weather, dwell, rinse, and drying to avoid damage and streaks.