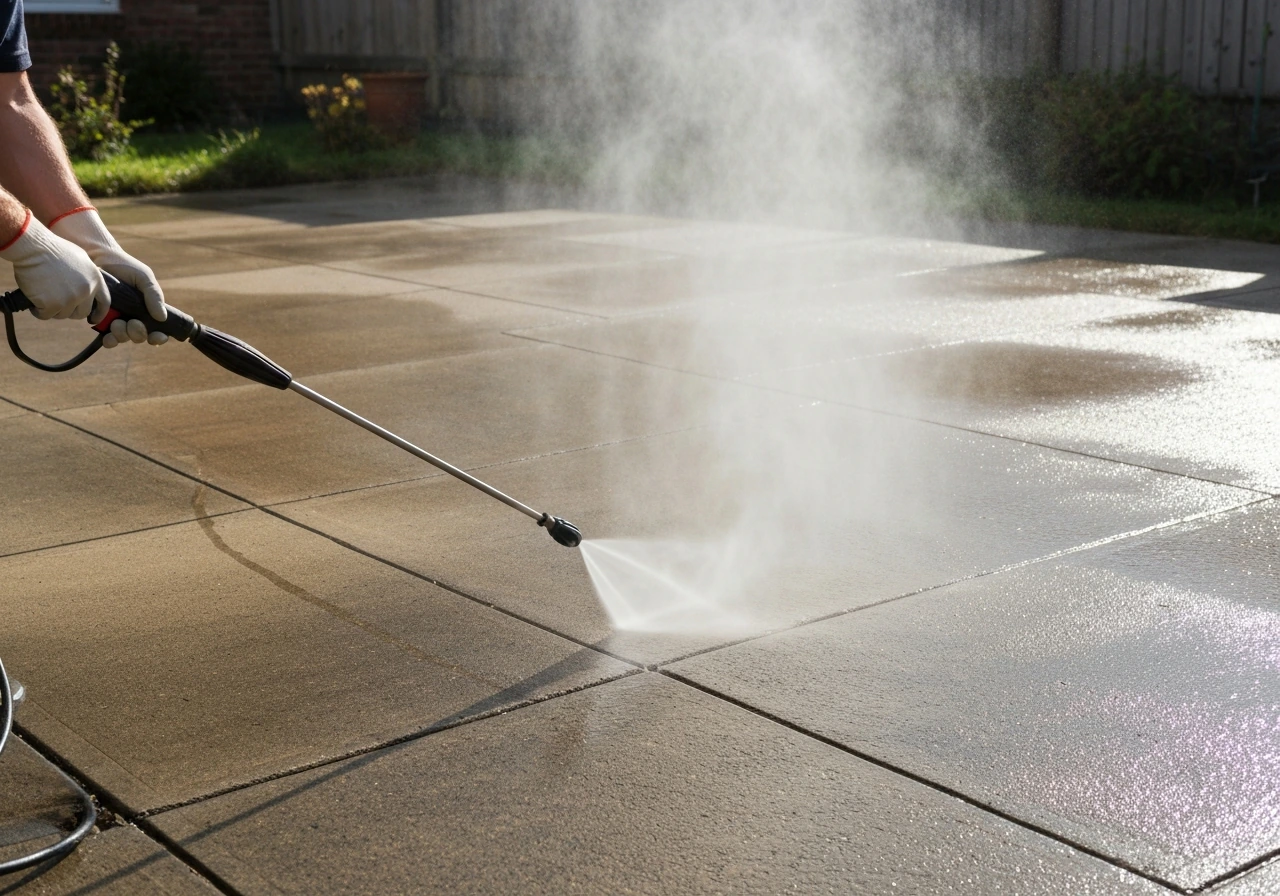
Yes, it is generally fine to power wash patio pavers, but the key word is "generally." Concrete and brick pavers handle pressure washing well when you stay between 1,200 and 1,800 PSI and use a wide fan nozzle held about 12 inches from the surface. For detailed guidance on exactly how much PSI to use for different patio materials, see our guide on how much PSI do I need to clean my patio. Natural stone pavers, especially softer types like limestone or sandstone, need much lower pressure, sometimes as little as 300 PSI, and a slower hand. The main risks are not the water itself but using too much pressure, a narrow nozzle, or getting too close, all of which can pit the surface, erode joint sand, and leave you with gaps between pavers that weeds love. Done right, pressure washing is one of the fastest and most effective ways to clean a patio.
Is it OK to Power Wash Patio Pavers? Safe Steps & PSI Guide
When to use a pressure washer (and when not to)
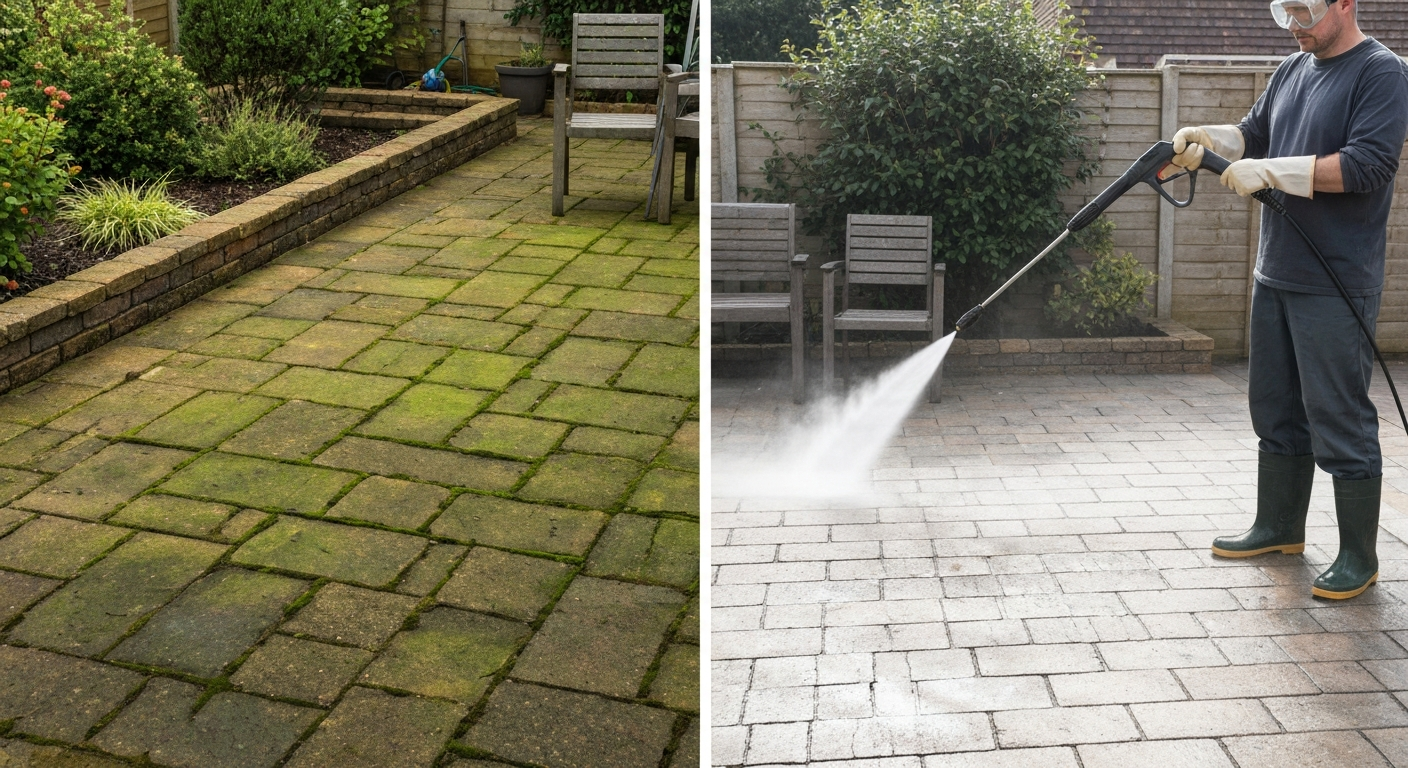
Pressure washing earns its place when you are dealing with embedded grime, algae, moss, or heavy mold that a brush and bucket simply will not shift in a reasonable amount of time. If your pavers have gone visibly green or black from biological growth, or if there is a season's worth of compacted dirt, a pressure washer will do in 30 minutes what hand-scrubbing takes hours to accomplish. That said, it is not always the right first move.
Unilock's own maintenance guidance recommends starting with the mildest effective method: soapy water and a stiff brush. If that clears the problem, you are done and you have not touched your joint sand. A pressure washer only becomes the sensible choice when mild cleaning fails, when you have a large area (anything over about 20 square meters makes hand-washing genuinely impractical), or when you need to prep the surface before resealing.
There are situations where I would actively steer you away from a pressure washer. Freshly laid pavers should not be washed for at least two to three months after installation, because the jointing compound needs time to cure. Pavers with crumbling or missing mortar joints need repair before washing, not after. Polished or honed natural stone, certain porcelain finishes, and very soft sedimentary stones like some limestones and sandstones can be damaged even at moderate pressures. For those surfaces, a soft-wash approach using a chemical cleaner with a garden hose rinse is a much safer first option.
Safer alternatives worth knowing
- Diluted patio cleaner with a stiff nylon brush: effective for light algae and surface dirt on any paver type
- Oxygen bleach solutions (like Simple Green Oxy Solve): applied with a garden sprayer, left to dwell for 3 to 5 minutes, then rinsed with a standard hose
- Soft-wash systems: low-pressure delivery (under 500 PSI) combined with a higher-concentration detergent, ideal for sensitive stone and older pavers with fragile joints
- Steam cleaners: slower but very effective on grease and organic stains without the runoff concerns of detergents
The real risks and benefits, honestly assessed
I have seen both sides of this. Pressure washing done well transforms a patio in an afternoon and can add years to the life of your pavers by removing corrosive biological growth before it etches the surface. Done badly, it blows out joint sand, scarifies the paver face, and forces an expensive repair job. For a focused FAQ on whether pressure washing can damage a patio, see our guide titled does pressure washing damage patio. The benefits are real, but so are the risks, and they are worth spelling out clearly.
| Factor | Benefit | Risk if misused |
|---|---|---|
| Cleaning power | Removes embedded algae, moss, mold, and grime quickly | Erodes soft stone faces or polished finishes |
| Speed | Cleans large areas in a fraction of hand-washing time | Rushing leads to inconsistent results and damage |
| Joint sand | Low-PSI washing leaves sand intact | High PSI or close nozzle distance blows sand from joints |
| Surface prep | Effectively opens pores before sealing | Washing too close damages paver edges and creates ruts |
| Biological growth | Kills and removes moss, algae, and lichen growth | Missed areas encourage faster regrowth if surface stays damp |
| Cost | DIY with a rented or owned machine is economical | Over-aggressive washing requires expensive resanding or resealing |
One thing worth flagging: pressure-wash runoff is classified as a potential pollutant under EPA NPDES stormwater guidance, especially if you are using detergents. Do not let dirty wash water run straight into storm drains. I will cover this more under the safety checklist, but it is a real consideration, not just bureaucratic box-ticking.
Pre-cleaning safety checklist and how to do a patch test
Before you fire up any pressure washer, work through this checklist. It takes about ten minutes and can save you hours of damage repair later. The patch test in particular is something I insist on with any new paver surface or any time I am trying a new cleaner. Techo-Bloc explicitly recommends testing any cleaner on a hidden area first, and from personal experience, I would add that this applies to pressure alone, not just chemicals.
- Clear the area: remove all furniture, pots, cushions, and any items that could be hit by overspray or runoff
- Inspect the joints: check that joint sand or mortar is intact; repair any gaps or crumbling sections before washing
- Check for cracks or loose pavers: pressure washing a cracked paver can extend the crack or dislodge it entirely
- Cover drains and borders: use temporary drain covers or fold a piece of cardboard over adjacent drain openings to catch sediment, and lay a tarp over any lawn or border plants you want to protect from detergent runoff
- Set up runoff containment: if using detergents, position absorbent barriers or direct wash water toward a containment area rather than a storm drain
- Put on your PPE: safety glasses or goggles are non-negotiable (OSHA 29 CFR 1910.133 mandates eye protection for pressure washing tasks), wear waterproof footwear with grip, and use gloves if handling chemical cleaners; hearing protection is worth adding if you are using a petrol-powered machine
- Check weather: avoid washing if rain is forecast within 24 to 48 hours and you plan to seal afterward; the surface needs to be fully dry before any sealer is applied
How to do a patch test
Pick an inconspicuous spot, ideally a paver tucked behind a raised bed or under furniture. Start with your chosen nozzle at the pressure setting you plan to use for the whole area, hold it at 12 inches from the surface, and make two or three slow passes. Step back and examine the result after a minute. Look for any signs of surface pitting, scoring, or a change in texture compared to the untreated area around it. If the surface looks fine, test the same approach on the joint sand nearby. If sand is displaced or the stone face changes appearance, either increase your nozzle distance to 18 to 24 inches or drop the PSI. If you are using a chemical cleaner alongside the water, apply it to the same test patch first and check for discoloration, etching, or unexpected reactions before committing to the full area.
Step-by-step: preparation, washing, and aftercare
Preparation
- Sweep the entire surface with a stiff outdoor brush to remove loose debris, leaves, and grit
- Pre-wet the pavers thoroughly with a garden hose; this prevents the paver from absorbing detergent unevenly and protects border plants from chemical splash
- Apply your chosen patio cleaner or detergent at this stage if required, following the product's dwell time instructions (typically 3 to 5 minutes for enzyme or oxygen-bleach products)
- Set your pressure washer to the appropriate PSI for your paver type (see the surface-specific sections below) and fit the correct nozzle
Washing
- Work in sections of roughly 1 to 2 square meters at a time to maintain consistency
- Hold the lance at approximately 30 degrees to the surface, not perpendicular; this angle cleans effectively while pushing debris away rather than driving it into the paver surface
- Keep the nozzle moving at a steady pace; never hold it still over one spot
- Maintain a consistent nozzle-to-surface distance of about 12 inches (30 cm) for most paver types; increase to 18 to 24 inches for softer materials
- Wash parallel to the joint lines rather than across them to minimize sand displacement
- Rinse each completed section immediately with a lower-pressure wide-fan pass before moving on
Aftercare
- Rinse the entire area thoroughly with clean water to remove all detergent and loosened debris
- Inspect joints: if sand has been displaced, allow the surface to dry fully, then brush kiln-dried jointing sand into gaps and compact lightly
- Allow the pavers to dry completely, at least 24 to 48 hours in dry weather, before applying any sealer; Techniseal specifically warns that sealing a damp substrate causes adhesion failure
- Apply a penetrating or film-forming sealer appropriate to your paver type if desired, following the manufacturer's directions
- Dispose of any collected wash water according to local regulations; do not allow water containing detergents to enter storm drains
Concrete pavers: PSI, nozzle, distance, and technique
Concrete pavers are the most forgiving of all paver types when it comes to pressure washing, which makes them a good starting point if you are new to this. They are dense and manufactured specifically to withstand outdoor use, including cleaning. That said, concrete pavers still have joint sand that needs protecting, and surface abrasion is possible if you push the pressure too high.
| Setting | Recommendation |
|---|---|
| PSI range | 1,200 to 2,000 PSI for general cleaning; stay closer to 1,400 to 1,600 PSI near joints |
| Nozzle | 25-degree or 40-degree fan tip; never use a 0-degree or 15-degree tip on pavers |
| Distance from surface | 12 inches (30 cm) as a starting point; move to 18 inches if you see any surface change |
| Angle of lance | Approximately 30 degrees to the surface, not perpendicular |
| Detergent | Outdoor patio cleaner or oxygen-bleach solution; apply at low pressure before rinsing |
| Speed of pass | Steady walking pace; never pause the wand over one spot |
Efflorescence, the white powdery mineral residue that sometimes appears on concrete pavers, responds reasonably well to pressure washing combined with a dilute acidic cleaner, but use the acid sparingly and always rinse thoroughly. If the efflorescence keeps returning, it is a moisture issue from below, and no amount of pressure washing will fix it permanently. Techo-Bloc's guidance on this is practical: pre-wet the surface, use a low-PSI rinse pass after the cleaner, and always wear PPE when handling acid-based products.
Brick pavers: PSI, nozzle, distance, and technique
Brick pavers need a slightly more careful approach than concrete because the material is more porous and can be softer depending on the firing temperature and age of the bricks. Older, reclaimed, or handmade bricks are considerably more vulnerable than modern kiln-fired paving bricks. If in doubt, start lower and test.
| Setting | Recommendation |
|---|---|
| PSI range | 1,000 to 1,500 PSI for modern kiln-fired brick; 300 to 600 PSI for older or reclaimed brick |
| Nozzle | 40-degree fan tip for standard brick; never use a rotary or turbo nozzle |
| Distance from surface | 12 to 18 inches (30 to 45 cm); increase to 24 inches for older brick |
| Angle of lance | 30 degrees; keep lance moving parallel to the joint lines |
| Detergent | Mild brick cleaner or oxygen bleach; avoid strong acids unless dealing with specific mineral staining and always test first |
| Special caution | Check mortar joints before washing; pressure will dislodge any that are already loose |
Historic or listed-building brick is a different category entirely. The National Park Service's preservation guidance recommends keeping rinse pressure below 300 PSI for sensitive masonry, and GSA technical procedures suggest that some stone and brick types should not exceed 100 PSI during cleaning. I am not saying your garden patio bricks are historic monuments, but if you are dealing with genuinely old brick that crumbles at the edges or has a soft, handmade feel, treat it with the same care. A garden hose and a good brick cleaner will serve you far better than a pressure washer in those cases.
Natural stone pavers: granite, limestone, and mixed stone
Natural stone is where I see the most DIY mistakes. People assume that because stone looks tough, it can handle high pressure. In reality, the hardness varies enormously between stone types, and some of the most popular patio stones (limestone, certain sandstones) are genuinely soft and will show surface damage at pressures that would barely disturb a concrete paver. For guidance specific to slate, including recommended PSI, nozzle choice, and whether pressure washing is advisable at all, see can you pressure wash slate patio. Granite sits at the other end of the scale and is quite robust, but it is still worth using a measured approach.
| Stone type | Recommended PSI | Nozzle | Distance | Special notes |
|---|---|---|---|---|
| Granite | 1,000 to 1,500 PSI | 25-degree or 40-degree fan | 12 to 18 inches | Hard and durable; main risk is joint sand loss, not surface damage |
| Limestone | 300 to 600 PSI | 40-degree fan only | 18 to 24 inches | Soft and porous; high pressure etches the surface; consider soft-wash as first option |
| Mixed/Indian stone (sandstone blends) | 500 to 800 PSI | 40-degree fan | 18 to 24 inches | Highly variable hardness; always patch test; avoid acidic cleaners |
| Slate | 600 to 900 PSI | 40-degree fan | 15 to 18 inches | Can delaminate under high pressure; test on an inconspicuous area first |
| Porcelain | Up to 1,600 PSI | 25-degree or 40-degree fan | 12 to 15 inches | Dense and non-porous; Belgard recommends staying at or below 1,600 PSI to protect jointing material |
Limestone deserves a special mention because it is one of the most popular natural patio surfaces and also one of the most commonly damaged by overzealous pressure washing. The calcium carbonate in limestone reacts with acidic cleaners, so avoid anything with a low pH. More importantly, even plain water at 1,500 PSI can visibly etch a soft limestone surface, leaving a rough, whitened texture that does not go away. If you have limestone pavers, I would honestly recommend skipping the pressure washer for routine cleaning and using a pH-neutral stone cleaner with a brush instead. Pressure washing should be reserved for a deep clean no more than once a year, at low PSI, with a wide nozzle held well back from the surface.
For porcelain pavers specifically, the material itself is extremely hard and non-porous, so the paver face handles pressure well. The vulnerability is the jointing compound. Belgard's technical guidance caps the recommended pressure at 1,600 PSI for this exact reason: above that point you start degrading the joint material and displacing the sand. Porcelain patio cleaning is covered in more depth in a dedicated guide on this site if your patio is all-porcelain. For a focused how-to and specific PSI/nozzle guidance, see our dedicated guide Can you pressure wash a porcelain patio Can you pressure wash a porcelain patio?.
Tackling common problems: mold, algae, moss, rust, grease, and pet stains
Mold, algae, and moss
These are the most common reason homeowners reach for a pressure washer, and it is a legitimate use. Biological growth embeds into the paver surface and will return quickly if you only blast it off without treating the spores. The most effective approach is to apply an algaecide or biocidal patio cleaner before pressure washing, allow it to dwell for the recommended time, then rinse with the pressure washer. This kills the organisms at the root rather than just displacing them. For cleaning fabric items, see our guide on how to clean patio cushions with a pressure washer for safe pressure settings, detergent choices, and drying tips. Pressure washing alone without a pre-treatment will clean the surface visually, but regrowth often appears faster than before because disturbed spores have been spread across a wider area.
Rust stains
Pressure washing alone will not remove rust stains. You need an oxalic acid-based rust remover applied to the dry or slightly damp surface, left to react, then rinsed off. Always test on a hidden paver first because oxalic acid can lighten some stones and react badly with certain concrete finishes. Once the stain is lifted, a low-pressure rinse pass cleans up the residue without spreading it further.
Grease and oil
Hot water pressure washers are significantly more effective on grease than cold water machines. If you only have access to a cold-water machine, apply a degreasing detergent and allow a longer dwell time (up to 10 minutes) before washing. A rotary surface cleaner attachment is useful here because it concentrates the cleaning action without increasing the PSI risk of a hand lance. For stubborn oil spots, you may need two or three applications.
Pet stains and organic odors
Pressure washing moves the visual stain but does not break down the uric acid compounds responsible for persistent pet odors. Use an enzyme-based cleaner first, let it dwell for at least 5 to 10 minutes, then rinse with the pressure washer. Enzyme cleaners work by biologically breaking down organic compounds rather than just dissolving them, which is why they outperform standard detergents on pet stains. Keep the PSI at the lower end of your paver type's range to avoid driving the stain deeper into porous surfaces.
Environmental and safety considerations you should not skip
Pressure-wash runoff containing detergents, biocides, or loosened algae and sediment is a real environmental concern. Under EPA NPDES guidance, allowing this water to drain untreated into storm drains is a potential violation, and some states (Pennsylvania's DEP stormwater BMP requirements are a good example) explicitly require containment and collection of wash water when detergents are in use. In practice this means: if you are washing a patio with a detergent, either contain the runoff with sandbag barriers and collect it for disposal, or direct it to a lawn or border area that can absorb it rather than a hard drainage point.
For personal safety, wear safety glasses or goggles every single time. Pressure-washer water at even 1,000 PSI can cause serious eye injury. Waterproof non-slip footwear matters too, because a wet patio plus a pressure-washer kickback is an easy way to fall. OSHA standards (29 CFR 1910.133) require eye protection for pressure-washing tasks in a commercial context, and the reasoning applies equally at home. Add hearing protection if you are using a petrol machine for more than 30 to 40 minutes, and wear chemical-resistant gloves any time you are handling concentrated patio cleaners.
Sealing and maintenance after cleaning
Cleaning is the ideal time to assess whether your pavers need sealing or resealing. A freshly cleaned, dry paver surface takes sealer better than any other time. The critical rule: the surface must be completely dry before you apply anything. Techniseal and most other sealer manufacturers are clear that applying a sealer to a damp substrate causes adhesion failure and can trap moisture under the film, leading to a blotchy, peeling result. Techniseal and other sealer manufacturers advise allowing pavers to dry completely (commonly 24–48 hours depending on weather) after cleaning and rinsing before applying penetrating or film‑forming sealers, because applying sealer to a damp substrate can cause adhesion failure and peeling Techniseal HD Paver Prep — Pre‑Sealer Cleaner / Product Page (Techniseal distributor). In practice this means waiting a minimum of 24 hours after washing in warm, dry weather, and 48 hours or more in cooler or humid conditions.
Penetrating sealers (also called impregnating sealers) are generally the better choice for natural stone and permeable pavers because they do not form a surface film that can peel. Peer‑reviewed research (Improving Restorative Maintenance Practices for Mature Permeable Interlocking Concrete Pavements (MDPI, 2018)) found that restorative maintenance combining high‑pressure washing followed by vacuuming or vacuum + brushing can restore infiltration in clogged permeable pavements. Film-forming sealers give a more visible sheen and better stain resistance on concrete and porcelain, but they require more careful surface preparation. After sealing, re-top any joints where sand was displaced during washing using kiln-dried jointing sand, and compact it by brushing it into the joints and walking over the surface before the sand fully settles.
When to hire a professional instead
Most homeowners can handle standard patio pressure washing as a DIY task, but there are situations where calling in a professional exterior-cleaning contractor is the smarter call. Look for contractors certified through the Power Washers of North America (PWNA), which is the main U.S. trade body offering training and best-practice certification in flatwork cleaning, soft-wash, chemical handling, and environmental compliance. Certification means the contractor knows how to handle containment, runoff, and chemical selection properly, not just point a lance at a surface.
- Your pavers are historic, listed, or genuinely old soft brick or stone that could be permanently damaged by DIY pressure washing
- You have a very large area (over 100 square meters) where equipment hire and time cost make professional cleaning cost-competitive
- The staining is specialist in nature, such as deep oil contamination, paint, or chemical spills, where industrial-grade cleaners and techniques are needed
- Your patio is in an enclosed space with strict runoff containment requirements that are difficult to meet without professional equipment
- You have already tried DIY cleaning and the results were inconsistent or caused surface damage
Getting two or three quotes and asking specifically what PSI and chemicals they plan to use is a reasonable quality check. Any professional worth hiring will be able to tell you exactly what equipment and pressure settings they intend to use for your specific paver type.
FAQ
Is it OK to power wash patio pavers?
Yes — in many cases pressure washing is an effective way to clean patio pavers, but it must be done carefully. Benefits: removes dirt, mold, algae, efflorescence, and grease; can restore permeable surfaces when paired with solids removal. Risks: high pressure or wrong nozzle can scar or etch surfaces, blow out joint sand, damage softer natural stone (sandstone, slate), or force water under pavers. Recommendation: start with the least‑aggressive approach (sweeping, soap + water, soft brush), run a small test patch, and only use a pressure washer at pressures and nozzles matched to the material and stain type. Contain and manage runoff and use PPE.
When should I avoid pressure washing and use alternatives?
Avoid pressure washing if: pavers are newly installed (wait the manufacturer’s recommended cure period, commonly 2–3 months before sealing or aggressive washing); surface is historic or soft, cracked, delaminating or flagged by a mockup/test as sensitive; local regulations prohibit untreated runoff or detergents and you cannot contain wash water; stains are oil/grease deeply absorbed — consider chemical degreasers and poultices first. Use alternatives like scrubbing with a nylon brush and detergent (soft‑wash), oxygen bleach treatments for biological growth, or professional restorative cleaning with containment and vacuum removal for permeable pavements.
How do I quick‑test whether pressure washing is safe for my patio?
Pick a small, inconspicuous area (corner or underside edge). Clean using the mildest method first (soap + water and brush). If you then plan to pressure wash: start at the lowest pressure and widest fan nozzle, hold the wand at the recommended distance for that surface (typically ~12 in / 30 cm), and sweep continuously. Inspect for surface damage, color change, joint loss, or mortar disturbance. If any damage appears, stop and use a gentler method or call a pro.
What PSI and nozzle settings are recommended for different patio materials?
General guidance — always test first and keep the wand moving. - Porcelain: up to ~1,600 PSI; use wide fan nozzle (25°–40°), keep brooming motion and avoid concentrated jets to prevent loss of jointing material. - Concrete pavers / interlocking concrete: 1,400–1,800 PSI typical for restorative cleaning of permeable pavers when followed by solids removal; use 25°–40° fan tips and maintain ~12–18 in (30–45 cm) distance. - Brick (masonry): use low pressure when possible; many preservation guidelines recommend below ~300 PSI for historic brick to avoid surface damage; use a wide fan and angled spray; test patch. - Natural stone (granite, bluestone): moderate pressure (up to ~1,200–1,800 PSI depending on hardness) with wide tip; avoid pressure >2,000–2,500 PSI and test. - Sandstone, slate, softer stones: use low pressure (often <300–800 PSI), soft‑wash or hand brushing preferred; mockups required. - Porcelain and glazed tiles: treat like porcelain — avoid very high pressure and avoid concentrated rotary/zero‑degree tips. Adjust based on stone hardness and manufacturer guidance.
What nozzle angles, distance and sweeping technique should I use?
Use wider fan nozzles (25°–40°) rather than narrow/zero‑degree jets. Hold the lance at about a 30° angle for heavy grime if recommended by the manufacturer, or perpendicular for rinsing, keeping the nozzle typically ~12 in (30 cm) from the surface (many manuals recommend ≈12 in/30 cm). Keep the wand moving in a steady sweeping motion—don’t dwell on one spot—to avoid etching or joint loss. For delicate surfaces increase distance and use a wider fan.
Step‑by‑step checklist: prep, washing, and aftercare
Prep: sweep debris, remove furniture/planters, protect adjacent plants/structures, plug or block drains to contain runoff (or set up containment/filtration), test patch, gather PPE (eye, gloves, hearing protection). Washing: pre‑wet surface, apply detergent/biocide at low pressure if needed and allow recommended dwell time, rinse with appropriate PSI/nozzle using sweeping strokes and maintaining distance, avoid blasting joint sand directly. Aftercare: allow surface to dry fully (often 24–48+ hours depending on weather), inspect for joint sand loss and re‑sweep jointing sand or use polymeric sand if required, wait manufacturer‑recommended curing before resealing (commonly 24–48 hrs for cleaning but sealers often need completely dry substrate—some recommend 2–3 months after new installations), properly dispose or treat collected wash water according to local regulations.
Does Pressure Washing Damage a Patio? How to Clean Safely
Learn when pressure washing damages patios by material, PSI, and nozzle distance, plus safe settings, prep, and alternat