The best all-round homemade patio cleaner is a warm water solution with oxygen bleach (sodium percarbonate) at roughly 120g per 5 litres. It handles mold, algae, moss, and general grime on most surfaces without the etching risk you get from vinegar or acid-based mixes, and it breaks down into oxygen and water so it won't torch your garden borders. That said, the right recipe depends on what surface you've got and what you're actually trying to shift, so use the quick reference below first before mixing anything up.
Best Patio Cleaner Homemade Recipes for Every Surface
Rhea Lang
10 Jun 2026
Quick pick: match your cleaner to your surface and stain
Before you grab a bucket, you need to know two things: your patio material and your main problem. The wrong combination can either do nothing useful or cause permanent damage. Vinegar is a classic example. It's touted everywhere as a natural cleaner, but acetic acid can dull and etch sandstone, limestone, and concrete pavers, and I've seen patios end up with a rough, pitted surface that actually attracts more dirt afterwards. Same goes for muriatic acid mixes. Unless you're an experienced mason dealing with heavy efflorescence, don't go near it.
| Surface type | Main problem | Best homemade cleaner |
|---|---|---|
| Concrete (poured or slabs) | Mold, algae, general grime | Oxygen bleach solution (120g/5L warm water) |
| Concrete (poured or slabs) | Grease, oil, pet stains | Dish soap + baking soda paste, or oxygen bleach |
| Brick and clay pavers | Mold, moss, algae | Oxygen bleach solution (120g/5L warm water) |
| Brick and clay pavers | General grime | Warm water + washing-up liquid, light scrub |
| Natural stone (sandstone, slate) | Mold, algae | 3% hydrogen peroxide solution (diluted 1:3 with water) |
| Natural stone (sandstone, slate) | General grime | pH-neutral soap in warm water only — no acid, no bleach |
| Porcelain tiles | Mold, grime | Oxygen bleach solution (diluted, 60g/5L) or pH-neutral soap |
| Porcelain tiles | Grease | Dish soap + warm water, stiff brush |
| Any surface | Rust stains | Lemon juice paste with salt (light rust) — test first; serious rust needs a commercial remover |
A quick note on natural stone: sandstone and slate are porous and acid-sensitive, which rules out vinegar entirely and means you need to be cautious even with oxygen bleach at full strength. Hydrogen peroxide at 3% (the standard brown-bottle pharmacy kind) is a better starting point for biological growth on stone. Porcelain is tougher but grout lines can be vulnerable, so keep concentrations moderate.
DIY homemade patio cleaner recipes
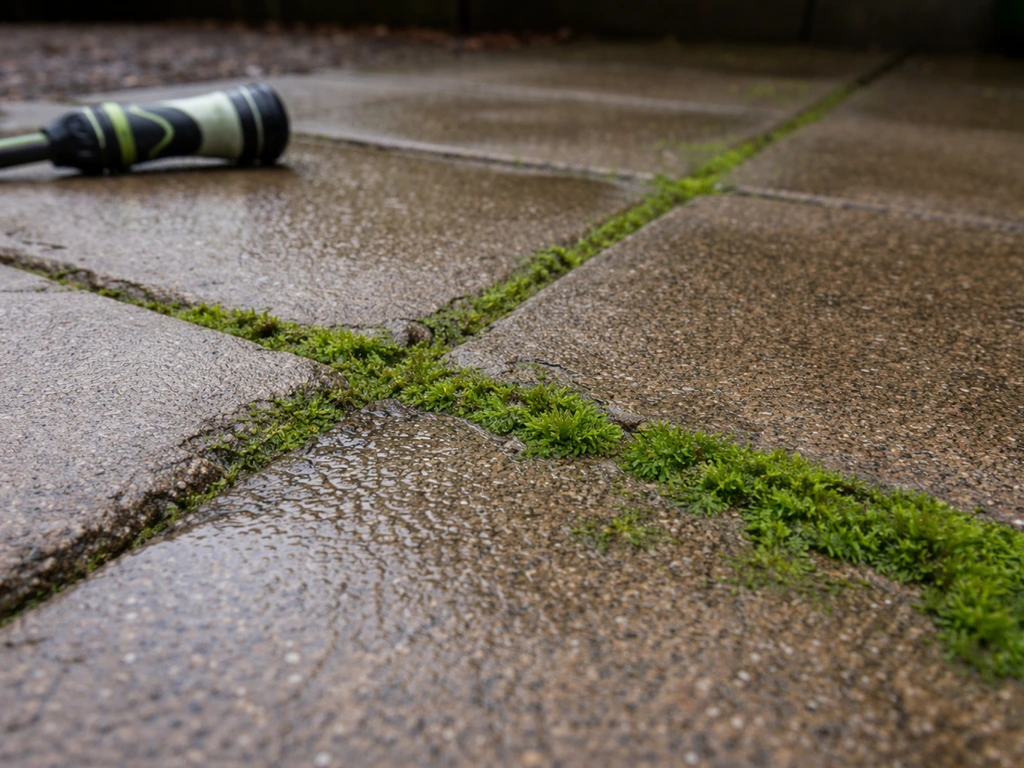
For mold, algae, and moss (the most common problem)
This is the one I reach for first on concrete, brick, and most pavers. Mix 120g of oxygen bleach (sodium percarbonate powder, sold cheaply in bulk online or in cleaning supply stores) into 5 litres of warm water. Stir until fully dissolved. Apply generously with a watering can or a pump sprayer, making sure the surface is visibly wet. Leave it for 10 to 20 minutes depending on how bad the growth is: 10 minutes for light surface mildew, closer to 20 for thick green or black patches that have been there a while. Then scrub and rinse thoroughly. On natural stone, drop the concentration to about 60g per 5 litres and lean toward the shorter dwell time.
For natural stone specifically, 3% hydrogen peroxide (diluted 1 part peroxide to 3 parts water) is gentler and still effective against mold and algae. Spray it on, let it sit for 10 to 15 minutes, then scrub with a soft-bristle brush and rinse well. A similar method with 3% hydrogen peroxide is to spray it on and let it dwell for 10, 15 minutes before scrubbing and rinsing let it sit for 10 to 15 minutes.
I've used this on a sandstone patio that was green with algae and it worked without touching the colour or texture of the stone, which is more than I can say for the first time I tried a vinegar solution on a similar surface years ago.
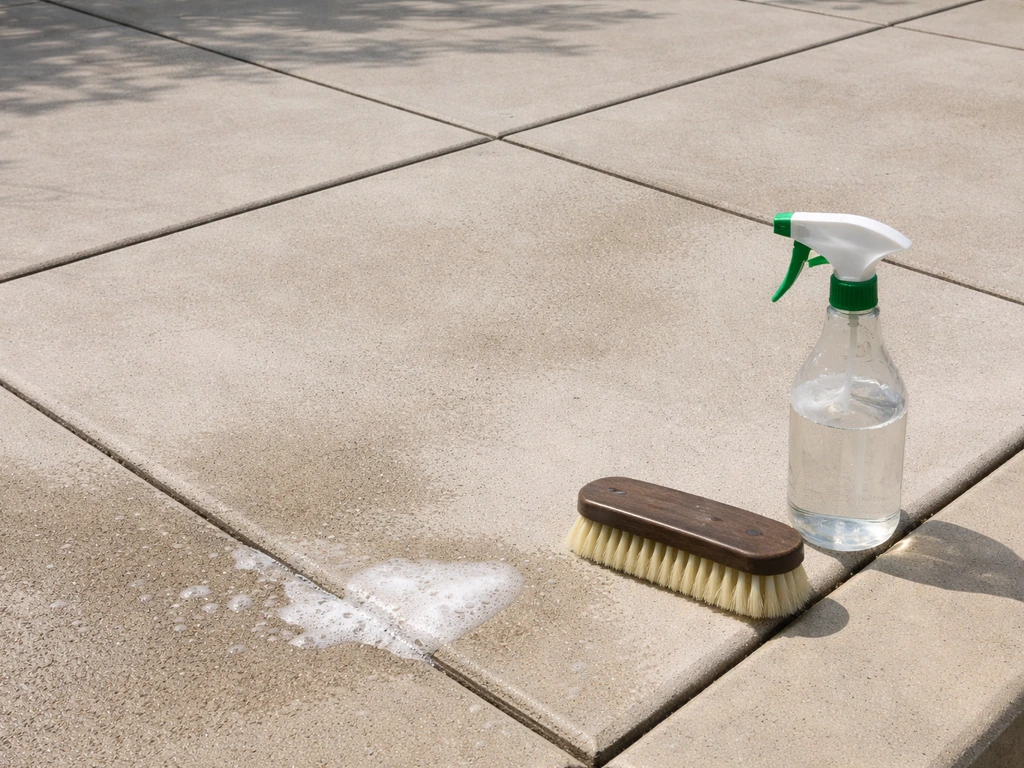
For general everyday grime and dirt
If the patio just looks grimy rather than visibly green or black, keep it simple. Mix a good squirt of washing-up liquid (dish soap) into a bucket of hot water, scrub with a stiff brush, and rinse. For a bit more cleaning power, add 3 to 4 tablespoons of baking soda to the mix. This works well on concrete and brick and is genuinely safe for all patio materials including natural stone. Don't overcomplicate it when you don't need to.
For grease, cooking oil, and pet stains
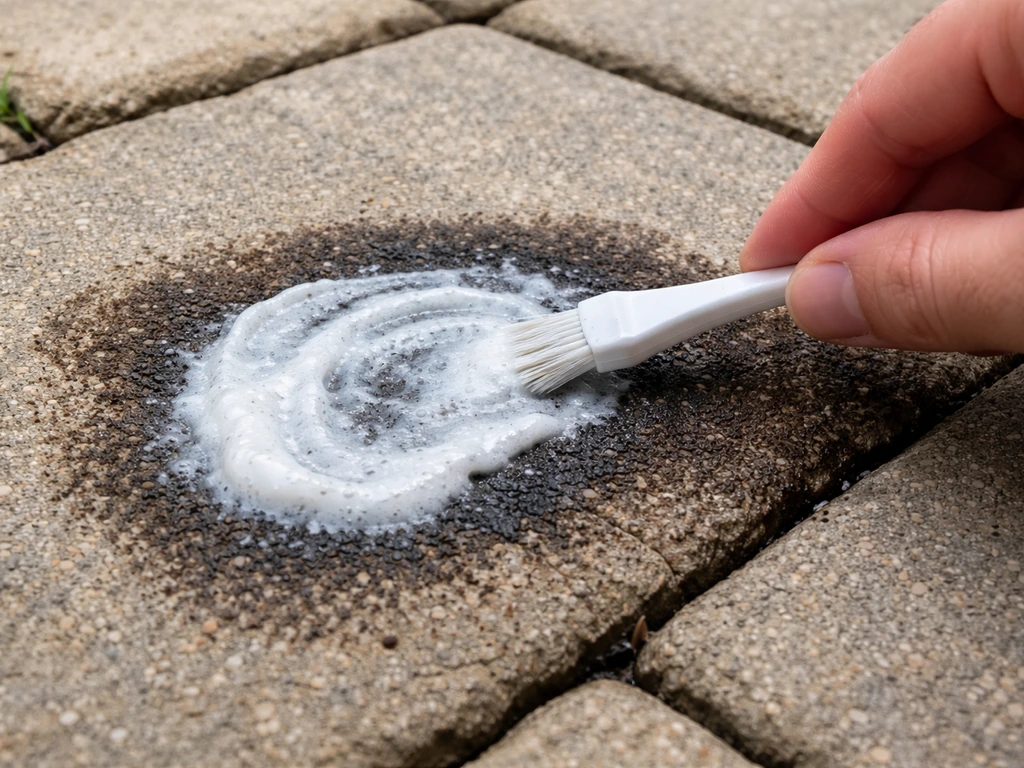
Grease and oil stains need a different approach because they're not water-soluble. Make a paste with baking soda and a few drops of dish soap, apply it directly to the stain, and let it sit for 15 to 20 minutes. The baking soda acts as a mild abrasive and the soap cuts through the oil. Scrub hard in a circular motion with a stiff brush, then rinse.
For older, set-in grease stains, the oxygen bleach solution also works surprisingly well as a follow-up if the paste alone doesn't fully shift it. Pet urine stains on concrete respond well to the oxygen bleach mix too, since it breaks down the organic compounds causing both the stain and the smell. For stubborn spots and ongoing protection, you can also compare this DIY approach with the best patio cleaner options available commercially.
For light rust stains
Mix lemon juice with enough table salt to make a thick paste, apply it to the rust stain, and leave for 10 to 15 minutes before scrubbing with a stiff brush. This works on light surface rust on concrete and brick. Always spot test first on natural stone, and be aware that lemon juice is still acidic so don't use it on sandstone or limestone surfaces. For anything more than light rust, a homemade approach usually isn't enough and you'll need a commercial rust remover formulated for paving.
How to prep and apply safely
What you'll need
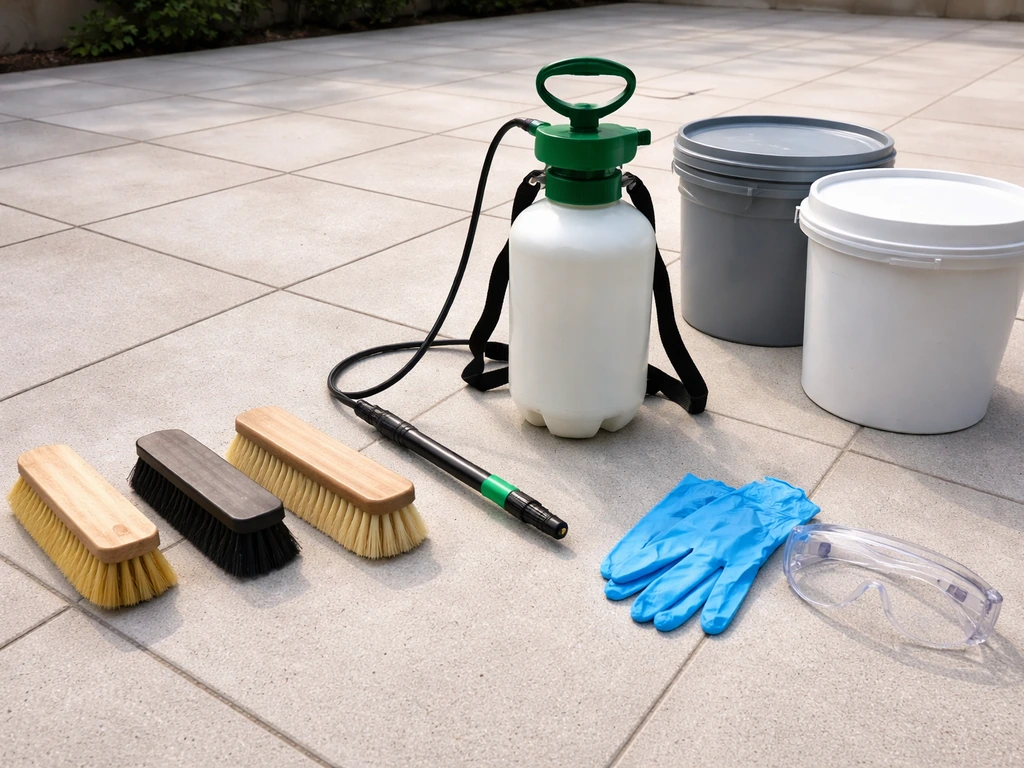
- A stiff-bristle brush (medium stiffness for stone, stiffer for concrete and brick)
- A soft-bristle brush for natural stone and porcelain grout lines
- A pump garden sprayer or watering can for applying solution evenly
- A garden hose with decent pressure for rinsing, or a pressure washer (see next section)
- Rubber gloves and eye protection, especially when using oxygen bleach
- A bucket for mixing
Step-by-step application
- Clear the area: move furniture, pots, and anything else off the patio. Cover nearby plants and borders with plastic sheeting or give them a good pre-soak with water before you start, as even relatively mild solutions can affect plants if they pool around roots.
- Sweep thoroughly: remove loose debris, leaves, and surface dirt before applying any cleaner. Applying solution to a debris-covered surface wastes it and reduces contact with what you're actually trying to clean.
- Spot test: always apply your solution to a small, hidden corner and leave it for the full dwell time before committing to the whole patio. This is non-negotiable on natural stone and coloured pavers.
- Pre-wet the surface: dampen the whole area with water first. This stops the dry surface from absorbing the cleaning solution too quickly and ensures even coverage.
- Apply the cleaning solution: use a pump sprayer or watering can for even distribution. Make sure the whole area is properly wet with the solution, not just lightly misted.
- Allow the dwell time: leave the solution to work. Don't let it dry out, especially in warm weather. If it starts drying, apply a little more or lightly mist with water.
- Scrub: use firm, overlapping circular strokes. Focus extra attention on grout lines, corners, and shaded areas where growth tends to be thicker.
- Rinse thoroughly: this is critical. Residue left in the pores of masonry or stone can cause future problems and discolouration. Rinse until the water runs clear.
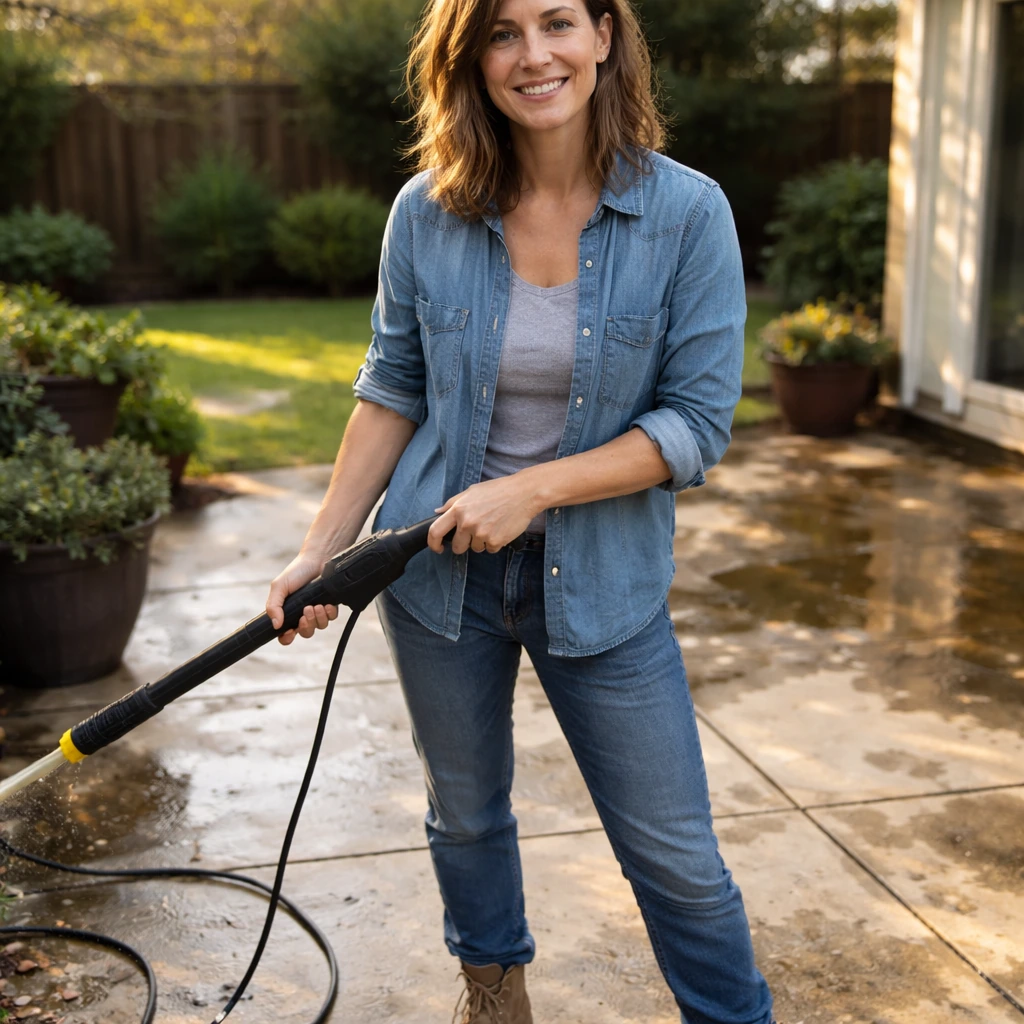
Pressure washing vs scrubbing: when to use which
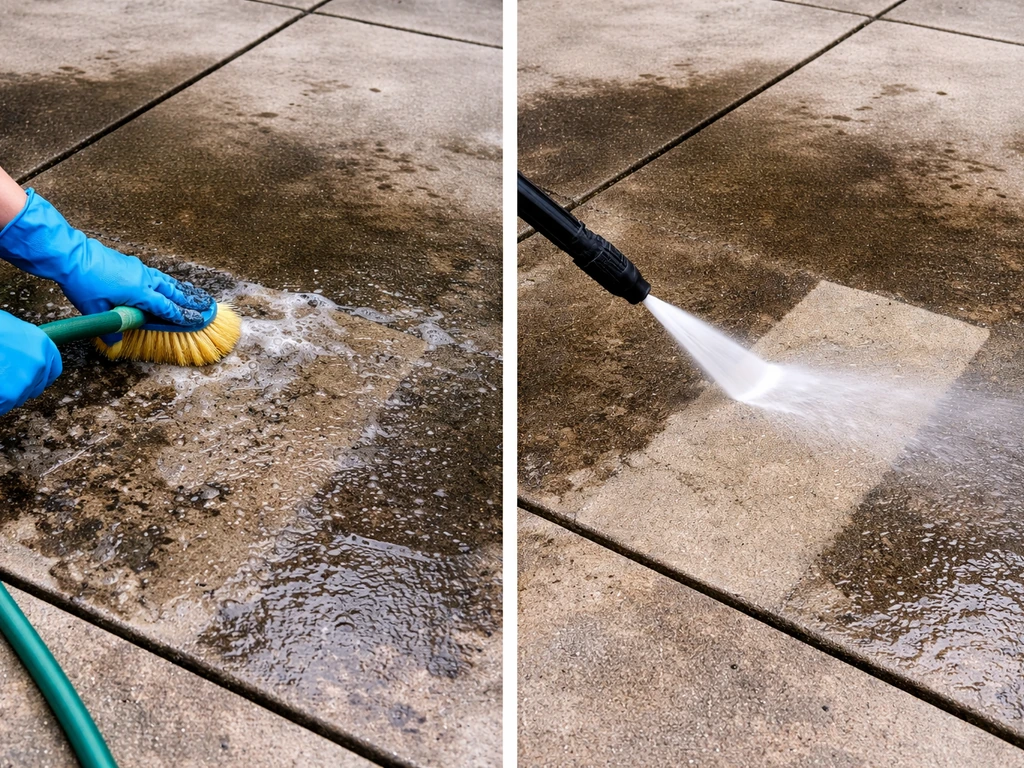
A stiff brush and a hose will handle a lot, but if your patio is heavily soiled, large, or has deep biological growth embedded in the surface, pairing your homemade cleaner with a pressure washer saves a huge amount of effort. The key is using the right pressure and nozzle for your surface, because getting this wrong etches concrete, blasts out mortar from brick joints, and can permanently roughen natural stone.
For general patio cleaning, a 25-degree nozzle is your go-to. It's a wide enough fan to clean efficiently without concentrating too much force in one spot. For concrete and hard brick that needs heavier cleaning, you can step up to a 15-degree nozzle, but keep it moving and don't hold it close to the surface. For rinsing at the end, switch to a 40-degree nozzle to get a wider, gentler wash across the surface.
On natural stone and porcelain, I'd stick with the 25-degree or 40-degree nozzle and keep pressure around 500 to 1000 PSI. On concrete you can go higher, but honestly most domestic pressure washers in the 1200 to 1600 PSI range are perfectly adequate at the 25-degree setting.
One important rule: apply your cleaning solution by hand (sprayer, watering can) rather than through the pressure washer. High pressure can force cleaning solution deep into the masonry, where it can cause problems later, particularly with bleach-based solutions leaving residues in pores. Apply, dwell, then pressure wash to rinse and lift the loosened dirt.
| Surface | Recommended PSI range | Nozzle for cleaning | Nozzle for rinsing |
|---|---|---|---|
| Concrete | 1000–1600 PSI | 25° (15° for heavy stains) | 40° |
| Brick / clay pavers | 500–1000 PSI | 25° | 40° |
| Natural stone (sandstone, slate) | 500–800 PSI | 25° or 40° | 40° |
| Porcelain tiles | 500–800 PSI | 25° | 40° |
Keep the nozzle at least 30cm from the surface and don't linger in one spot. On brick and pavers, avoid pointing the spray directly into mortar joints at close range. And always do a test patch in an inconspicuous corner before going over the whole patio, especially if the surface is older or you're not sure of its condition.
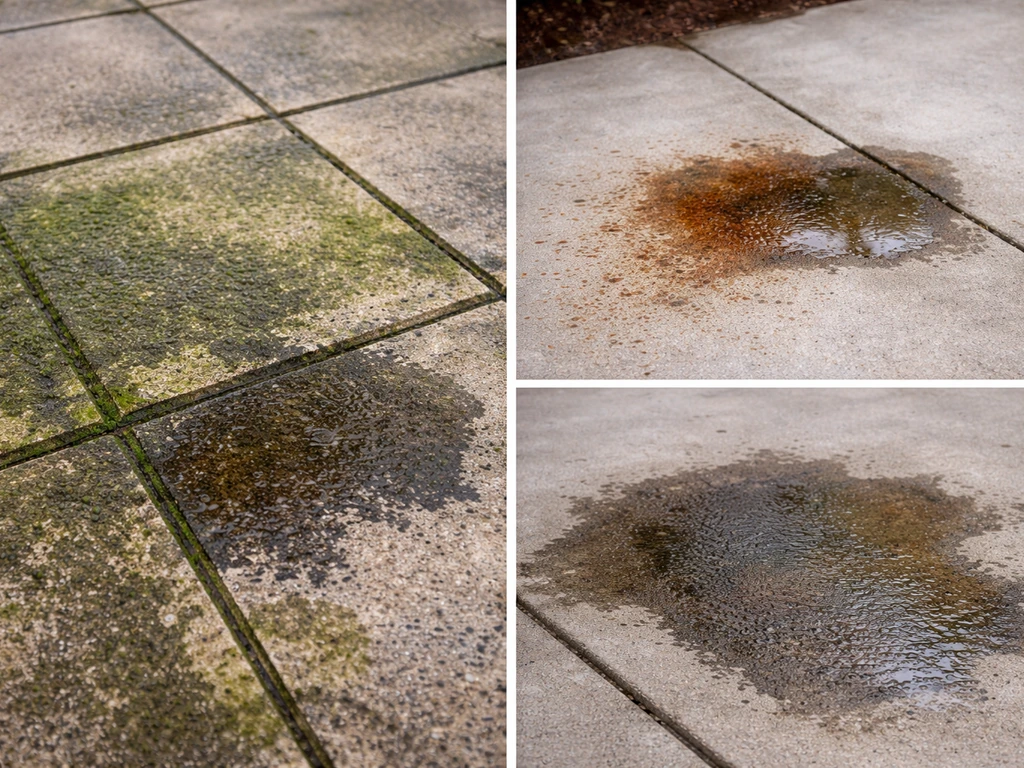
Spot testing, setting expectations, and troubleshooting
Spot testing isn't optional. Pick a corner behind a pot or under a furniture leg, apply your solution at full strength, leave it for the full intended dwell time, scrub, rinse, and let it dry completely before you assess it. Wet surfaces always look different to dry ones. If the colour, texture, or finish looks different after drying, adjust your concentration downward or switch to a gentler option.
Realistically, a single application of a homemade cleaner won't always shift everything on a first pass, and that's normal. Here's how to troubleshoot if the stain doesn't fully lift:
- Biological growth (mold, algae, moss): let the first application dry and then apply a second round. Sometimes dead growth needs to be physically removed first before the second pass penetrates properly. A stiff brush between applications helps.
- Grease and oil: repeat the baking soda paste, and this time leave it longer, up to 30 minutes. Adding a little more dish soap to the mix and scrubbing harder usually shifts it on the second attempt.
- Rust stains: if lemon juice and salt aren't shifting it, this is one area where a homemade solution has its limits. Switch to a commercial patio rust remover formulated for your surface type.
- General grime that won't shift: increase dwell time, use hotter water in your mix, and pair with a pressure washer rinse rather than just a hose. Sometimes the issue is simply that the surface needs more mechanical action than scrubbing alone provides.
- Staining on natural stone that persists: if hydrogen peroxide at 3% diluted 1:3 isn't working after two applications, this may be ingrained mineral staining rather than biological growth, and a homemade cleaner probably isn't the right tool. At this point it's worth looking at specialist stone cleaning products.
If you're dealing specifically with heavy moss, lichen, or algae that covers most of the patio rather than spot stains, the approach is more similar to a full surface treatment than spot cleaning. If you are searching for the best patio cleaner for moss and algae, focus on a full-surface treatment with the right coverage and dwell time, not just spot cleaning moss, lichen, or algae. The same oxygen bleach solution works, but coverage and dwell time matter more.
This is where the topic overlaps with finding the best cleaner for moss and algae specifically, and it may be worth considering whether a commercial biocide-based product makes more sense for large-scale biological growth than a purely DIY approach. If you want the best patio cleaner for lichen, compare DIY oxygen-bleach options with commercial biocide-based products and choose based on how widespread the growth is.
For many patios with stubborn algae, choosing the best patio algae cleaner can save time compared with DIY mixes. For a simple, reliable option, look for the best patio cleaner for moss and algae and match it to your patio material.
Keeping it clean so you don't have to do this again anytime soon
The single most effective thing you can do to prevent mold, algae, and moss from coming back quickly is to remove the conditions they need to grow: moisture, shade, and organic material. That means keeping joints clear of leaves, dirt, and debris, because organic matter sitting in joints is basically a ready-made growing medium for weeds and biological growth.
- Sweep the patio regularly, at minimum every couple of weeks during autumn and spring when debris accumulates fastest.
- Clear joint sand that has washed out and top up with polymeric jointing sand, which is more resistant to weed and moss colonisation than standard sand.
- Apply a dilute oxygen bleach solution (half-strength) as a preventative treatment every 6 months in early spring and autumn, before growth gets established rather than after.
- Improve drainage if water consistently pools in the same areas. Persistent standing water is the main driver of algae and mold growth.
- Trim back overhanging shrubs and trees where you can. Shaded patios dry much more slowly and are far more prone to biological growth.
- For rust prevention, check whether there are metal fittings, furniture legs, or planters sitting directly on the patio that are causing rust transfer. Rubber feet on furniture and using plastic saucers under metal pots makes a noticeable difference.
- For grease-prone areas (near a BBQ or outdoor kitchen), lay down a breathable anti-slip mat and clean the immediate area with dish soap and hot water after each use rather than letting grease build up over a season.
If you stay on top of maintenance like this, a full deep clean with a homemade solution every spring is usually enough to keep most patios looking good year-round. The alternative is spending a full day scrubbing off two years of accumulated growth, which is never a fun way to start the warmer months.
FAQ
How long should I wait before using the patio again after cleaning with oxygen bleach or hydrogen peroxide?
Wait until the surface is fully dry and any residue is rinsed away, typically 24 hours for most patios. If the patio is in constant shade or the weather is cool and damp, give it extra time, because oxygen-based cleaners can leave faint whitening in deeper pores until everything dries and cycles out.
Can I mix oxygen bleach homemade cleaner with other ingredients like vinegar, ammonia, or detergent boosters?
Do not mix oxygen bleach with vinegar or any acidic cleaners, and avoid ammonia or chlorine bleach entirely. Even if detergent is fine in some recipes, combining products can reduce effectiveness or create unwanted reactions. Keep it to one active approach per session, then add only the dish soap or baking soda options mentioned for grime or grease.
What’s the best way to handle dark staining that doesn’t lift after the dwell time?
For stubborn discoloration, don’t just increase dwell time indefinitely. Instead, reapply after scrubbing and rinsing, or switch to the surface-appropriate option (oxygen bleach for organic growth on concrete and most pavers, hydrogen peroxide for natural stone). If the stain is tannin, rust that has penetrated, or mildew spores embedded in grout, multiple treatments spaced over a few days work better than one long soaking.
Is oxygen bleach safe for plants, pets, and kids while it’s wet?
Oxygen bleach is gentler than chlorine types, but it can still irritate and stress plants if runoff is heavy. Wet down nearby plants before application, prevent runoff into beds as much as possible, and rinse thoroughly at the end. Keep pets off until the patio is dry and fully rinsed.
Can I use the oxygen bleach patio cleaner on jointed brick or pavers without damaging the mortar?
Yes in most cases if you apply by hand and keep dwell time within the recommended window, but avoid blasting or prolonged soaking in mortar joints. Pressure washer application through the machine can drive solution deeper and loosen or roughen joints. For older, sandy mortar, do a test patch first and use the gentler dwell time.
Will baking soda help with algae and moss, or is it only for general grime?
Baking soda is better for grime and mild scuffing, it does not reliably kill established algae or moss like oxygen bleach or peroxide. If you see green or black growth, use the oxygen bleach or hydrogen peroxide approach, then you can follow with dish soap and a scrub for the remaining film.
Can I store leftover homemade cleaner, or should I mix fresh every time?
Mix fresh when possible, especially for oxygen bleach solutions. Concentrations can weaken over time and oxygen release can vary, particularly if stored in a container that absorbs heat. If you must store, use a tightly sealed, clearly labeled container and use within a day.
What nozzle angle and distance should I use if I’m stuck with a pressure washer?
Use it only for rinsing and keep the nozzle at least 30 cm from the surface. Stick with a wide fan (25 degrees is the main default), keep the wand moving, and avoid directing spray into mortar joints at close range. For natural stone, target moderate pressure, roughly 500 to 1000 PSI, and re-rinse rather than “attack” the stain with high pressure.
How do I clean a patio if I don’t know the material, like a mix of pavers and stone?
Treat it as natural stone unless proven otherwise. Start with the safest gentler option, hydrogen peroxide at the moderate dilution for biological growth, and keep oxygen bleach concentration lower until you confirm results in the test patch. If it’s mixed, do one section at a time so you don’t over-treat the most sensitive areas.
What should I do if the patio looks lighter or patchy after drying?
Patchiness usually means the cleaner was too strong for that surface or it sat unevenly in pores. Let the area dry fully, then scrub with warm water plus a small amount of dish soap, rinse, and reduce concentration on the next pass. In many cases, repeated gentler treatments restore a more uniform finish better than one stronger application.
Can I prevent moss and algae without using a chemical biocide?
Yes, the biggest practical difference is removing the growth conditions: keep leaves and debris out of joints, improve drainage so water doesn’t pool, and trim back overhanging shade when possible. A spring deep clean plus basic joint maintenance usually reduces recurrence more than frequent reapplication of cleaners.
Next Article
Best Patio Algae Cleaner: How to Choose and Use It
Pick the best patio algae cleaner fast: identify green algae, choose safe formula by surface, apply steps, and rinse.