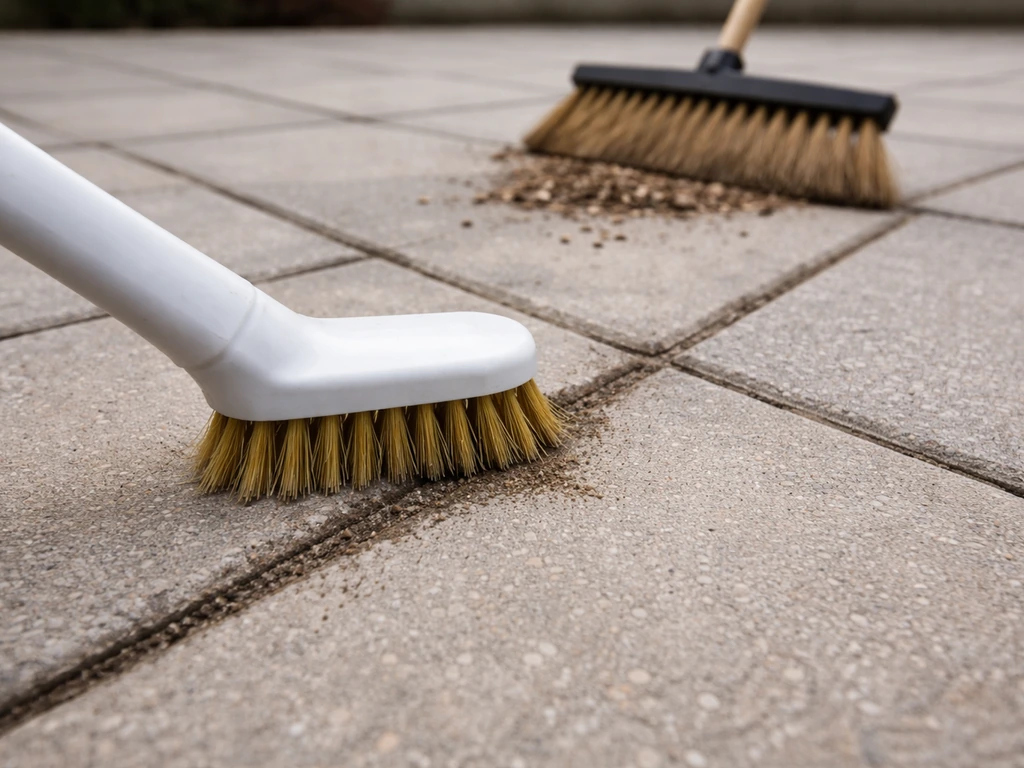
For most patios, a stiff-bristle nylon grout brush with a crevice or angled head is the right starting point. Pair it with an oxygen bleach solution for mold and algae, a neutral cleaner for natural stone joints, and a pH-appropriate product for grease or pet stains. The brush shape, bristle stiffness, and cleaner chemistry all need to match your specific patio surface and joint type, get that combination right and you'll shift grime that has been building for years. Get it wrong and you risk scratching your pavers, etching the stone, or watching bristles shed into every joint on your patio.
Brush in Patio Grout Reviews: Best Brushes and How to Use Them
Rhea Lang
6 Jun 2026
What 'grout brush' actually means for patio joints
When you search for grout brush reviews in a patio context, you're not really looking at the same product as a bathroom tile brush. Patio joints are wider, dirtier, more exposed to weather, and often filled with polymeric jointing sand rather than traditional grout. Quikrete's polymeric jointing sand, for example, is designed for joints up to 2 inches wide between interlocking pavers, brick, natural stone, and concrete slabs. That's a very different situation from a 3mm bathroom grout line.
Reviews matter here because the wrong brush causes real damage. Steel wire brushes can scratch pavers and natural stone surfaces. Brushes with loose bristles leave debris in joints. A brush that's too wide won't get into the joint at all. And if you're dealing with polymeric sand joints specifically, an overly aggressive brush can dislodge the stabilized sand and leave you with a crumbling, weed-prone joint. Understanding what reviewers are actually testing helps you cut through the marketing language and pick something that solves your specific problem.
How to pick the right brush for your patio surface and joint type
Start with your surface first, then the joint. These two things determine bristle stiffness and brush shape more than anything else.
Matching bristle type to your surface
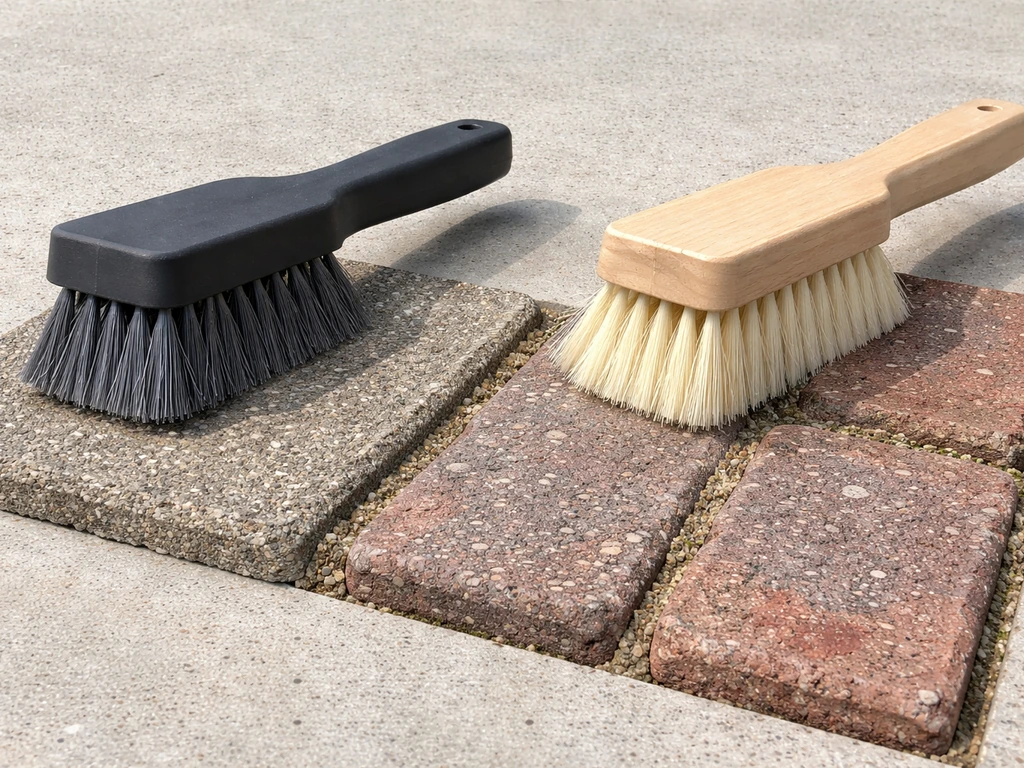
- Concrete pavers and brick: stiff crimped nylon bristles work well here. They're aggressive enough to shift ingrained grime without scratching the surface the way steel would.
- Natural stone (sandstone, Indian sandstone, limestone, travertine): soft to medium nylon bristles only. These surfaces scratch and etch easily. Specialty retailers that cater to preservation work specifically recommend nylon over any metal bristle option for this reason.
- Porcelain pavers: medium nylon is fine. Porcelain is hard and scratch-resistant, so you have more flexibility, but steel wire is still unnecessary and risks marking the surface.
- Slate: treat like natural stone. Medium nylon, no wire.
Matching brush shape to your joint width and location
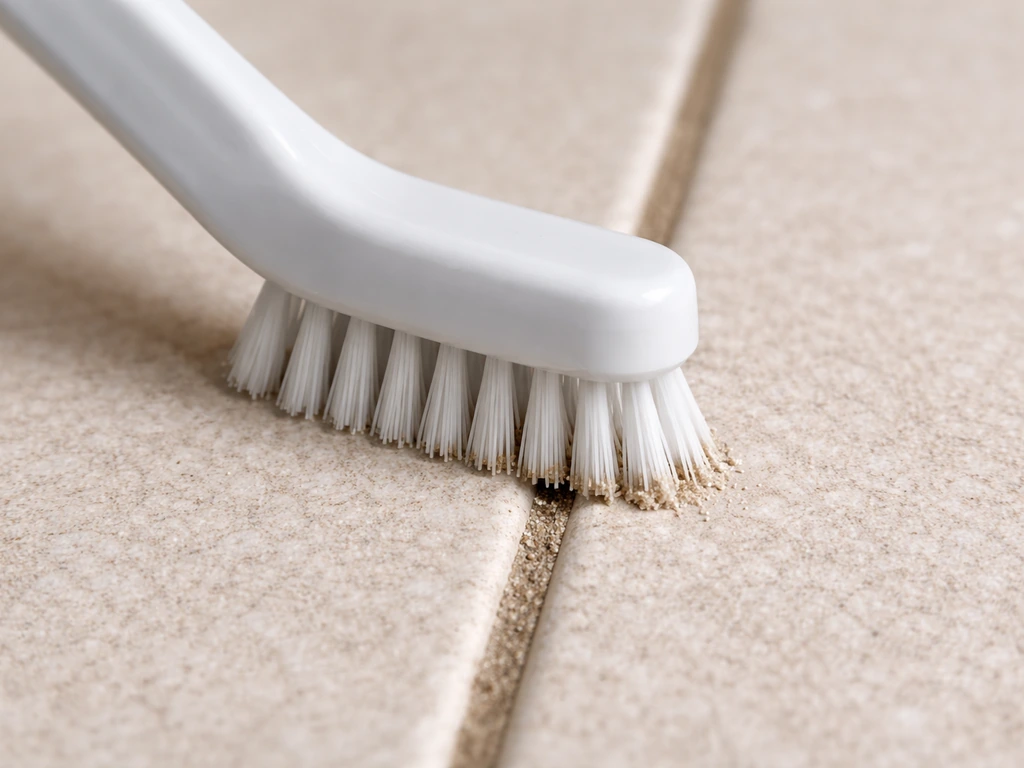
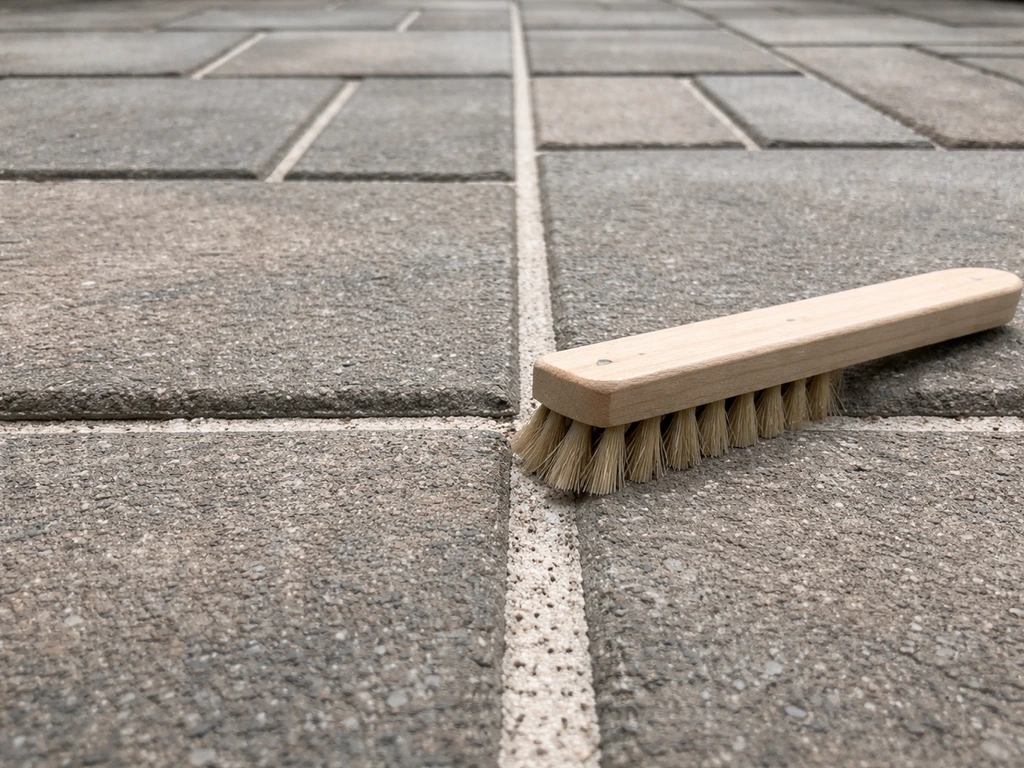
- Narrow joints (under 10mm): toothbrush-style brushes with unflagged nylon bristles are ideal. They concentrate pressure exactly where you need it and allow detail work in tight spaces.
- Medium joints (10–25mm): a standard crevice-style grout brush or an angled head brush gives you the reach and bristle coverage you need without being too wide.
- Wide joints (25mm and above): a wider stiff-bristle utility brush or a patio-specific scrub brush with a shaped head works better than a narrow grout brush.
- Corners and edges: triangle-head grout brushes with stiff crimped polyester or nylon bristles are purpose-built for corners where flat brushes can't get proper contact.
- Long runs of joint: look for a brush with a thumb rest or ergonomic handle. QEP's tile and grout brush includes a thumb rest specifically designed to improve leverage and reduce hand fatigue over longer sessions.
Review-style comparison: brush features that actually change results
I've used most of the common brush styles on different patio surfaces and there are some real differences worth knowing about before you spend money.
| Brush Type | Bristle Material | Best For | Avoid On | Standout Feature |
|---|---|---|---|---|
| Crevice/grout brush (Carlisle Flo-Pac style) | Stiff crimped nylon | Concrete, brick, standard paver joints | Polished natural stone, slate | Durable crimped nylon holds its shape through long sessions |
| Triangle/corner grout brush | Stiff crimped polyester or nylon | Corners, edges, shaped joints | Delicate stone surfaces | Head geometry gives full bristle contact in corners |
| Toothbrush-style (Lavex 7½" style) | Unflagged nylon | Tight joints, detail work, small areas | Wide joints (inefficient) | Precise pressure on narrow lines, great for detailed cleaning |
| QEP tile and grout brush | Thick durable nylon | All joint widths, general patio use | Very delicate stone surfaces | Thumb rest reduces fatigue; works across different joint sizes |
| Steel wire brush (Gardena paver brush style) | Steel wire | Weed removal from paver gaps, not grime cleaning | Natural stone, porcelain, brick (risk of scratch/rust staining) | Effective at clearing organic debris from joints, not for cleaning |
The steel wire brush is worth addressing specifically because it appears in a lot of paver-related product listings. It's genuinely useful for scraping out established weeds from joints before you clean, but it is not a cleaning brush. Using it on sandstone, limestone, or porcelain will leave scratches. On concrete it may leave metal residue that causes rust staining. Use it for weed removal only, then switch to nylon for the actual scrubbing.
One thing you often can't tell from product listings alone is bristle retention. Cheap brushes shed bristles into the joints almost immediately, which is frustrating and means you're pulling hairs out of grout lines for the next hour. Brushes from established brands (QEP, Carlisle, Lavex) tend to hold together much better. If you're seeing reviews complaining about shedding, that's the main thing to watch for.
How to use a grout brush on your patio: step by step
Technique matters as much as brush choice. Here's the process that gets consistent results.
- Clear the patio surface first. Remove furniture, sweep off loose debris, and pull any obvious weeds from joints. If you're using a steel wire brush for weed removal, do it now, not after you've applied cleaner.
- Pre-wet the surface. Wet the joints and surrounding pavers with plain water before applying any cleaning solution. This serves two purposes: it reduces how deeply cleaner penetrates into the joint sand (important for polymeric sand joints), and it stops dry pavers from immediately wicking up your cleaning product before it has time to work. Techniseal specifically instructs saturating joints before applying paver cleaning products.
- Apply your cleaning solution. Work in manageable sections of about 1–2 square metres at a time. Apply the solution to the joints and the surrounding surface and let it dwell according to the product instructions. Keep the surface wet — never let cleaning solution dry on the patio. Techniseal's technical guidance puts this bluntly: keep the surface wet at all times until completely rinsed off.
- Scrub the joints. Work the brush back and forth along the joint line with firm, consistent pressure. For very narrow joints, use the tip of a toothbrush-style brush. For wider joints, use a crevice or flat-head grout brush. Agitate along the joint first, then across it to lift loosened grime. Don't scrub at an extreme angle — keep the bristles roughly perpendicular to the joint for maximum contact.
- Reapply cleaner if needed. For heavy staining or established biogrowth, let the cleaner dwell again for a few minutes and repeat the scrubbing. One pass is rarely enough for significant build-up.
- Rinse thoroughly. Rinse with clean water, working from one end of the patio to the other. A garden hose with a good flow is fine for most situations. For very stubborn residue or large areas, a pressure washer on a low to medium setting (avoiding direct high-pressure into joints if you have polymeric sand) is more efficient.
- Check the result and repeat on stubborn spots. Once the surface dries slightly you can see what still needs attention. Spot-treat those areas rather than re-cleaning the whole patio.
Best cleaning solutions to pair with your brush
The brush does the mechanical work, but the cleaning solution does the chemical lifting. Getting the chemistry wrong is where most people run into trouble, especially on natural stone patios.
Mold, algae, and moss

Oxygen bleach (sodium percarbonate) is the safest starting point for most patio surfaces. It's a gentler oxidizer than chlorine bleach, less likely to bleach out paver color, and effective against algae and mold when given adequate dwell time. Apply it as a solution, let it sit for 10–15 minutes while keeping the surface wet, then scrub and rinse. For really established green or black growth on concrete or brick, a dilute sodium hypochlorite (chlorine bleach) solution works faster, but rinse thoroughly and avoid it on natural stone or colored pavers.
General grime and grout haze
For ordinary accumulated grime, a pH-neutral patio cleaner is the safest all-round choice. If you're dealing with grout haze left after laying or re-pointing, MAPEI recommends their Cement Grout Haze Remover used with a soft brush or white scrubbing pad. Crucially, they warn against using acid-based cleaners on natural stone surfaces including marble, travertine, and limestone. For those surfaces, a neutral cleaner is the rule. Louisville Tile's guidance similarly states that acid-sensitive stones require a neutral cleaner rather than any acid-based haze remover.
Efflorescence (white salt deposits)
Efflorescence on concrete and brick pavers can be treated with a buffered acid-based cleaner, but the acid concentration matters. Industry guidance from Mutual Materials notes that buffering reduces the risk of the acid dislodging joint sand, which is particularly important if you have polymeric sand joints. Use the lowest effective concentration, keep the surface wet, and rinse completely. Again: no acid-based cleaners on limestone, travertine, or marble joints.
Grease stains
Grease needs an alkaline degreaser, not an acid or oxygen bleach. Apply it, let it break down the grease for a few minutes, then scrub with a stiff nylon brush and rinse well. For porous surfaces like sandstone, you may need to repeat this two or three times as grease tends to be absorbed rather than just sitting on the surface. Choosing the best sandstone patio cleaner for your stain type helps you avoid damaging the stone while getting grime to lift.
Pet stains
Enzymatic cleaners are the best option for pet urine stains on patio joints. The enzymes break down the uric acid crystals that cause the persistent smell and staining. These are gentler on most patio surfaces than bleach-based products and are safe around pets once dried. Apply liberally, let dwell for 10–15 minutes, scrub, and rinse.
Surface and cleaner compatibility at a glance
| Stain Type | Concrete/Brick | Natural Stone (sandstone, limestone) | Porcelain |
|---|---|---|---|
| Mold/algae/moss | Oxygen bleach or dilute chlorine bleach | Oxygen bleach only (no chlorine on pale stone) | Oxygen bleach or neutral cleaner |
| General grime/haze | Neutral cleaner or mild acid-based cleaner | Neutral cleaner only (no acid) | Neutral cleaner |
| Efflorescence | Buffered acid-based cleaner | Neutral cleaner only (no acid) | Mild acid or neutral cleaner |
| Grease | Alkaline degreaser | Alkaline degreaser (test first) | Alkaline degreaser |
| Pet stains | Enzymatic cleaner | Enzymatic cleaner | Enzymatic cleaner |
If you're also dealing with broader staining issues across your patio surface (not just the joints), it's worth looking at dedicated patio cleaners for your specific material. If you want to see how these chemistry and compatibility tips translate into real purchase decisions, a patio stone cleaner review can help you compare brands for your specific stone type and joint material. Different cleaners and cleaning methods are covered in detail for sandstone, Indian sandstone, brick, and general patio slabs in related guides on this site. For the best patio cleaner for Indian sandstone, you want a pH-neutral option that won't etch or damage the stone finish.
Common problems and how to avoid them
Scratches on pavers or stone
This almost always comes down to using a brush that's too aggressive for the surface. Steel wire on natural stone is the most obvious culprit, but even stiff nylon on polished surfaces can leave marks if you're pressing very hard. The fix is to match bristle stiffness to surface hardness and let the cleaning chemistry do more of the work so you don't need to press as hard.
Bristles shedding into joints
Cheap brushes, particularly unbranded ones, are the main offender here. The bristles aren't secured properly and start shedding after the first few uses. Stick with established brands and check reviews for mentions of shedding before you buy. If you do get bristles in joints, a damp cloth pressed along the joint followed by a rinse usually pulls them out.
Stains that won't lift
If you're scrubbing and nothing is shifting, the most likely issue is a mismatch between your cleaner and the stain type. Alkaline grime won't respond to alkaline cleaners. Acid-based stains won't shift with acid products. The second most common issue is insufficient dwell time, the cleaner needs time to break down the stain before the brush can lift it. The third possibility is that the stain has penetrated deeply into a porous surface, in which case you may need multiple treatments over several days rather than one heavy-handed session.
Polymeric sand coming loose during cleaning
This is a specific problem for patios with polymeric jointing sand. High-pressure rinsing directed straight into joints is usually the cause, not the brush itself. Keep the rinse angle shallow and the pressure moderate. Also avoid acid-based cleaners in polymeric sand joints unless the product is specifically formulated for this use, the acid can degrade the polymer binders. Sakrete's guidance on applying and maintaining PermaSand emphasizes removing all residue with a fine bristle brush before wetting, which underlines that the brush stage comes before water, not after.
Grout haze or white residue after cleaning
If you see white haze appearing after cleaning rather than before, it's usually dried cleaning solution or disturbed polymeric sand residue that wasn't fully rinsed. The prevention is keeping the surface wet throughout the process and rinsing completely before the solution dries. If haze is already there, MAPEI recommends a dedicated cement grout haze remover with a soft brush or white scrubbing pad, and again, on natural stone specifically, use a neutral cleaner rather than any acid-based haze product.
Rinsing, sealing, and keeping joints cleaner for longer
Getting the joints clean is satisfying, but the maintenance steps afterwards are what determine how quickly you're back on your knees with a brush again.
Rinsing properly
Rinse methodically from one end of the patio to the other. Don't assume a quick spray is enough, cleaning solution left in joints will dry to a haze or continue to work on the joint material, which is not what you want. For patios with polymeric sand, keep the rinse pressure low enough that you're not washing sand out of the joints. A shower-style spray head rather than a jet nozzle is the right choice here.
When and whether to seal
Sealing patio joints and pavers after cleaning significantly slows re-staining. The seal creates a barrier that stops mold, algae, and grime from penetrating the surface. But timing matters. You need the surface completely dry before applying sealer, applying over wet pavers causes white blushing and milky spots, which ServeOn Sealants specifically warns about. For newly re-pointed polymeric sand joints, allow 24–72 hours of curing time before sealing (H&C Concrete and Unilock both reference this range depending on conditions). If your patio is in a shady or cooler spot, Unilock suggests allowing up to 24 hours extra drying time.
For grout/joint sealer specifically, MAPEI recommends waiting at least 24 to 72 hours after grout cures before applying sealer. Once sealed, paver sealer typically lasts 3 to 5 years before needing reapplication, though climate and foot traffic affect this. Alliance Gator also makes the useful distinction between first-time sealers and resealers, if your patio has been sealed before, the prep and product type may be different.
Ongoing maintenance to slow re-staining
- Sweep the patio regularly to stop organic debris sitting in joints and feeding mold and algae growth.
- Rinse with plain water every few weeks in wet or shady conditions. This disrupts the early stages of biogrowth before it becomes established.
- Apply a diluted oxygen bleach solution once or twice a year as a preventative treatment, especially going into autumn and winter.
- Check polymeric sand joints annually. If sand is washing out or joints are crumbling, top them up before weeds establish themselves.
- Keep a stiff nylon grout brush handy for spot-cleaning. It takes five minutes to scrub a few joints when you notice early discoloration — that's much easier than a full patio clean once staining has built up.
What to buy and what to skip: a quick checklist
Here's how to narrow down your brush choice based on your exact situation.
| Your Situation | Buy This | Avoid This |
|---|---|---|
| Concrete or brick patio, general grime | Stiff crimped nylon crevice or grout brush (QEP, Carlisle Flo-Pac) | Steel wire brush |
| Natural stone (sandstone, limestone, travertine) | Soft to medium nylon brush, purpose-built for delicate surfaces | Steel wire, stiff nylon brushes, acid-based cleaners |
| Porcelain pavers | Medium nylon grout brush (QEP or similar) | Steel wire |
| Tight narrow joints | Toothbrush-style nylon brush (Lavex or similar) | Wide flat scrub brushes |
| Corners and edges | Triangle-head grout brush (polyester or nylon) | Round or flat brushes |
| Long patio session | Brush with ergonomic handle and thumb rest | Short-handled brushes without grip support |
| Weed removal from joints | Steel wire paver brush for this step only | Nylon brush (not effective for weed extraction) |
| Polymeric sand joints | Soft nylon brush, low-pressure rinse | Steel wire, high-pressure jet rinse, acid-based cleaners |
The most common mistake people make is buying one brush and one cleaner and expecting it to handle every situation on every part of their patio. If you want the best patio slab cleaner, follow the same idea and choose a patio-specific cleaner that matches your surface and stain type one brush and one cleaner. A £5 nylon grout brush from a hardware store will do most of what you need on concrete or brick pavers.
But if you have natural stone joints with mold and you clean them with a chlorine bleach product and a stiff brush, you're going to end up with etched stone and bleached-out color. Match the tool and the chemistry to the surface, give the cleaner enough dwell time to actually work, keep everything wet until you rinse, and let the patio dry completely before you seal. That's the process that gets lasting results.
FAQ
Can I use a regular bathroom grout brush for patio joints?
You can try, but most bathroom grout brushes are sized for 3mm lines and tighter grout geometry. Patio joints are wider, often dirtier, and commonly contain polymeric sand, so you usually want a longer handle, an angled or crevice head, and nylon that can scrub without scratching. If the brush is too wide, you will miss portions of the joint and end up with uneven cleaning.
What bristle stiffness should I choose for pavers versus natural stone?
For concrete and most unpolished pavers, stiff nylon is typically the safe balance between cleaning power and surface protection. For polished pavers, tile-like porcelain finishes, and softer natural stones, go softer and let dwell time and cleaner chemistry do more work. Pressing hard with stiff nylon on polished surfaces can leave visible scuffs even if the bristles are nylon.
How do I prevent bristles from shedding into polymeric sand joints?
Look for reviews that specifically mention bristle retention, not just “good scrubbing.” Before the main job, rinse the brush under running water and rub the bristles with your hand over a clean towel, if you see fuzz or loose strands, do not use it. During scrubbing, avoid aggressive back-and-forth motions that flex the bristles more than necessary.
Is it okay to use a steel wire brush to remove mold and algae?
Steel wire is better treated as a weed and debris scraper than an algae or mold scrubber. It can scratch stone and can leave metal residue that may rust on concrete. For mold and algae, stick to oxygen bleach with proper dwell time, then switch to a nylon grout brush for the scrubbing stage.
How long should the cleaner sit before scrubbing?
For oxygen bleach and most peroxide-based patio treatments, aim for about 10 to 15 minutes while keeping the surface wet. If the patio dries early, the cleaning solution may stop working and you can end up with incomplete joint cleaning or haze. For established stains, plan on repeating rather than extending dwell time with the wrong chemistry.
What should I do if my joints look clean but I see haze after drying?
White haze usually comes from leftover residue that was allowed to dry in the joint, or from polymeric sand disturbed during rinsing. Re-clean with the appropriate haze remover for cement haze only if your surface is compatible, otherwise switch to a gentle neutral option on natural stone. In future sessions, keep the surface wet during dwell time and rinse thoroughly with moderate pressure.
How should I rinse if I have polymeric jointing sand?
Use shallow rinse angles and moderate, not jet-level, pressure. A shower-style spray head is typically safer than a narrow nozzle. If you see the jointing sand washing out or gaps forming, stop, let it settle, and re-evaluate pressure and brush method before continuing.
Can I seal polymeric sand joints right after cleaning?
Not immediately. Polymer-based joints need curing time first, commonly 24 to 72 hours depending on conditions, and shaded patios or cooler weather can require extra drying time. Also ensure the joints are fully rinsed and dry, sealing over moisture can cause whitening or milky spots.
Should I use acid cleaners for efflorescence on concrete pavers?
Sometimes, but use buffered, low concentration products and keep the surface wet with careful rinsing. Acid can degrade polymeric joint binders if you have sand-filled joints, so it is not a universal fix. If you have limestone or other acid-sensitive natural stone, avoid acid-based treatments entirely and choose a neutral approach.
My patio has both grease stains and mold, which cleaner should I use first?
Start with the problem that requires bleach or oxidation for organic growth, then move to grease afterward. Mixing strong chemistries without rinsing can reduce effectiveness or create residue. After each stage, rinse thoroughly and allow the surface to dry before switching to the next product type.
Are enzymatic cleaners safe for pets and still effective in patio joints?
They are generally safer than bleach-based products once dried, because they target uric acid crystals rather than relying on oxidation. For patio joints, apply generously, keep dwell time around 10 to 15 minutes, then scrub and rinse well. If the odor returns quickly, you may need repeat treatments over a couple of days because urine can penetrate deeper into porous joint material.
What’s the fastest way to find the right brush when shopping based on reviews?
Filter reviews for three specific cues: mention of bristle shedding, fit for wide joints, and whether users used it on polymeric sand or pavers. Also check whether the brush head shape matches your joint style, angled heads work better for getting into edges without pressing sideways.
Next Article
Best Brush in Patio Grout: Choose the Right Scrubber Today
Find the best brush for patio grout and match bristles and shape to concrete, brick, stone, porcelain. Remove mold fast.
