Yes, you can pressure wash most patios, but whether you should depends on what your patio is made of and what you're trying to clean. Concrete and brick handle pressure washing well. Natural stone, sandstone, slate, and porcelain need a much lighter touch, and some surfaces are better cleaned without a pressure washer at all. Get the surface and the problem matched to the right approach first, and you'll clean it faster without causing damage you'll regret later.
Should I Pressure Wash My Patio? Safe Guide by Material
Rhea Lang
1 Jun 2026
Quick decision: when pressure washing helps vs. hurts

Here's the honest version of this decision. Pressure washing is genuinely useful when you have a hard, dense surface covered in algae, moss, general grime, or surface staining that scrubbing won't shift. It's the wrong call when the surface is soft or porous, already cracked or spalling, sealed with a finish you want to keep, or held together with loose mortar or sandy jointing.
| Situation | Pressure wash? | Why |
|---|---|---|
| Concrete patio with algae/moss/grime | Yes | Dense surface handles pressure well |
| Brick with general dirt and organic growth | Yes, with care | Lower pressure to protect mortar joints |
| Natural stone (limestone, sandstone, travertine) | Caution / low PSI only | Soft stone erodes under high pressure |
| Porcelain pavers | Yes, up to 1,500 psi | Hard surface but follow manufacturer guidance |
| Cracked, spalling, or scaling concrete | No | Pressure forces water into cracks and worsens damage |
| Freshly sealed or coated surface | No | Pressure strips the sealer you just paid for |
| Loose or deteriorating mortar/grout joints | No | Blasts out jointing material, destabilises the surface |
| Patio with rust, grease, or pet stains | Partial — cleaner needed first | Pressure alone won't lift these; chemical pre-treatment does the work |
One thing I always check before turning on a pressure washer: run your finger along the mortar joints. If sandy material comes out easily, stop. High pressure will make a bad situation much worse, and repointing is a lot more expensive than a bottle of cleaner and a stiff brush.
Identify your patio material and the cleaning problem
Getting this right saves you a lot of grief. If you are wondering can you pressure wash patio umbrella, start by identifying what material your umbrella frame and fabric are made of because the safer pressure level depends on whether it is more like concrete and brick or more like natural stone. Your surface material and the type of buildup you're dealing with dictate everything: how much pressure is safe, which chemicals actually work, and whether you even need a pressure washer.
Surface types at a glance
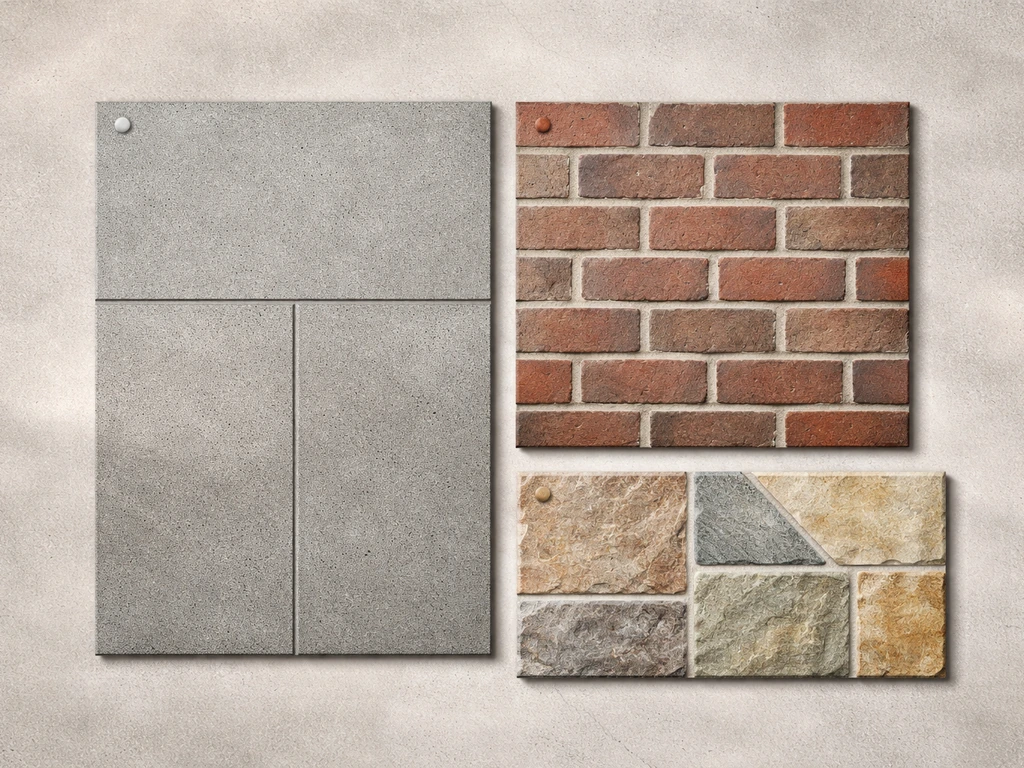
- Concrete: dense, durable, tolerates higher pressure. Most DIY-friendly surface to pressure wash.
- Brick: tougher than it looks, but the mortar joints are the weak point. Age matters here.
- Sandstone and limestone: soft, porous, and easy to erode or etch. Treat with serious caution.
- Slate: harder than sandstone but can still flake under high pressure on the surface layers.
- Travertine: a type of limestone, very reactive to acids, and soft enough to damage easily.
- Porcelain pavers: hard, non-porous, and forgiving, but grout lines still need protecting.
- Natural stone (general): ranges widely in hardness; if in doubt, assume low pressure is safest.
Common buildup types
- Green algae: surface-level, often slippery, responds well to chemical treatment plus rinsing.
- Black algae and mould: deeper-rooted, needs sodium hypochlorite or specialist biocide, not just water.
- Moss: thick growth, physically needs removal before chemical treatment reaches the surface.
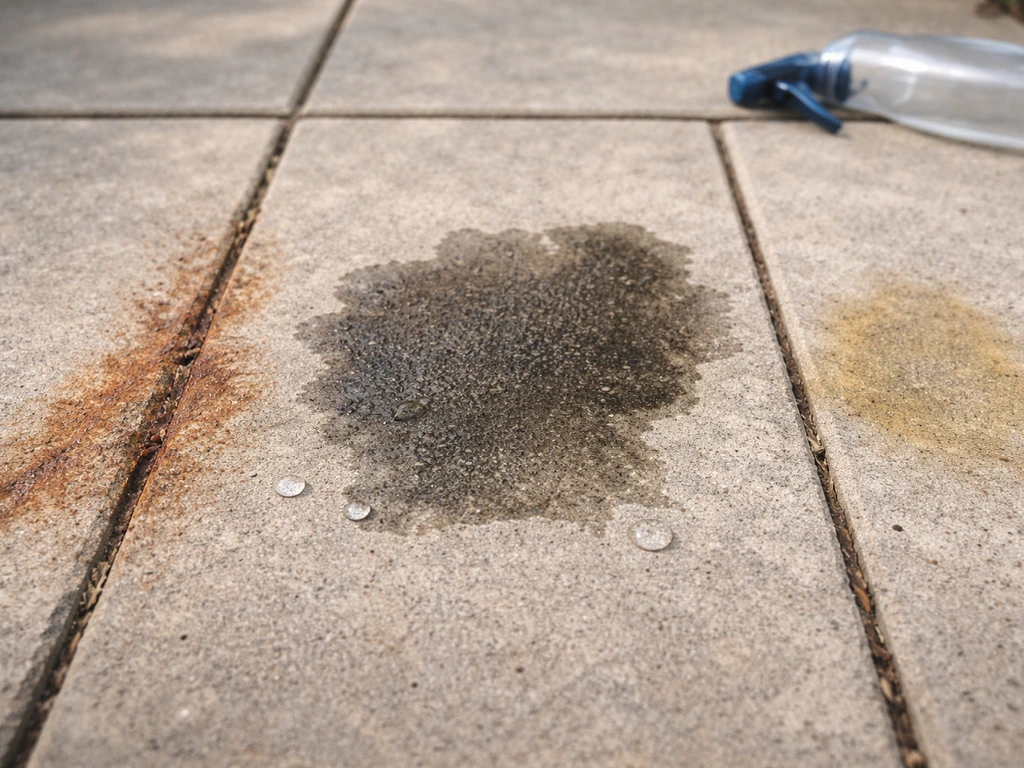
- Rust stains: iron deposits from furniture or water. Needs an oxalic acid-based cleaner, not pressure.
- Grease and cooking oil: hydrophobic, so water alone is useless. Degreasers break it down first.
- Pet urine stains: enzyme-based cleaners are the only reliable fix. Pressure water alone spreads it.
- General grime and dirt: usually the easiest problem. Pressure washing on its own is often enough.
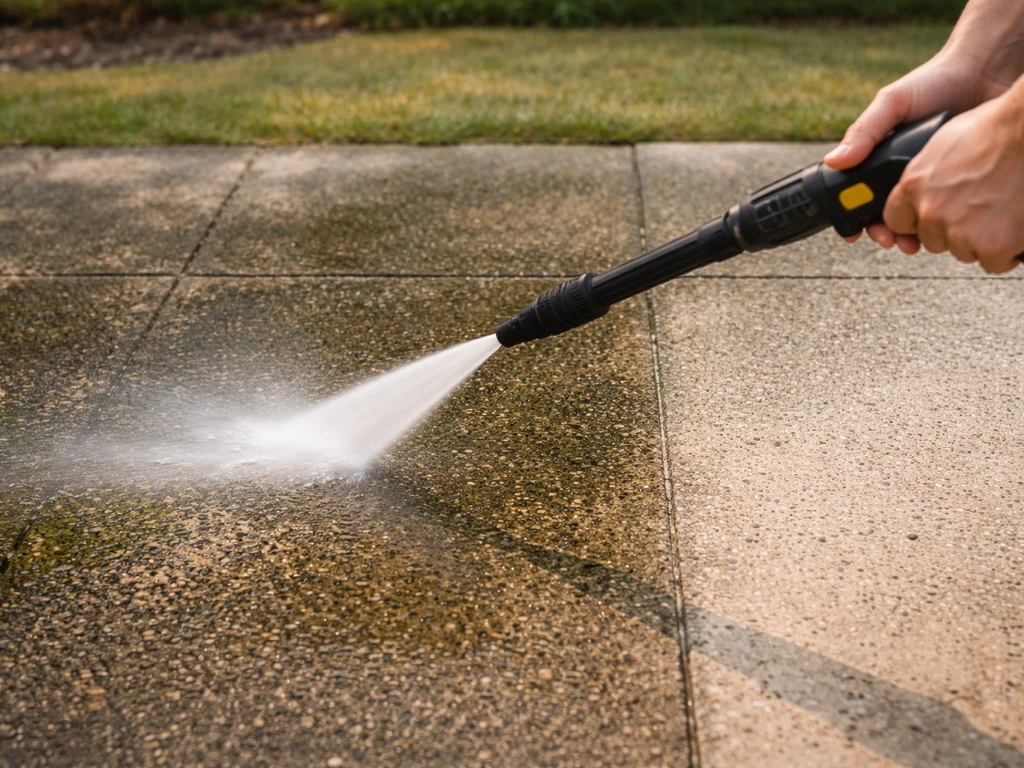
How to pressure wash safely: equipment, PSI, nozzles, distance, and technique
Getting the settings right is the difference between a clean patio and a damaged one. I've seen people strip mortar joints clean off brick by using the wrong nozzle at too close a range. Here's what actually works.
What pressure (PSI) to use
Most homeowner electric pressure washers run between 1,300 and 2,000 psi, and that's usually plenty. For concrete, up to 2,000 psi is generally fine. For brick, stay in the 1,200 to 1,500 psi range to protect the mortar. For natural stone, the safe window is 800 to 1,000 psi, using a wide fan nozzle. Porcelain pavers can handle up to 1,500 psi according to manufacturer guidance. Avoid running anything over 3,500 psi on outdoor paving surfaces, and if your concrete is already cracked or unsealed, even lower pressure can cause damage.
Nozzle selection
The nozzle angle controls how concentrated the spray is. A 0-degree (red) nozzle fires a pencil-thin jet that can cut into surfaces and should essentially never be used on patios. The 15-degree (yellow) nozzle is for tough paint stripping and heavy-duty concrete cleaning, not general patio work. For most patios you want the 25-degree (green) nozzle as your working tip, and the 40-degree (white) wide-fan nozzle for rinsing or for more fragile surfaces like softer stone. The soap/low-pressure nozzle (usually black) is for applying detergent at low pressure before you rinse.
Distance and angle
Keep the nozzle around 30 cm (about 12 inches, or one foot) from the surface as a starting point, but for natural stone or older brick, step that back to around 90 cm (roughly 3 feet) and let the wider fan tip do the work. Always hold the wand at a consistent angle of roughly 45 degrees to the surface, not directly perpendicular. A straight-on blast concentrates force and can drive water into cracks or blast out grout and jointing sand.
Technique
- Sweep and clear the patio first. Remove all furniture, pots, and loose debris. Cover nearby plants.
- Pre-wet the surface with a low-pressure rinse if applying detergent, or just to dislodge loose dirt.
- Apply detergent using the black soap nozzle, working in sections so it doesn't dry out before you rinse.
- Switch to your 25-degree or 40-degree nozzle and work in consistent overlapping strokes, moving in one direction like you're mowing a lawn.
- Keep your movements smooth and steady. Stopping in one spot concentrates the pressure and risks damage.
- Rinse from the highest point of the patio downward so dirty water doesn't flow back over cleaned areas.
- Keep power connections away from runoff water. If the unit trips a circuit breaker, have a qualified electrician check it before using it again.
When to skip pressure washing and use alternatives
Sometimes the gentler approach isn't just safer, it's actually more effective. This especially applies when the buildup is biological (mould, algae, moss) because chemistry kills the organism at the root, while pressure just physically removes what's on the surface and leaves the spores behind to regrow. If your patio is green again within a few weeks of pressure washing, this is probably why.
Soft washing
Soft washing uses low water pressure (well under 500 psi) combined with a sodium hypochlorite and surfactant solution to do the cleaning work chemically rather than mechanically. The solution dwells on the surface for 10 to 20 minutes, kills mould, algae, and moss at the root, and then gets rinsed off at low pressure. It's the professional standard for treating organic growth on sensitive surfaces, and it genuinely outperforms pressure washing alone for regrowth prevention. The typical active bleach concentration at the point of application is roughly 0.5% to 3%, depending on the surface and severity.
Scrubbing with cleaners
For smaller areas, cracked surfaces, or anything too fragile for even low-pressure washing, a stiff-bristle brush with the right cleaning solution is often the most controlled approach. You can soak oxygen bleach solution on algae for at least 10 minutes (keeping it wet so it doesn't evaporate), then scrub and rinse. It's slower but you're in complete control of where the chemistry goes and how hard you're working the surface.
Surfaces that should almost always be cleaned without pressure
- Sandstone: too soft and porous. Even moderate pressure will erode the surface texture and open up pores to more future staining.
- Travertine: porous limestone that reacts badly to acids and physically damages under pressure.
- Any surface with active cracks, spalling, scaling, or blistering: fix these first before any wet cleaning.
- Recently sealed patios: pressure washing strips sealers. Wait at least six months after sealing before any pressure washing.
- Old brick with crumbling mortar: get the joints repointed first.
Product and chemical add-ons for stubborn stains
Pressure water alone doesn't solve specific stain problems. Here's what actually works for each type, and a few honest notes on what doesn't.
Mould and black algae
Sodium hypochlorite (bleach) is the most effective active ingredient here. Diluted to around 1 to 3% active concentration, applied with dwell time, it kills the organism rather than just removing its visible surface layer. Use a surfactant alongside it to help the solution cling to the surface rather than running off. Don't let it dry before rinsing, especially on stone. Many commercial patio biocides use this chemistry with the dilution and surfactant already formulated in.
Green algae and moss
Oxygen bleach (sodium percarbonate) is a gentler alternative that works well on green algae, particularly if you want to avoid chlorine bleach near plants or on lighter-coloured stone. Soak it on the surface for at least 10 minutes, keep it wet, then scrub and rinse thoroughly. For thick moss, physically remove as much as you can first (a stiff brush or plastic scraper), then apply the biocide to what remains. Pressure washing over thick, unbroken moss without treatment first just scatters it.
Rust stains
Rust stains come from metal furniture legs, plant pots, or iron-rich water. Pressure washing does nothing to them. You need an oxalic acid-based rust remover or a specialist rust stain cleaner for outdoor surfaces. Apply it carefully according to the label, and avoid using acid-based products on limestone, travertine, or marble-type stones because acid causes surface etching, creating permanent dull marks. On acid-sensitive stones, a poultice approach is much safer.
Grease and cooking oil
Grease is hydrophobic, which means water pressure simply moves it around rather than lifting it. Apply a degreaser or alkaline concrete cleaner first, work it into the stain with a brush, and give it dwell time before rinsing. Products like Simple Green's concrete and driveway cleaner work on this class of stain, though the product itself notes you should test on deteriorated or sealed surfaces before proceeding. Simple Green also recommends testing its concrete and driveway cleaner on deteriorated or sealed surfaces before proceeding Simple Green's concrete and driveway cleaner work on this class of stain.
Pet urine stains and odour
Enzyme-based cleaners are the only reliable fix for pet urine. They break down the uric acid crystals that cause both the stain and the persistent smell. Bleach masks the odour temporarily but doesn't eliminate the source. Apply the enzyme cleaner, keep it wet, and allow at least 10 to 15 minutes of dwell time before rinsing. Pressure washing without pre-treatment just drives the contamination deeper into a porous surface.
Surface-specific do's and don'ts
Concrete
Concrete is the most forgiving patio surface for pressure washing. Up to 2,000 psi is generally safe for sound, sealed concrete. Always check for cracks, scaling, spalling, blistering, or delamination first. These are signs of unsound concrete and need repair before any wet cleaning. Once pressure washed and dry, unsealed concrete will stain again quickly, so sealing afterwards is worth doing.
- Do: use a 25-degree nozzle, keep consistent distance, pre-treat stains with appropriate cleaner.
- Do: repair cracks and patch spalling before cleaning.
- Don't: use a 0-degree nozzle on concrete surfaces.
- Don't: pressure wash unsound, cracked, or scaling concrete without addressing the damage first.
Brick
Brick patios are durable but the mortar joints are vulnerable. Keep pressure under 1,500 psi, use a 25 or 40-degree nozzle, and keep the wand moving. The real danger is holding the spray over a joint for too long, which erodes the mortar or blasts out jointing sand entirely. Check joints after cleaning and re-sand or repoint any that look depleted. If you have an older brick patio with already-soft mortar, soft washing is a much safer choice.
- Do: test a small area first, especially on aged brick.
- Do: recheck and resand joints after every pressure wash.
- Don't: direct the spray straight into mortar joints.
- Don't: use pressures above 1,500 psi on traditional or old brick.
Natural stone (general) and pavers
Natural stone varies enormously in hardness. Harder stones like granite or basalt handle pressure much better than softer calcareous stones. For paver installations, Techniseal's guidance is to work around 1,500 psi to prevent damage. Lower-pressure pacinlock guidance confirms that anything over about 2,000 to 3,000 psi is unnecessary and increases risk, and that lower pressure is easier to control and less likely to cause problems.
Stick to fan nozzles (40-degree) and keep your distance for any natural stone. If you're working on a paver patio, checking out the specific guidance on power washing paver patios is worth your time. If you’re wondering can you power wash patio cushions, the safest route is usually to remove cushion covers and treat them according to the fabric care instructions rather than blasting them with pressure.
- Do: stay at 800 to 1,500 psi maximum depending on stone hardness.
- Do: use a fan-tip nozzle to reduce direct impact.
- Don't: use acid-based cleaners on limestone, travertine, marble, or any calcareous stone.
- Don't: allow bleach or citric acid products to sit on acid-sensitive stone.
Sandstone and slate
Sandstone is soft and erodes easily. High pressure will open up the pore structure, roughen the surface texture, and make it stain faster in future. I'd keep pressure washing off sandstone entirely if possible, and use soft washing with a gentle biocide instead. Slate is harder but can still flake at the surface layers under direct impact from a concentrated nozzle. If you do use a pressure washer on slate, keep it to 800 psi maximum with a 40-degree wide-fan nozzle at arm's length.
- Do: use soft washing or hand scrubbing as the primary cleaning method for sandstone.
- Do: use pH-neutral, non-acidic cleaners on both materials.
- Don't: use pressure washers on sandstone if you can avoid it.
- Don't: use 15-degree or 0-degree nozzles anywhere near either surface.
Porcelain
Porcelain pavers are actually one of the more pressure-washer-friendly premium surfaces. The tile itself is very hard and non-porous. Manufacturer guidance generally allows up to 1,500 psi, with a fan-tip nozzle. The grout lines are still the weak point, so keep the spray moving and avoid dwelling on them. Sweep or blow off debris first. For stubborn stains, a pH-neutral cleaner applied before rinsing is usually all you need.
- Do: keep pressure to 1,500 psi maximum and use a fan nozzle.
- Do: follow up with the sealing product the manufacturer recommends if joints need protection.
- Don't: use abrasive or highly alkaline cleaners that can affect the grout.
- Don't: use a zero or 15-degree nozzle on the grout lines.
Aftercare and prevention to keep it clean longer
Cleaning the patio is only half the job. What you do in the next 48 to 72 hours and through the rest of the season has a big impact on how long it stays clean.
Right after cleaning
- Give the surface a thorough final rinse with clean water to remove all detergent residue, especially on stone and brick where residue can cause efflorescence or discolouration.
- Let the surface dry completely before placing furniture back on it. For most patios this means at least 24 to 48 hours in dry conditions.
- Check mortar joints and grout lines. Resand or repoint anything that looks thin or depleted.
- Inspect for any cracks or damage that the cleaning revealed. Deal with repairs before sealing.
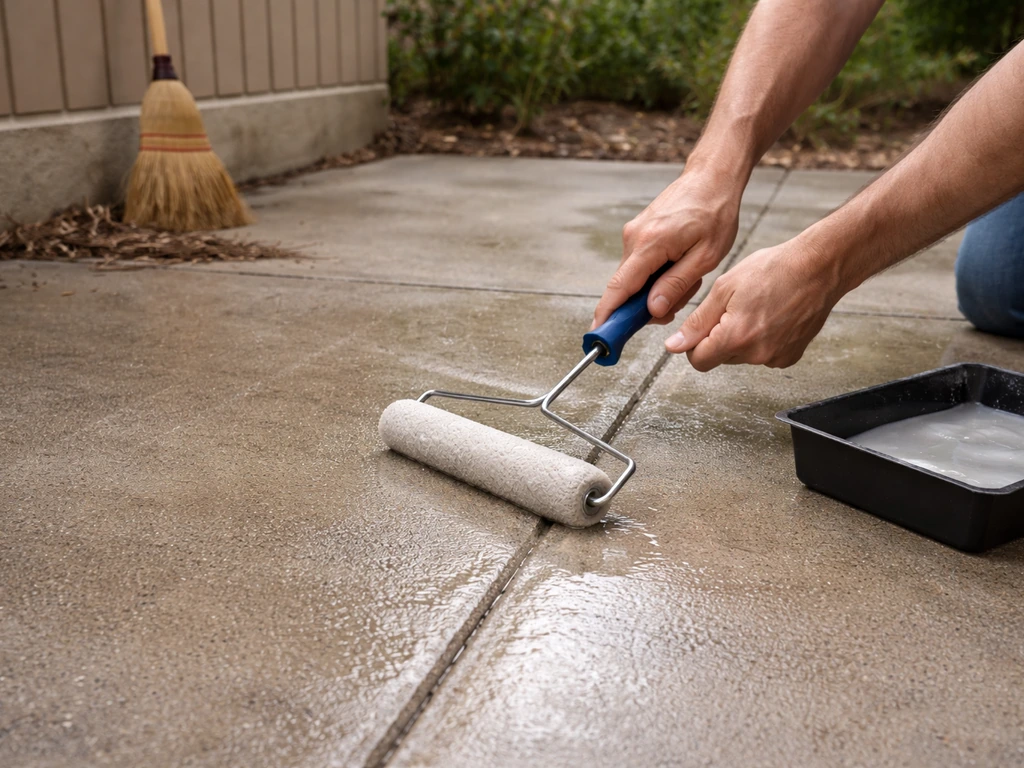
- Apply a suitable sealer once the surface is completely dry if the surface benefits from one (concrete, brick, most natural stone). Sealing too early traps moisture and can cause clouding or adhesion failure.
Sealing: worth it for most surfaces
A good sealer significantly slows down organic regrowth and makes the surface easier to clean next time. It also protects against staining from spills, rust marks from furniture, and freeze-thaw damage on porous materials. Use a sealer matched to your surface type: penetrating/impregnating sealers for natural stone and brick, film-forming sealers for concrete where you want enhanced colour or a surface sheen. One caveat: don't pressure wash a sealed surface until at least six months after applying the sealer, or you'll strip it straight back off.
Prevention habits that actually work
- Sweep or blow the patio regularly, at least every couple of weeks. Leaf and debris buildup is what feeds algae and moss growth.
- Don't leave wet plant pots, rubber-backed mats, or metal furniture in fixed positions for long periods. These create perfect conditions for staining and biological growth.
- Apply a biocide treatment (a diluted sodium hypochlorite or specialist patio biocide spray) once or twice a year as a maintenance dose, rather than waiting for visible growth.
- Improve drainage if water pools in low spots after rain. Standing water is the single biggest driver of algae and moss growth.
- Trim back overhanging trees or shrubs that shade the patio and drop debris. Shaded, damp surfaces grow algae and moss much faster than well-lit, well-drained ones.
- After cleaning patio furniture, make sure you're not reintroducing grime or mildew straight back onto a freshly cleaned surface.
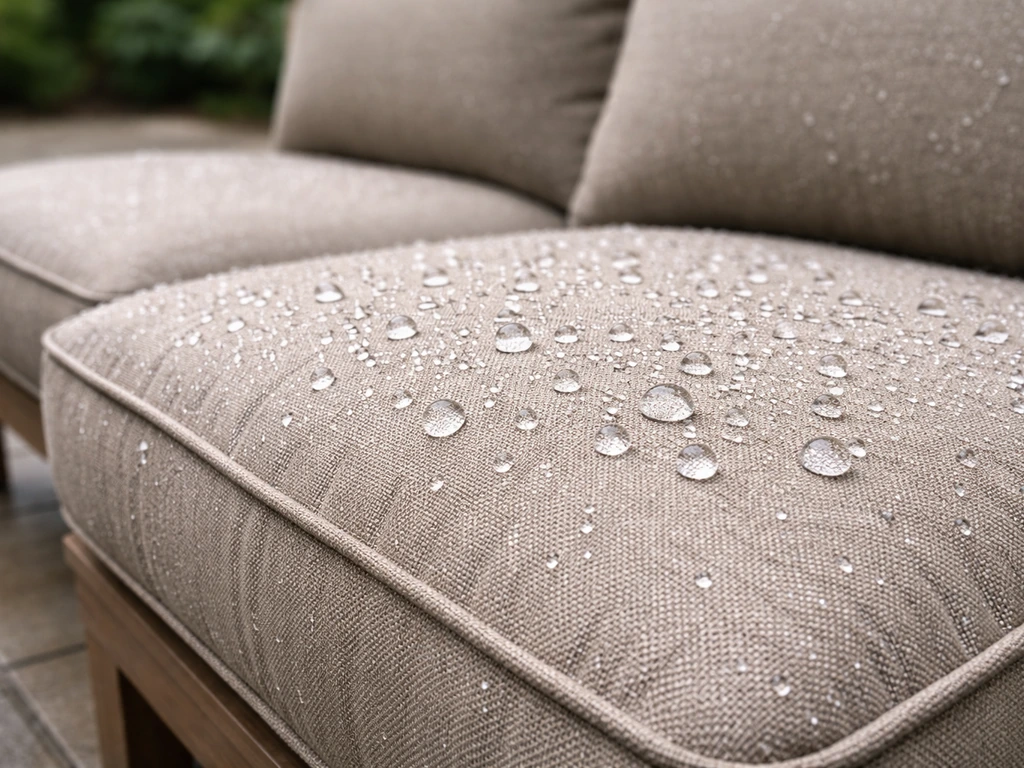
Done right, a properly cleaned and sealed patio should stay looking clean for a full season with just regular sweeping and an occasional biocide spray. A waterproofing spray for patio cushions can help repel moisture and stains so your seating stays fresher between cleanings. The deep clean becomes an annual or biennial job rather than something you're tackling every few months.
FAQ
My patio is sealed, should I still pressure wash it? (How do I know when it is safe?)
If your patio has already been treated with a sealer, you can still clean it, but a pressure washer is usually the wrong first step. Wait at least six months after sealing before using a pressure washer, then switch to a biocide or pH-neutral cleaner if the goal is mainly algae or grime.
What if my patio has cracks or flaking, can I still pressure wash it?
If you see cracks, scaling, spalling, blistering, or sections that look like the top layer is coming off, stop and plan repairs first. Wet cleaning can push water into already-failing areas and accelerate delamination, especially on concrete and older brick.
Will pressure washing work if the patio is covered in thick moss or slimy algae?
Yes, but only if you treat it as a two-step process. Remove loose debris first, then clean with the correct chemistry at low dwell time, and only pressure rinse afterward (or use soft washing). Pressure washing straight over heavy organic mats can scatter algae and make regrowth worse.
If I power wash and everything looks clean, why does it turn green again quickly?
Don’t. For biological growth, the surface looks cleaner after blasting, but spores and rooted material remain and regrow. The more effective approach is to use a biocide (often chlorine or oxygen based) with dwell time, then rinse, and finally re-seal if appropriate.
After pressure washing brick, should I check or redo the jointing sand?
For uneven jointed brick or older mortar, check joints before and after cleaning. If you notice sand is missing or mortar looks eroded, plan to re-sand with appropriate jointing sand or repoint. This is a key step people skip, and it affects both appearance and long-term stability.
What should I do about plants, grass, and runoff after using patio cleaner or bleach?
Rinse thoroughly with clean water after any biocide, especially bleach-type products, and avoid letting treated runoff sit in plant beds. If you need to protect landscaping, apply on a calm day, keep solution off foliage when possible, and rinse promptly once dwell time is complete.
I have rust stains from furniture, will pressure washing remove them?
Not if the issue is rust. Pressure washing removes surface dirt, but rust is embedded metal oxidation. Use an oxalic-acid rust remover or a dedicated outdoor rust stain product, and avoid acid-based cleaners on acid-sensitive stones like limestone, travertine, or marble-type surfaces.
If there are pet urine stains, should I pressure wash first or use an enzyme cleaner?
Use enzyme cleaners for pet urine, and treat it before you rinse with water. Pressure washing alone often drives contamination deeper into porous material, so you need pre-treatment, enough dwell time, and a proper rinse to prevent lingering odor.
What are common mistakes that ruin grout or mortar when power washing a patio?
Yes, you can damage grout and jointing sand by holding the nozzle too close or letting it dwell in one spot. For brick and pavers, keep the wand moving, use a fan nozzle (25 or 40 degree depending on surface fragility), and maintain adequate distance to reduce erosion.
How do I choose the right pressure and nozzle if I’m not sure how my patio will react?
Test in a small, hidden section first, but also verify you’re using the right nozzle for the job. If you see darkening, roughened texture, or joint erosion, stop and switch to a gentler nozzle and lower pressure, or move to soft washing.
Next Article
Best Waterproofing Spray for Patio Cushions: How to Choose and Use
Choose the best waterproofing spray for patio cushion fabric and apply it step by step for lasting rain and mildew prote