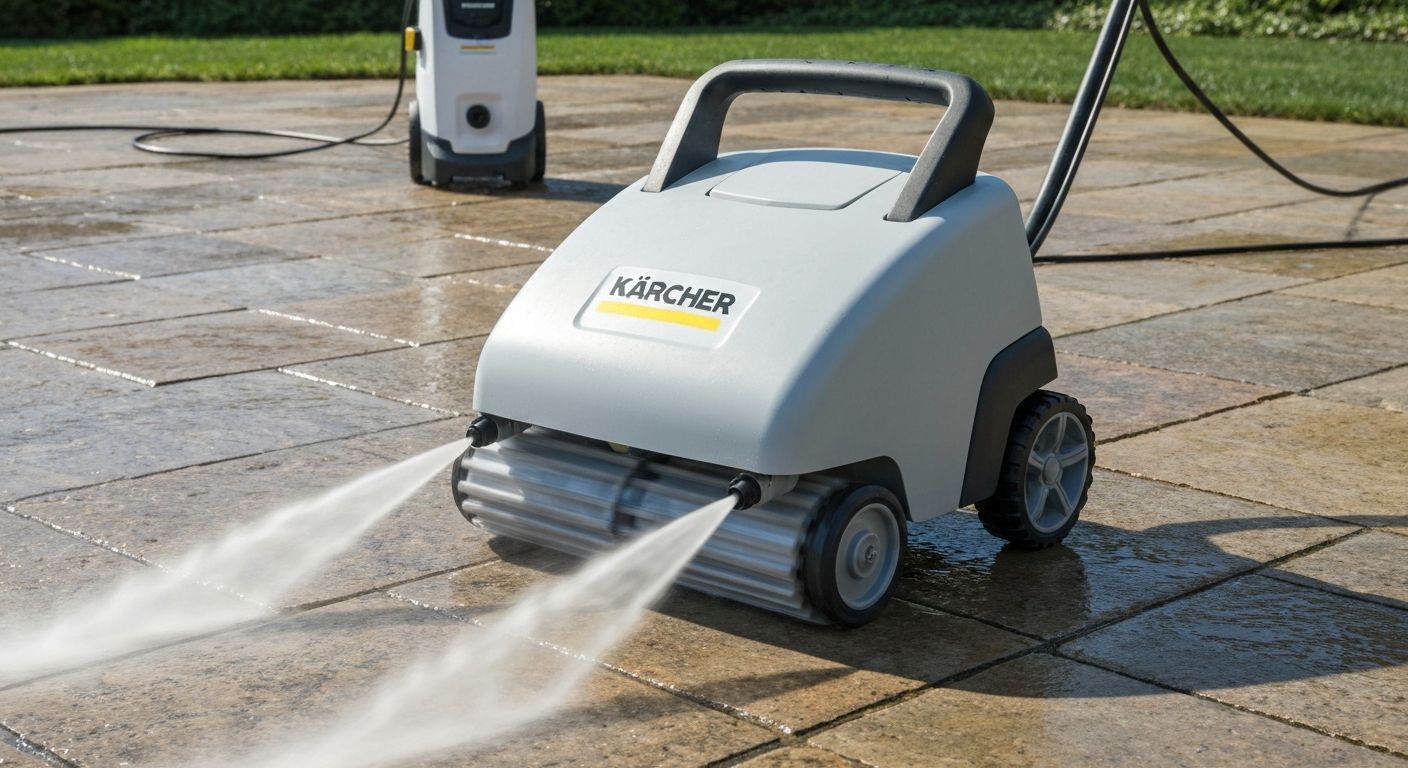
Attaching a Kärcher patio cleaner is straightforward once you know the connection system your machine uses. On most K2, K3, and K4 models made in the last decade, you slot the patio cleaner's lance into the trigger gun using the Quick Connect coupling, press it until it clicks, then connect the short detergent hose (if your model has one) to the detergent inlet on the machine. That's the core of it. The rest of this guide fills in the model-specific differences, the parts you need to have on hand, and the checks that stop you from cracking a tile or blowing a connector on the first run.
How to Attach Kärcher Patio Cleaner: Step-by-Step Guide
Rhea Lang
18 Jul 2026
What this guide covers and who it's for
This is a practical attachment and setup guide for homeowners who own a Kärcher K-series pressure washer (K2, K3, or K4 being the most common domestic machines) and want to connect a Kärcher T-Racer or T-series patio cleaner attachment. I've written it to cover the full process from unboxing the accessory through to your first cleaning pass, including safety checks, model-specific quirks, detergent connection, surface settings, and what to do when something doesn't go right. If you've already got the attachment connected and just need to know why it isn't spinning, the troubleshooting table further down will help. If you're using a K2 specifically, there are also dedicated articles covering the K2 setup and the K3 and K4 setups in more detail if you want to go deeper on a single machine.
Tools and parts checklist before you start
Before you carry anything outside, run through this list. I've been caught out more than once by a missing O-ring or a misplaced cleaning needle, and it always happens when you're already in waterproof trousers on the driveway.
- Kärcher T-Racer or T-series patio cleaner body (T5 / T450 / T350 / T550 depending on your kit)
- Extension lance/wand (usually supplied with the patio cleaner or the pressure washer kit)
- Trigger gun (the handle that connects the hose to the accessory)
- High-pressure hose with M22 x 1.5 connectors at each end
- Quick Connect adapter or M22 screw adapter if your gun and lance use different coupling types
- Detergent suction hose (the short tube that draws liquid cleaner from a bottle into the machine)
- O-ring set (Kärcher order no. 2.640-729.0) — keep a spare set in the box, they are cheap and a cracked or missing O-ring causes leaks at every connector
- Vario joint (order no. 2.640-733.0) — optional but useful if you find the angle between gun and patio cleaner feels awkward or is stressing the connector
- Cleaning needle (supplied with the T-Racer) to clear blocked nozzles
- Kärcher stone, patio, or Patio & Deck RM 564 detergent if you plan to apply cleaner through the machine
- Eye protection and waterproof footwear
A quick note on O-rings: the replacement set (2.640-729.0) covers the couplings used across the domestic K-series range, so one set covers all the connection points on a typical K2, K3, or K4 setup. Check every male connector before attaching anything. If the rubber looks cracked, flattened, or is missing entirely, replace it before switching the machine on.
Compatibility: which machines and patio cleaner models work together
Kärcher's domestic K-series machines (K2 through K7) all use the same Quick Connect coupling system on the gun side, which means all T-series patio cleaners are mechanically compatible with all current K-series guns. The practical differences come down to water pressure and flow rate, which affects how well a particular patio cleaner performs on a given machine.
| Machine | Max pressure | Max flow rate | Recommended T-cleaner | Detergent system |
|---|---|---|---|---|
| K2 | 110 bar (approx. 1,595 psi) | 360 l/h | T5 / T350 (often included in Home kits) | Suction hose from bottle |
| K3 | 120 bar | 380 l/h | T5 / T350 / T450 | Suction hose from bottle; some models Plug 'n' Clean |
| K4 | 130 bar | 420 l/h | T5 / T450 / T550 (often included in Home kits) | Plug 'n' Clean / Connect 'n' Clean |
| K5–K7 | 145–160 bar | 500–600 l/h | T450 / T550 | Plug 'n' Clean / Connect 'n' Clean |
If you have an older K-series machine that uses a screw-thread M22 x 1.5 gun connection rather than a Quick Connect, you'll need a Quick Connect adapter to fit a current T-Racer lance. Kärcher sells these adapters separately. To check what your machine uses, look at the front of the trigger gun where the lance or wand slots in: a Quick Connect collar twists and clicks, while an M22 screw connection requires you to thread on the lance by hand. When in doubt, the Kärcher product page for your specific model lists the coupling type under 'technical data' or 'equipment.'
The T350 (order no. 2.643-252.0) is the smallest and best matched to a K2 or K3 in terms of pressure. The T450 (2.643-214.0) suits K3 and K4 well. The T550 (2.643-251.0) works with K4 and above. Using a large T550 on a K2 isn't dangerous, but the lower flow rate of the K2 means the rotating arm spins slowly and cleaning results suffer. Go for the size that matches your machine's output.
Safety and preparation checks before you attach anything
I'll keep this practical rather than preachy, but a few of these genuinely matter. High-pressure water at 110 to 130 bar causes serious injuries, and patio surfaces can become dangerously slippery the moment the jet hits them.
- Switch the pressure washer off at the mains and release any residual pressure by squeezing the trigger gun before attaching or detaching any accessory.
- Inspect the high-pressure hose for cracks, kinks, or worn sections. Do not use a damaged hose.
- Check all O-rings on every connector before assembling. Replace any that look worn or are missing.
- Clear the patio of furniture, plant pots, loose gravel, and any objects the jet could launch at speed.
- Warn anyone nearby, including children and pets, and keep them at least 3 metres away during use.
- Put on eye protection. The T-Racer has a shroud that contains most of the spray, but reflection off uneven surfaces still happens.
- Wear waterproof, non-slip footwear. The surface around you will be wet within seconds.
- Read the HARD/SOFT nozzle distance setting on the T-Racer (the grey central knob) and set it to match your surface hardness before you start. Softer or older surfaces should start on a higher (softer/more distance) setting.
- If you are using detergent, check the product label for handling requirements. Kärcher's Patio & Deck RM 564 is a diluted alkaline cleaner; avoid skin and eye contact and keep runoff away from drains where possible.
How to attach a Kärcher patio cleaner: step-by-step
These steps cover the standard Quick Connect setup used on current K2, K3, and K4 machines. Model-specific notes for each machine follow in the sections below.
- Make sure the pressure washer is off and unplugged from the mains power supply.
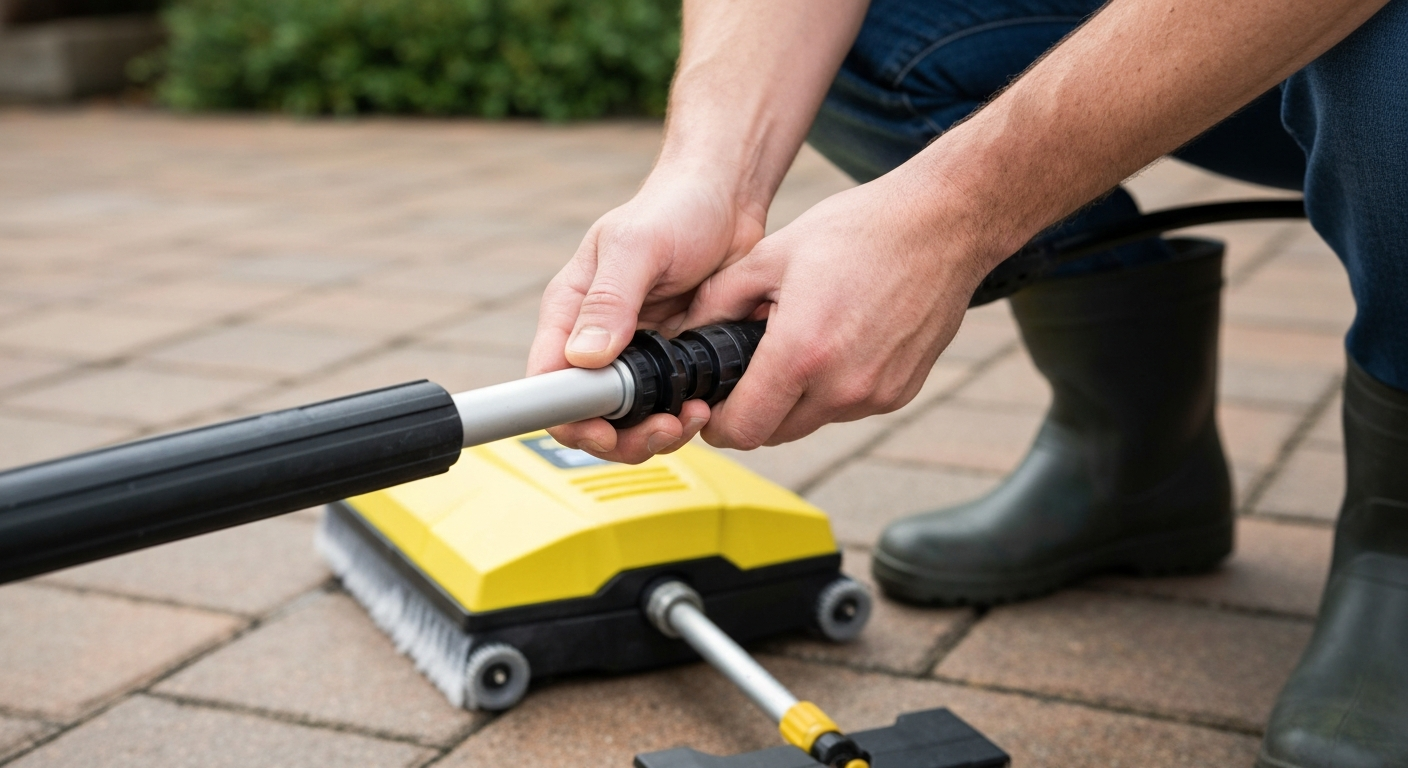
- Assemble the patio cleaner: fit the extension lance/wand into the T-Racer body connector and twist to lock, following the arrow on the collar. You should feel a positive click.
- Check the twin flat-jet nozzles on the underside of the T-Racer rotating arm are present, undamaged, and unobstructed. Use the cleaning needle to clear any debris from the nozzle openings if needed.
- Connect the assembled patio cleaner (lance end first) to the trigger gun: push the lance male connector into the gun's Quick Connect female coupling, then rotate the collar to lock. Pull back gently to confirm it is seated securely.
- Connect the other end of the trigger gun to the high-pressure hose coming from the machine. On Quick Connect guns this is a push-and-rotate; on M22 screw connections, thread it on by hand and tighten firmly.
- If you are using detergent, fit the detergent suction hose to the machine's detergent inlet (usually labelled with a detergent bottle icon on the machine body), and drop the filter end of the hose into your detergent bottle. Do not dilute detergent into the water tank; always use the suction system.
- Plug the pressure washer in and switch it on.
- Point the patio cleaner at the surface before squeezing the trigger. The T-Racer shroud should sit approximately 5–10 cm from the surface to start; adjust using the HARD/SOFT knob once you see the cleaning result on a test patch.
- Squeeze the trigger and move the patio cleaner in slow, overlapping sweeps. Move too fast and you'll leave stripe marks; the Kärcher guidance recommends steady, overlapping passes for uniform results.
- After finishing, release the trigger, switch the machine off, release residual pressure by squeezing the trigger again, then disconnect the patio cleaner for rinsing and storage.
Surface-specific settings and detergent guidance
The HARD/SOFT knob on the T-Racer adjusts the height of the rotating arm above the surface, which changes the effective cleaning intensity. Hard setting brings the nozzles closer for dense, sealed surfaces; soft setting raises them for delicate or porous ones. Here's how I apply this across the surfaces most homeowners deal with.
| Surface type | HARD/SOFT setting | Detergent recommended | Notes |
|---|---|---|---|
| Concrete (sealed or poured) | HARD to mid | Kärcher Patio & Deck RM 564 or stone cleaner | Concrete handles high pressure well; watch for loose or crumbling edges |
| Natural stone (sandstone, limestone) | SOFT to mid | Stone cleaner, low-alkaline formula | Porous surfaces absorb water; take a test patch first and avoid prolonged dwell |
| Brick | Mid | Patio & Deck RM 564 | Mortar joints can erode; keep the cleaner moving and avoid hovering over joints |
| Slate | Mid to SOFT | Stone cleaner or plain water first | Slate can flake if the nozzle is too close; start on SOFT and adjust up carefully |
| Porcelain tiles | HARD to mid | Diluted all-purpose or no detergent | Glazed surfaces clean easily; check grout joints are in good condition first |
| Wood decking | SOFT | Kärcher Wood Cleaner or RM 612 | Low pressure only; grain raises if you're too aggressive; always clean along the grain |
For detergent application through the machine, Kärcher's Connect 'n' Clean and Plug 'n' Clean systems (used on K4 and above) let you snap a detergent container directly onto compatible nozzles. On K2 and most K3 machines, the suction hose draws from an external bottle. In both cases, apply detergent on a low-pressure or detergent nozzle setting first, allow 2 to 3 minutes of dwell time, then switch to the patio cleaner attachment to rinse and clean. For step-by-step instructions on preparing and applying Kärcher patio cleaner fluid safely and effectively, see how to use Kärcher patio cleaner fluid. The patio cleaner itself doesn't apply detergent; it is a rinse and agitate tool.
K2-specific notes
The K2 runs at up to 110 bar with a flow rate of around 360 l/h, which is the lowest output in the K-series domestic range. It will power a T350 or T5 patio cleaner perfectly well on concrete, brick, and porcelain. On tougher or heavily soiled surfaces like algae-covered riven slate, the K2 can struggle to spin the arm consistently, which shows up as patchy cleaning or slow rotation. If you're seeing that, check the nozzles first (clogged nozzles are the most common cause of slow spin), and if they're clear, the K2 may simply need a second pass.
- Check your K2 gun type: newer K2 models use a Quick Connect gun, older ones use a screw thread. If yours is a screw-thread model, pick up a Quick Connect adapter before trying to fit a current T-Racer lance.
- Attach the T-Racer extension lance to the T-Racer body, then connect to the K2 trigger gun via Quick Connect or M22 screw thread.
- The K2 detergent system uses a suction hose from an external bottle. Drop the filter end into your diluted patio cleaner solution before switching on.
- Set the T-Racer to SOFT to mid when starting out; the K2's lower pressure means you rarely need the HARD setting and it reduces the risk of marking softer surfaces.
- Move slowly and overlap each pass by about 50%. With 360 l/h of flow, patience gives better results than speed.
There's a full walkthrough of the K2 and patio cleaner combination in the dedicated K2 patio cleaner guide on this site, which covers the most common K2 Home kit variants and includes notes on which T-cleaner size came with which kit year. For a step-by-step walkthrough specific to the K2, see our guide on how to use Kärcher K2 patio cleaner.
K3-specific notes
The K3 sits in the middle of the domestic range at up to 120 bar and 380 l/h. Kärcher's K 3 Classic product page (technical data) lists the K3's maximum pressure at about 120 bar and flow around 380 l/h, and shows Quick‑Connect couplings used on many K3 versions Kärcher K 3 Classic — product page (technical data). It handles a T350 or T450 comfortably, and for most garden patios it's the sweet spot between power and price. Most current K3 Home kits include a surface cleaner, but the connection type varies slightly between K3 Classic, K3 Full Control, and other variants.
- Identify your K3 variant: the K3 Classic uses a standard trigger gun with Quick Connect; the K3 Full Control uses a Full Control gun with a pressure selector dial on the handle. Both attach a T-Racer in the same way, but check the gun's connection end matches the lance.
- Connect the T-Racer assembly to the gun using Quick Connect, ensuring the collar locks with a positive click.
- If your K3 uses Plug 'n' Clean detergent (some K3 Home kits do), the detergent connects via a snap-on container on the foam nozzle, not through the patio cleaner itself. Apply detergent with the foam nozzle first, then switch to the patio cleaner to clean.
- Set the T-Racer to mid on most K3-compatible surfaces. The extra pressure over the K2 means you can afford to keep the nozzle slightly further from delicate surfaces.
- If you have a Full Control gun, set it to a mid-range pressure (not maximum) for stone and brick surfaces.
The K3 patio cleaner setup is covered in more detail in the dedicated K3 guide on this site, including notes on Full Control pressure selection and which T-cleaner model was bundled in different K3 Home kit years.
K4-specific notes
The K4 runs at up to 130 bar and 420 l/h, and Kärcher frequently bundles it with a T5 surface cleaner in the K4 Home kit. This is where the T-Racer really performs: the higher flow rate keeps the arm spinning consistently, and the cleaning speed on concrete and stone is noticeably faster than with a K2 or K3.
- Check whether your K4 Home kit T5 attachment came pre-assembled or in separate parts. The T-Racer body and extension lance are often packed separately; assemble the lance into the body before connecting to the gun.
- Connect using the K4's Quick Connect gun coupling. The K4 also supports the optional Vario joint (2.640-733.0), which is worth using if the rigid connection angle feels awkward on uneven patio areas.
- The K4 uses Plug 'n' Clean or Connect 'n' Clean detergent on most current models. Apply Kärcher's Patio & Deck RM 564 or stone cleaner with the foam nozzle first, allow it to dwell for 2 to 3 minutes, then switch to the T5 patio cleaner for the cleaning pass.
- With 130 bar available, exercise more caution on sandstone, old brick, and slate. Start on the SOFT setting and test a small inconspicuous area first before cleaning the full patio.
- The K4's power makes it easy to rush and leave stripe marks. Keep your pass speed consistent and overlap by at least 30 to 50% for an even result.
For a full K4-specific walkthrough, the K4 patio cleaner guide on this site goes into more detail on the Full Control Plus variants, pressure selector use, and surface-specific settings. If you're running a K5, K6, or K7 at home, the connection process is identical to the K4 but you'll want to use the larger T450 or T550 to get the full benefit of the higher flow rates.
Troubleshooting common attachment problems
Most attachment problems fall into one of three categories: it won't connect, it leaks at a connector, or the rotating arm doesn't spin. Here's a quick reference for each.
| Problem | Most likely cause | Fix |
|---|---|---|
| Lance won't click into gun | Incompatible coupling type (screw vs. Quick Connect) | Buy a Quick Connect adapter (M22 x 1.5 thread) for older machines |
| Lance won't click into gun | Residual pressure in hose | Squeeze trigger to release pressure before connecting |
| Water leak at lance-to-gun connector | Missing or worn O-ring | Replace O-ring from set 2.640-729.0; check both connectors |
| Water leak at hose-to-machine connection | Loose M22 fitting or worn O-ring | Hand-tighten the M22 connector and replace O-ring if needed |
| Patio cleaner arm not spinning | Clogged nozzle(s) | Clear with the supplied cleaning needle; rinse with clean water |
| Patio cleaner arm not spinning | Nozzle distance set too close (HARD setting) | Increase distance using the HARD/SOFT knob |
| Patio cleaner arm not spinning | Worn or damaged nozzles | Replace with spare nozzles 2.643-338.0 (or 2.643-335.0 for T350) |
| Patio cleaner arm not spinning | Insufficient flow from machine | Check inlet filter on machine is clean; check water supply pressure |
| Patchy or striped cleaning result | Moving too fast or uneven overlap | Slow down and overlap each pass by at least 30–50% |
| Detergent not drawing through | Suction hose filter blocked or not submerged | Clean the inline filter; ensure the hose end is fully submerged in detergent bottle |
If the arm still won't spin after clearing the nozzles and checking the settings, the issue is most likely worn nozzle inserts. This is more common on machines used frequently over several years. Kärcher's spare nozzle sets (2.643-338.0 for most T-Racer models, 2.643-335.0 specifically for the T350) are inexpensive and genuinely fix the problem. There's a more detailed walkthrough of spinning problems in the dedicated guide on why your Kärcher patio cleaner isn't spinning on this site.
After each use: cleaning, maintenance, and storage
Kärcher's own T-Racer manual is clear on this, and it's good advice: rinse the patio cleaner with clean water after every use. Detergent left inside the rotating arm and nozzles degrades the rubber seals and blocks the nozzle openings. I rinse mine by reconnecting it to the gun, pointing it at a drain, and running the machine for 30 seconds without detergent. Then I disconnect, shake out the excess water, and store it inside.
- Rinse the entire patio cleaner assembly with clean water after every session, including the lance and connectors
- Use the cleaning needle to check the nozzle openings are clear before storing
- Wipe down the exterior of the body and arm with a cloth to remove grit and debris
- Inspect O-rings at all connection points after use; replace any that look compressed, cracked, or deformed
- Store in a dry, frost-free location away from direct sunlight — UV degrades rubber seals and plastic components over time
- Do not leave detergent in the suction hose or machine's detergent inlet; flush both with clean water
- If storing for winter, run clean water through the machine for at least 30 seconds to flush residual detergent from the internal system
When to get a replacement part or seek service
Most issues with a Kärcher patio cleaner are fixable at home with a replacement O-ring set, a new nozzle pair, or a cleaning needle. These parts are cheap and widely available direct from Kärcher and from most garden machinery retailers in the UK. The parts worth keeping on hand are the O-ring set (2.640-729.0) and the spare nozzle set for your T-Racer model (2.643-338.0 for most, 2.643-335.0 for T350). If replacing the nozzles doesn't restore the spin and you've confirmed the machine's flow is normal, the rotating arm bearing inside the T-Racer body may be worn, and at that point a replacement patio cleaner unit is usually more economical than a service.
For the pressure washer itself, if you're getting reduced flow or pressure after all the above checks, the issue is likely inside the pump rather than the accessory. Kärcher's UK customer service line and authorised service centres can diagnose pump problems; attempting to open and service the pump yourself voids the warranty on machines still under guarantee. The K2 and K3 carry a two-year domestic warranty from new in the UK, and the K4 and above often come with longer warranties depending on the retailer. Keep your proof of purchase.
If you're seeing attachment problems that go beyond O-rings and nozzles, the Kärcher patio cleaner attachment problems guide on this site covers connector failure, arm housing cracks, and detergent system faults in more detail, including which faults are worth repairing and which indicate a worn-out unit.
FAQ
What is this guide for and who is it for?
This guide explains how to attach, operate, troubleshoot and maintain a Kärcher patio/surface cleaner for homeowners who own or plan to use a Kärcher pressure washer. It covers required parts and connectors, safety and preparation checks, step‑by‑step attachment (generic and model‑specific notes for K2, K3 and K4), detergent connection and use, operating settings for common surfaces, common faults and fixes, maintenance, storage and when to seek professional service or replacement parts.
What parts and tools do I need before attaching a Kärcher patio cleaner? (Checklist)
Tools/parts checklist: pressure washer with trigger gun and high‑pressure hose; patio/surface cleaner (T‑Racer / T‑series or model supplied with unit); extension lance or gun with Quick‑Connect or M22 fitting; any supplied adaptor (Quick‑Connect/M22 adapter) if required; O‑ring set or spare O‑rings; spare nozzles/cleaning needle; Vario joint if needed for angle adjustments; detergent bottle and compatible foam/plug‑in adapter if using detergent; gloves and eye protection. Optional: adjustable spanner for M22 threaded connections, cloths, bucket.
How do I check compatibility between my Kärcher machine and a patio cleaner?
Check your machine’s accessories and connector type: many Kärcher home models (K2–K4) use Quick‑Connect on the trigger gun or M22 × 1.5 threaded connections. Confirm whether your gun/hose has a Quick‑Connect female or an M22 male/female thread. Match the patio cleaner’s inlet (quick coupling or M22). If the connector types differ, use the manufacturer adapter (Quick coupling or M22 adapter) or the Vario joint (rotates 180°) listed by Kärcher. Also check max pressure and flow: ensure your machine’s pressure and flow meet the patio cleaner rating (consumer T‑Racer cleaners are designed for typical K‑series pressures).
Generic step‑by‑step: how to attach a Kärcher patio cleaner to the pressure washer
1) Turn off the pressure washer and isolate power/water. 2) Remove any lance/nozzle from the gun if present. 3) Fit the correct O‑ring on the cleaner’s inlet if required and inspect for damage. 4) If you use an extension lance, attach the lance to the trigger gun (Quick‑Connect or M22) following the gun’s instructions. 5) Connect the patio cleaner to the lance or directly to the gun: push until the Quick‑Connect clicks or screw the M22 connection hand‑tight plus a quarter turn with a spanner—do not overtighten. 6) If required, fit the Vario joint or angle adaptor. 7) Check the twin flat‑jet nozzles are present/clear and the distance/pressure adjustment knob (if fitted) is set for the surface (HARD/SOFT). 8) Reconnect water and power, release any trapped air, start the machine at low pressure and test briefly. 9) Observe leaks for 10–20 seconds; if none, proceed to cleaning.
Model‑specific quick notes for K2, K3 and K4 users
K2: Lower flow/pressure (≈110 bar, ~360 l/h). Many K2 Home kits have small surface cleaners; use low pressure for sensitive surfaces; check whether your gun is Quick‑Connect. K3: Moderate pressure/flow (≈120 bar, ~380 l/h). Often compatible with small T‑series cleaners and Quick‑Connect guns; good for routine patios and stone. K4: Higher pressure/flow (≈130 bar, ~420 l/h). K4 Home kits commonly include T‑Racer T5; use higher settings for concrete/rough stone but reduce for softer surfaces. For all: confirm connector type (Quick‑Connect or M22) and use adapters or O‑rings from Kärcher if needed.
How do I connect and use detergent with a patio cleaner?
If using detergent: use Kärcher recommended detergents (stone, patio & deck or wood‑specific formulas). Fit the detergent dispenser system your machine uses (Plug 'n' Clean / Connect 'n' Clean or foam nozzle). For a dedicated detergent inlet, fill the detergent bottle to the marked level and attach per machine instructions. Start with low detergent concentration and test a small area. Rinse detergent residue with clean water after cleaning. Always consult the detergent SDS for hazards and wear gloves/eye protection when handling concentrated products.
Next Article
Why is my karcher patio cleaner not spinning?, K2-K4 fixes
Troubleshoot a Kärcher patio cleaner that won't spin: quick tests, cleaning steps, part checks and repair or replacement