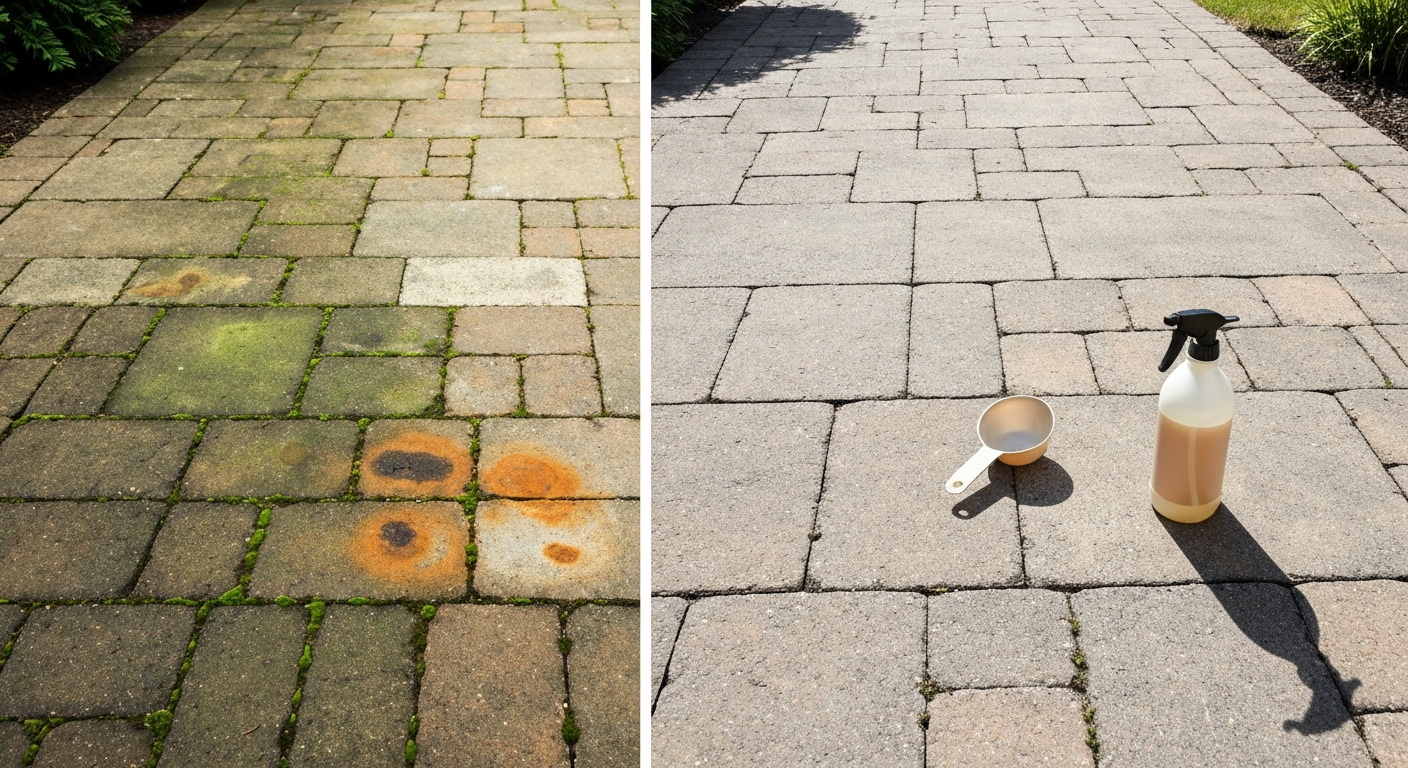
Sika Path & Patio Sealer goes on with a roller, brush, or low-pressure garden sprayer at roughly 1 litre per 5 to 6 square metres per coat. It touches dry in about 30 minutes, becomes walkable after an hour, and reaches full cure in around 4 hours at 20°C. Before any of that happens, though, the surface has to be bone dry, free of mould, grease, and old sealer, and laid for at least 3 months. Get those conditions right and the job is straightforward. Skip them and you will be stripping and starting over.
Sika Patio Seal Instructions: Complete How-To for Sealing

Rhea Lang
29 Jul 2026
When and why Sika patio sealers are worth using
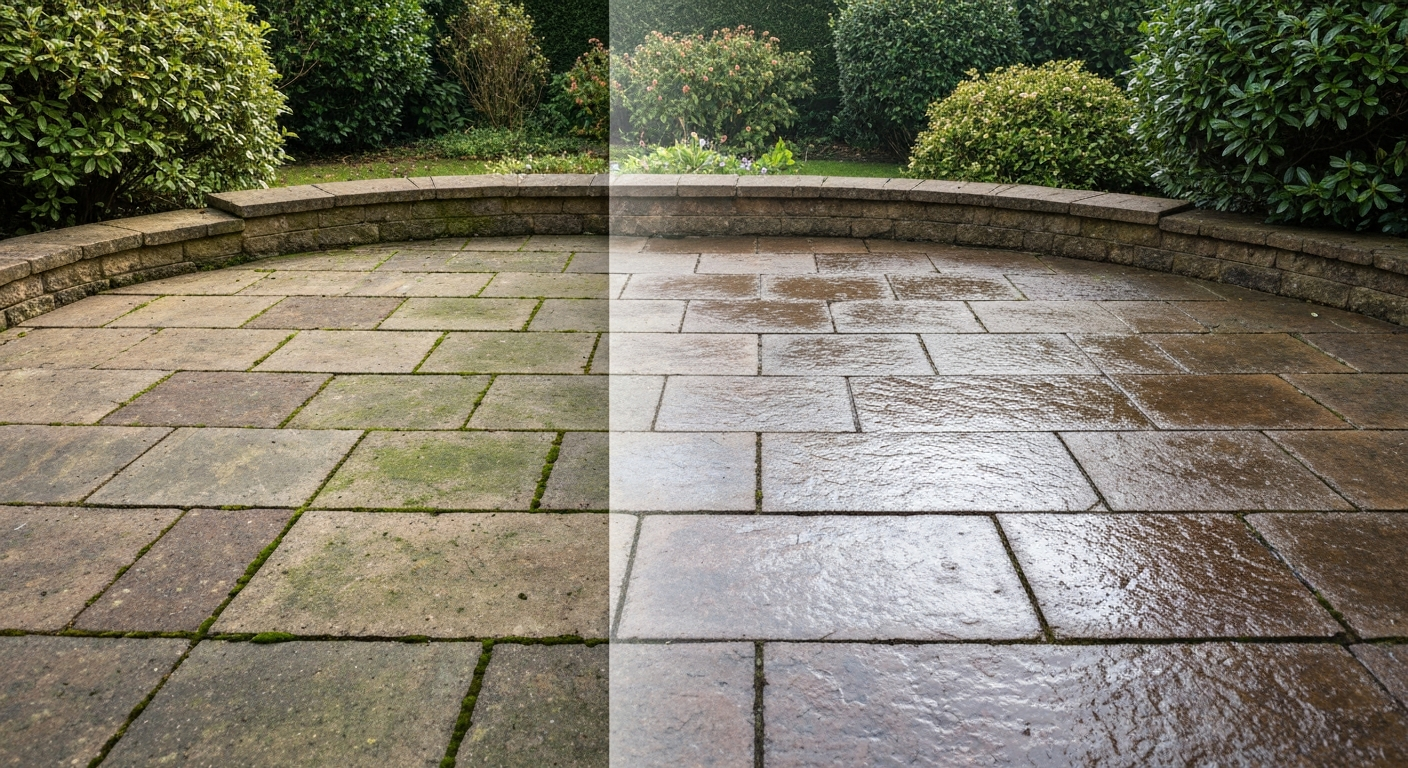
Sika makes a range of patio and path sealers that serve two distinct purposes: water repellency and surface protection, or colour enhancement with a wet-look finish. The water-repellent Path & Patio Sealer is the one most UK homeowners reach for first. It sits on top of the surface as a film-forming, acrylic-based coat that resists rain penetration, reduces freeze-thaw spalling, slows biological growth (moss, algae, lichen), and makes routine cleaning easier. The wet-look variants, including Sikagard-217 Wet Look and Sikagard A-28 Lo-VOC (the latter primarily sold in Canada), use an acrylic/methacrylate chemistry that does the same protective job while deepening colour and adding gloss. If your patio looks dull, faded, or soaks up water like a sponge, sealing is a reasonable fix. If it already sheds water cleanly and the colour satisfies you, sealing adds maintenance overhead without a meaningful benefit.
One important constraint from Sika's own product page: the Path & Patio Sealer is not suitable for porcelain paving. Porcelain is non-porous and film-forming sealers have nothing to bond to. I will come back to surface compatibility in detail shortly, but flag this early because porcelain patios are increasingly common and it is an easy mistake to make.
Do you actually need to seal your patio?
Sealing is not always necessary, and on certain surfaces (permeable/porous pavers designed for drainage, for example) it can actively cause problems by destroying the designed drainage capacity. Before you spend a Saturday on this job, run through the following checklist.
Signs that sealing makes sense
- Water soaks straight in rather than beading on the surface (the drop test: splash a small amount of water and watch for absorption within 30 seconds)
- The surface looks noticeably lighter, faded, or washed out compared to when it was new
- Moss, algae, or lichen returns within weeks of cleaning, suggesting the porous surface is constantly damp
- The patio is concrete or natural stone and is at least 3 months old (Sika's documented minimum cure time before sealing)
- You are in a freeze-thaw region and see surface spalling or crumbling after winter
- You want to make cleaning easier going forward (sealed surfaces are much quicker to hose down)
When to leave it unsealed
- The surface is porcelain: non-porous, nothing for a film-forming sealer to grip
- It is a permeable or porous-design paver system installed for stormwater drainage: sealing destroys that function
- The patio was laid less than 3 months ago: residual construction moisture will trap under the film and cause whitening or adhesion failure
- An existing sealer coat is still in good condition: applying over it without stripping can cause peeling and a patchy finish
- The surface is heavily contaminated with oil, grease, rust, or biological growth that has not yet been cleaned: sealing locks in the staining
Choosing the right Sika patio sealer
Sika's patio sealer range covers a few distinct product types, and picking the wrong one for your finish preference or surface is the most common source of disappointment. Here is how the main options break down.
| Product | Finish | Chemistry | Primary Use Case | Notes |
|---|---|---|---|---|
| Sika Path & Patio Sealer | Matt/natural | Acrylic film-forming | Concrete, natural stone, brick, sandstone, slate | Not for porcelain; not for paving under 3 months old |
| Sikagard-217 Wet Look | High-gloss wet look | Acrylic film-forming | Concrete and masonry | Deepens colour significantly; check regional availability |
| Sikagard A-28 Lo-VOC | Clear wet look | Acrylic/methacrylate | Concrete and masonry | Low-VOC formulation; primarily Canadian market SKU |
If you want a natural finish that protects without changing the look of your patio, the standard Path & Patio Sealer is the right choice. If you want that darker, richer appearance that makes natural stone look like it has just been rained on, a wet-look variant is what you are after. See our wet-look patio sealer reviews for independent comparisons and test results across brands wet look patio sealer reviews. Wet-look sealers do show scratches and scuff marks more obviously than matt finishes, and they typically need recoating more frequently in high-traffic areas. Worth knowing before you commit. For a deeper comparison of wet-look options, the wet-look patio sealer reviews and best wet look patio sealer guides on this site cover third-party testing across multiple brands. See our best wet look patio sealer UK guide for head-to-head testing and brand comparisons. See our best patio sealer wet look guide for brand comparisons, test results, and buying advice.
Surface compatibility: what Sika sealer works on (and what it does not)
Always check the Product Data Sheet (PDS) for your specific Sika SKU, available from Sika's technical documents portal, because compatibility can vary by product and region. That said, the general picture for the Path & Patio Sealer and most Sika film-forming patio sealers is as follows.
| Surface | Compatible? | Notes |
|---|---|---|
| Concrete (slabs, pavers) | Yes | Most common use case; ensure fully cured (min. 3 months) |
| Natural stone (general) | Yes | Test patch essential; some stones absorb unevenly |
| Brick | Yes | Absorption varies by brick type; test patch first |
| Sandstone | Yes | Highly porous; may require extra coats; test patch critical |
| Slate | Yes | Dense slate absorbs less; wet-look finish works well |
| Porcelain | No | Non-porous; film-forming sealers will not bond and may peel |
| Permeable/porous design pavers | Not recommended | Sealing destroys designed drainage function (ICPI guidance) |
Sandstone deserves a special mention. It is among the most porous and variable surfaces you will encounter, and consumption per square metre can be significantly higher than the published 5 to 6 m² per litre if the stone is particularly absorbent. Always do a test patch and measure actual consumption before buying your full quantity.
Materials, tools, and PPE checklist
Get everything on this list ready before you open the tin. Nothing is more frustrating than discovering mid-job that you are short on sealer or missing a brush for the tricky edges.
Tools
- Short-pile paint roller and extension pole (9-inch roller covers large slabs quickly)
- 3 to 4 inch paintbrush for edges, steps, and joints
- Low-pressure garden sprayer (optional, for large open areas with good clearance from planting)
- Pressure washer (for the cleaning stage, not application)
- Stiff-bristle deck brush or scrubbing brush
- Garden hose with adjustable nozzle
- Measuring tape (for calculating surface area)
- Plastic mixing paddle or wooden stick
Materials
- Sika patio sealer (calculated quantity: surface area in m² divided by 5.5, multiplied by number of coats, plus 10% for waste)
- pH-neutral patio cleaner or appropriate biological/algae cleaner for the pre-seal clean
- Degreaser or poultice product for any oil or grease stains (a PROSOCO-type poultice for embedded grease)
- Sealer stripper if old sealer is present (see the best patio sealer remover guide for product options)
- Masking tape and plastic sheeting for protecting adjacent surfaces
- Clean water for rinsing
- Old rags and paper towels for spills
PPE
- Chemical-resistant gloves (nitrile or neoprene)
- Safety glasses or goggles
- Old clothes or disposable coveralls
- Kneeling pad if working at low level for extended periods
- Respiratory protection if working in an enclosed or poorly ventilated space (check the SDS for your specific product)
Weather, timing, and protecting what is around the patio
Sika's published application temperature is above 8 to 10°C (check your specific PDS), and you need at least 4 hours of dry weather after application for the sealer to cure properly. Applying in direct, blazing sunlight in summer can cause the product to dry too fast and leave lap marks or an uneven finish. Early morning on an overcast but dry day is genuinely ideal. Avoid applying if rain is forecast within 4 hours.
In freeze-thaw regions, timing matters even more. Do not seal in late autumn if overnight temperatures are already dropping below 5°C, and never apply to a surface that still holds frost or is damp from overnight condensation. Sealer trapped under a film when a frost hits will whiten and lift. Aim for a spring or early summer application when temperatures are stable and the surface has had a chance to dry out fully after winter.
Protect everything adjacent to the patio before you start. Sika patio sealer will mark render, timber, painted metalwork, and planted beds. Tape plastic sheeting along the edges of the patio where it meets walls, fences, or planted borders. Move pots and furniture well clear. If you are using a garden sprayer, cover any exposed grass or plants that are within drift distance. Sealer overspray on decking or painted surfaces is a pain to remove cleanly.
Test patch first: check the colour and finish before going full coverage
This step is non-negotiable for natural stone, sandstone, and any surface where the existing colour matters to you. Apply sealer to a 0.5 m² patch in an inconspicuous corner, allow it to fully dry (4 hours minimum), and evaluate the colour shift, sheen level, and finish consistency in both dry and damp conditions. Wet-look sealers can deepen colour by 20 to 40% on porous stones, and what looks subtle when wet can look dramatic once fully dry. I learned this the hard way on a sandstone patio where the test patch looked perfect but the full-surface application produced a much more obvious darkening in shaded areas where the stone was slightly more porous. If the test patch result is acceptable, proceed. If it is not, this is the point to switch to a different product or finish level before committing.
The test patch also tells you your actual consumption rate on that specific stone, which is far more useful than the nominal 5 to 6 m² per litre figure for estimating how much product to buy. Weigh or measure what you use on that 0.5 m² patch and scale up accordingly.
Cleaning and preparing the surface: the most important part of the whole job
No sealer, Sika or otherwise, performs well over a dirty, contaminated, or damp surface. This preparation stage is where most DIY sealing jobs go wrong, not the application itself. Budget at least a full day for cleaning and drying before you plan to apply sealer. In damp weather, allow 48 hours or more for the surface to dry fully after washing.
Choosing the right cleaner for your surface and problem
pH-neutral cleaners are safe for almost all surfaces, including natural stone, and are the right starting point for routine grime. Alkaline (higher pH) cleaners are more aggressive and work well on concrete and brick for heavy biological growth, grease, and ingrained dirt, but they can etch or lighten sensitive stones like sandstone and limestone if left to dwell too long. For moss, algae, and lichen, a dedicated biological cleaner (usually alkaline or containing a biocide) applied and left to dwell before rinsing gives a much better result than pressure alone. For heavy oil and grease, a poultice-style product (applied like a paste, left to draw the contamination out of the pores, then scraped and rinsed) is the most effective approach on porous surfaces. For guidance on whether WD40 or similar lubricants can stain paving and how to remove them, see our guide on does WD40 stain patio. Scrubbing liquid degreaser into an oil stain on sandstone often just spreads it.
Pressure washing: settings, technique, and what to watch for
Pressure washing is the most efficient way to clean a patio before sealing, but too much pressure causes real damage. For natural stone, sandstone, slate, and brick, keep pressure below 1,500 PSI (around 100 bar) and use a wide fan nozzle (25 to 40 degrees). Concrete can handle up to 2,000 to 2,500 PSI with a 25-degree nozzle for stubborn staining. A rotating turbo nozzle speeds up cleaning but increases surface impact, so use it cautiously on softer stones. NPS conservation guidance recommends low-pressure chemical cleaning over high-pressure mechanical cleaning for any surface where physical erosion is a concern, which is worth keeping in mind for aged or softer stones.
Keep the lance moving constantly and maintain a consistent distance of around 20 to 30 cm from the surface. High-pressure jets directed at joints and grout lines at close range can erode jointing sand or mortar, especially in older patios. Use a lower pressure setting and wider angle when working near joints, or switch to a brush and hand cleaning for those areas. If your jointing is already compromised, consider having it re-pointed before sealing. ICPI Tech Spec 5 specifically addresses this for interlocking pavers: clean first, allow to dry, then check joint sand levels before sealing.
When to call a professional for pressure washing
Consider bringing in a professional cleaner if: the patio is large (over 80 to 100 m²) and you do not have access to a commercial-grade machine; the surface shows significant cracking, crumbling, or frost damage that needs assessment before washing; you are dealing with a listed or heritage building where irreversible surface damage has wider consequences; or the biological contamination (particularly lichen) is so severe that chemical treatment and hot-wash equipment are needed for reliable results.
Dealing with specific stains before sealing
- Rust stains: oxalic acid or phosphoric acid-based rust removers are the documented effective approach on stone and concrete. Apply, allow to dwell per the product instructions, then rinse thoroughly. For sensitive stone, a chelating poultice is gentler. The best patio rust remover guide covers specific product options. Do not seal over rust staining: the sealer will lock the discolouration in permanently.
- Oil and grease: use a poultice-type degreaser (apply as a paste or powder, leave for several hours, remove and rinse). Simple liquid degreasers scrubbed in can spread oil into adjacent pores rather than extracting it. PROSOCO Oil & Grease Stain Remover is a well-documented product for this application.
- Moss and algae: a dedicated biocidal patio cleaner applied at recommended dilution, allowed to dwell for 15 to 30 minutes, then pressure washed off. Dead biological matter must be physically removed, not just killed in place, before sealing.
- Pet stains: enzyme-based cleaners work best for organic staining. Rinse thoroughly and allow extra drying time before sealing.
- Efflorescence (white salt deposits): a dilute acid wash (e.g. 10% phosphoric acid solution) applied carefully, neutralised with clean water, then rinsed thoroughly. Do not use acid on limestone or marble-based stone.
Stripping old sealer
If the patio has been sealed before and the old coat is peeling, flaking, or visibly failing, it needs to come off before you apply fresh sealer. Applying Sika over a poorly adhering old coat will transfer the adhesion failure to the new coat. Use a dedicated film-forming sealer stripper, following the product's PDS for dwell time and application method. Stripper is usually applied, allowed to soften the old coat, then scrubbed and pressure washed off. Multiple passes are sometimes needed on heavy coats. blank" rel="noopener noreferrer">Sika's own Remover-208 is specified for cleaning uncured sealants and tools, not for stripping cured surface coats. For cured sealer removal, you need a purpose-made stripper. The best patio sealer remover guides on this site compare products with documented stripping performance. For product recommendations and side-by-side testing, see our best patio sealer remover guide. For removing stubborn stains and cured sealer residues, see our roundup of the best patio stain remover options for tested performance and stripping power. If rust stains are present after stripping, see our best patio rust remover guide for products that target iron stains on stone and concrete.
Drying windows, timing after rain, and common prep mistakes
The surface must be completely dry before sealing, not just surface-dry. In UK summer conditions, allow a minimum of 24 hours after pressure washing before applying sealer if the weather has been sunny and warm. After heavy rain, 48 hours is more realistic for porous surfaces like sandstone. Touch-testing the surface is not sufficient: a surface can feel dry to the touch while still holding moisture in its pores. Press a piece of cling film flat against the surface, tape down the edges, and leave it for an hour. Condensation under the film means moisture is still migrating out and the surface is not ready.
The most common prep mistakes I see: cleaning and trying to seal the same day (moisture failure), not removing all moss and algae debris after killing it (biological contamination seals in), skipping the test patch on variable stone (colour shock on the full surface), and not checking weather forecasts carefully enough (rain within 4 hours of application ruins the job). Worth taking the time to avoid all of them.
Water runoff management during cleaning
Chemical cleaners, algaecides, and pressure-wash runoff containing biological matter should not be allowed to drain directly into surface water drains or watercourses. Direct runoff to a planted area where soil can filter it, or contain it where possible. Check your local regulations if you are using strong chemical treatments, particularly biocidal products, near drainage gullies.
How to apply Sika patio sealer: step by step
Once the surface is clean, dry, stripped of old sealer if needed, and you have done your test patch, application is relatively straightforward. Work methodically and do not rush the drying time between coats.
- Stir the sealer gently before use. Do not shake it vigorously as this introduces bubbles that show up in the finish.
- Start at the furthest point from your exit route so you are not walking back over wet sealer.
- Apply the first coat with a short-pile roller for open areas, working in parallel strips with a wet edge to avoid lap marks. Use a brush for edges, steps, and within 5 cm of walls and planted borders.
- For a garden sprayer application on large open areas, use low pressure, a wide fan nozzle, and keep the nozzle close to the surface to minimise drift. Back-roll immediately with a roller to even out application and avoid pooling.
- Apply a thin, even coat rather than flooding the surface. Pooling sealer takes longer to dry, can look patchy when cured, and in hollows can leave a milky residue.
- Allow to touch-dry (approximately 30 minutes at 20°C) before applying a second coat if a second coat is specified or if the first coat has been noticeably absorbed and the surface still looks dry.
- Most Sika patio sealers benefit from two thin coats on porous surfaces. On dense slate or smooth concrete, one well-applied coat may be sufficient.
- Do not allow foot traffic for at least 1 hour after the final coat. Full cure takes approximately 4 hours at 20°C. Allow longer at lower temperatures.
- Clean application tools immediately with warm soapy water (for water-based formulations) before the product cures.
Coverage estimation
The published rate of 1 litre per 5 to 6 m² per coat is a baseline for average concrete and moderate-porosity stone. Porous sandstone can consume significantly more, sometimes 1 litre per 3 to 4 m² on the first coat as the stone soaks it up. Use your test patch measurement as your real-world guide, not the tin figure. For two-coat jobs on a 20 m² patio in average concrete or slate, budget approximately 4 litres minimum. For sandstone of similar size, budget 6 to 8 litres to be safe. Running out mid-job and having to order more means the first coat has cured before the second is applied, which can create visible lines.
Drying, recoat windows, and what to do in cold or humid conditions
The published dry times (touch dry 30 minutes, walkable 1 hour, fully dry 4 hours) are at 20°C with normal humidity. In cooler weather, say 10 to 12°C and overcast, those times roughly double. In cold, damp conditions (below 10°C or humidity above 85%) the sealer may not cure properly at all, leaving a tacky, cloudy, or easily marked surface. If you apply in marginal conditions and the surface remains tacky after 8 hours, you have a problem: the cure has stalled. At that point, keep foot traffic off it, wait for warmer, drier conditions, and reassess. In genuine worst cases, you may need to strip and re-apply.
Recoat timing: if you are applying a second coat, do it within the recoat window specified in the PDS (typically after the first coat has dried enough to accept a second coat without lifting, but before it has fully cross-linked). On warm days this window is roughly 1 to 4 hours. If you miss the window and the first coat has fully hardened, light abrasion with fine sand paper between coats improves adhesion.
Aftercare and maintenance schedule
A well-applied Sika patio sealer on concrete or natural stone should last 2 to 5 years depending on traffic, UV exposure, and climate, though this varies by product and conditions. Wet-look sealers on high-traffic areas tend toward the lower end of that range. Build a simple maintenance routine to extend seal life.
- Sweep or blow loose debris off the patio weekly: grit and leaf debris trapped under foot traffic act as abrasives that wear the sealer coat faster
- Rinse with a garden hose monthly in dry periods to prevent soluble salts and grime from building up in the surface
- Every 6 to 12 months, clean with a pH-neutral patio cleaner and a stiff brush or pressure washer (keeping pressure below 1,500 PSI to avoid stripping the sealer coat)
- Inspect annually for areas where the sealer is visibly wearing, lifting, or no longer beading water effectively
- When the beading test fails across most of the surface, clean thoroughly and apply a fresh maintenance coat rather than waiting until the surface is fully unprotected
Troubleshooting common problems
Patchy or uneven finish
Usually caused by uneven surface porosity (common on natural stone), uneven application thickness, or applying over a damp surface. If the patchiness is minor and the surface is otherwise well-sealed, a second thin coat applied evenly often corrects it. If the patchiness is caused by residual moisture, the flawed areas will look milky or slightly white: these need to be stripped back and re-applied on a properly dry surface.
Tackiness or stickiness after drying
This is almost always a temperature or humidity issue (applied too cold, too humid) or a product applied too thickly so the solvent cannot escape properly. For a mildly tacky surface, wait for warmer conditions and the problem sometimes resolves with time. For a persistently tacky surface that is picking up dirt, you need to strip it, allow the surface to dry properly, and re-apply in correct conditions.
White haze or whitening (blushing)
The classic sign of moisture trapped under the sealer film, either from a surface that was not fully dry, from applying in high humidity, or from rain hitting the surface before the coat cured. Mild blushing can sometimes be resolved by applying a thin additional coat on a warm day, which re-softens the film and allows moisture to escape. Severe blushing requires stripping the affected area. This is one of the reasons the drying window before application is so important.
Peeling or flaking
Indicates adhesion failure, most commonly caused by applying over an old sealer coat that was not removed, applying over a contaminated surface, or applying to a surface that was still too wet. Strip the peeling areas, clean and dry properly, and re-apply. If peeling is occurring on a relatively new application that was done correctly, check whether the surface itself (particularly sandstone) is showing signs of surface deterioration or salt migration.
Safety during application and responsible product disposal
Always consult the Safety Data Sheet (SDS) for your specific Sika product before starting: download it from Sika's technical documents portal. That document is the authoritative source for first aid measures, fire precautions, and disposal requirements for your specific formulation. General guidance for water-based acrylic sealers: work in a ventilated space, keep the product away from skin and eyes, do not allow product to run into drains or watercourses, and store and dispose of partially used tins according to your local hazardous waste guidelines (do not pour down drains or into soil). Clean water-based sealer from tools while still wet with warm soapy water. Cured sealer on tools is difficult to remove without solvent.
Keep children and pets off the sealed surface until it has fully cured (minimum 4 hours at 20°C, longer in cooler conditions). The wet product can be an irritant to paws and skin. Once cured, Sika's water-based patio sealers are generally considered safe for incidental contact, but always verify this in the product's SDS for your specific formulation and intended use.
A quick comparison: Sika patio sealer versus other sealer types
Sika Path & Patio Sealer is a film-forming acrylic, which means it sits on top of the surface rather than penetrating into it. That distinction matters for how it wears and how it looks compared to penetrating sealers.
| Sealer Type | How It Works | Finish | Durability | Best For |
|---|---|---|---|---|
| Film-forming acrylic (e.g. Sika Path & Patio Sealer) | Coats the surface with a protective film | Matt to gloss; wet-look options available | 2 to 5 years typical; wears from surface down | Concrete, stone, brick where colour enhancement or gloss is wanted |
| Penetrating silane/siloxane sealer | Impregnates into pores, invisible on surface | No change to appearance | Often longer-lasting (5 to 10 years) | Natural stone, brick, sandstone where original look must be preserved |
| Polyurethane sealer | Film-forming, harder wearing than acrylic | Gloss or semi-gloss | Longer than acrylic but more rigid, can crack | High-traffic concrete, driveways |
If your main concern is protecting the surface without changing its appearance at all, a penetrating silane or siloxane sealer is worth considering instead of Sika's film-forming products. If you want a wet-look finish and colour enhancement, film-forming acrylics like the Sikagard wet-look range or comparable products reviewed in the best wet look patio sealer UK guides are the right tool for the job.
FAQ
What primary manufacturer's documents must be consulted for each Sika patio sealer SKU used in the article?
Product Data Sheets (PDS/TDS) and Safety Data Sheets (SDS) for the exact SKU and region — to confirm intended substrates, permitted application methods (roller/brush/sprayer), coverage/consumption, dry and recoat times, temperature and humidity limits, storage/shelf‑life, and 'do not apply' warnings (e.g., new paving age, porcelain). Source: Sika product pages and global Technical Documents portal (Sika PDS/SDS links).
Which Sika references specifically demonstrate that Sika offers wet‑look acrylic sealers and what details must be extracted?
Sikagard A‑28 Lo‑VOC and Sikagard‑217 Wetlook PDSs — extract chemistry (acrylic/methacrylate), VOC statements, substrate list, gloss/wet‑look claims, recommended application methods, and recoat/dry behavior. Sources: Sikagard A‑28 and Sikagard‑217 PDSs (Sika Canada).
What authoritative industry guidance is needed for sealing interlocking/porous pavers and joint sand considerations?
ICPI Tech Spec 5 (Cleaning and Sealing Interlocking Concrete Pavements) and corroborating CMHA/ICPI guidance — to determine when not to seal permeable or jointed systems, how joint sand stabilization interacts with sealing, and paver‑specific prep recommendations. Sources: ICPI Tech Spec 5, CMHA technical guidance.
What research/authorities address the risk of sealing permeable or permeable‑paver systems?
University extension and stormwater resources (example UF/IFAS) and ICPI: evidence that sealing permeable/porous pavements can impair designed drainage and therefore should generally be avoided or handled with specialist methods. Source: UF/IFAS stormwater/permeable pavement guidance and ICPI references.
Which sources define safe, evidence‑based pressure‑washing limits and methods for stone, concrete and brick preparation?
Conservation and federal guidance (e.g., National Park Service) and ICPI technical notes — use low‑pressure/lance recommendations, caution on delicate natural stone and historic substrates, and soft‑wash/chemical alternatives. Source: NPS guidance on cleaning masonry and oil contamination; ICPI Tech Spec 5.
What evidence supports recommended biological‑growth (moss/algae/mould) and rust‑stain removal methods prior to sealing?
Peer‑reviewed conservation research on biocides and cleaning (e.g., npj Heritage Science) and manufacturer PDSs for rust/biocide cleaners; use oxalic/chelant poultices or vetted biocides with conservation controls for iron stains and biological growth removal. Sources: npj Heritage Science conservation research and product PDSs. Note: avoid untested home remedies; prioritize documented chemistries and substrate testing.
Next Article
Best Patio Stain Remover: Top Picks for Concrete & Stone
Find the best patio stain remover: tested picks, step-by-step fixes for mold, rust, oil, sealers, and aftercare.